

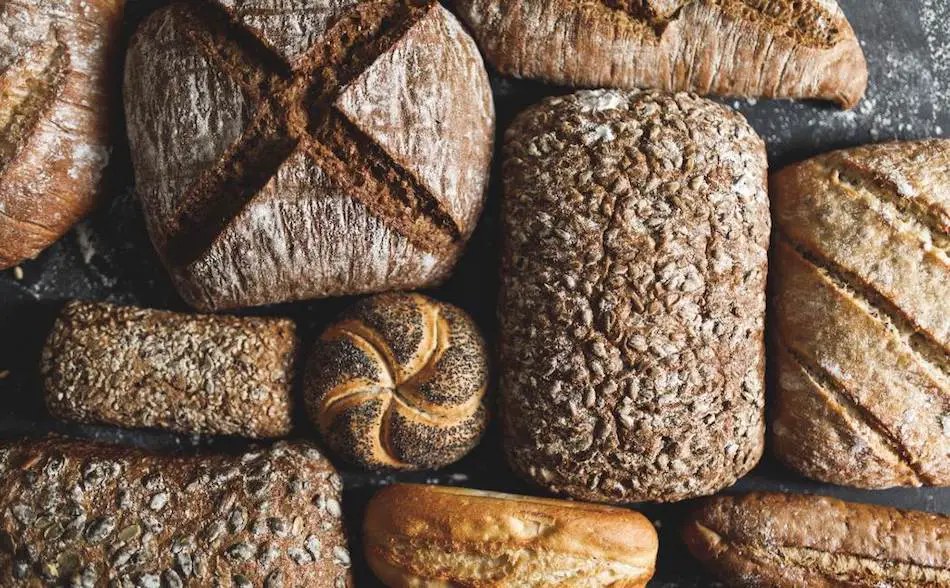
Baking bread at home can be a satisfying and delicious experience, but the traditional method can be time-consuming and require a great deal of physical effort. This is where the no knead rye bread comes into play. This simple yet flavorful bread is made with minimal ingredients and without the need for intensive kneading, making it an accessible option for home bakers of all skill levels. This article provides a step-by-step guide on how to bake a crusty, soft, and flavorful rye bread with ease.
No knead rye bread is a simple and delicious bread recipe that utilizes minimal ingredients and minimal effort to create a crusty, soft and flavorful loaf. The dough is made by mixing flour, yeast, salt, water, and rye flour. After mixing, the dough is left to ferment for several hours, during which time the yeast develops the bread’s flavor and structure. Then, the dough is shaped into a loaf and baked in a Dutch oven or heavy pot to create a crunchy crust and tender crumb. The result is a warm and comforting bread with a rich and hearty flavor that’s perfect for any meal. The best part? The no knead method means that you can have a fresh loaf of bread with minimal effort, making it an accessible option for home bakers of all skill levels.
Ingredients for No Knead Rye Bread
| Ingredients | Quantity |
|---|---|
| Rye flour | 500 g |
| All-purpose flour | 250 g |
| Salt | 10 g |
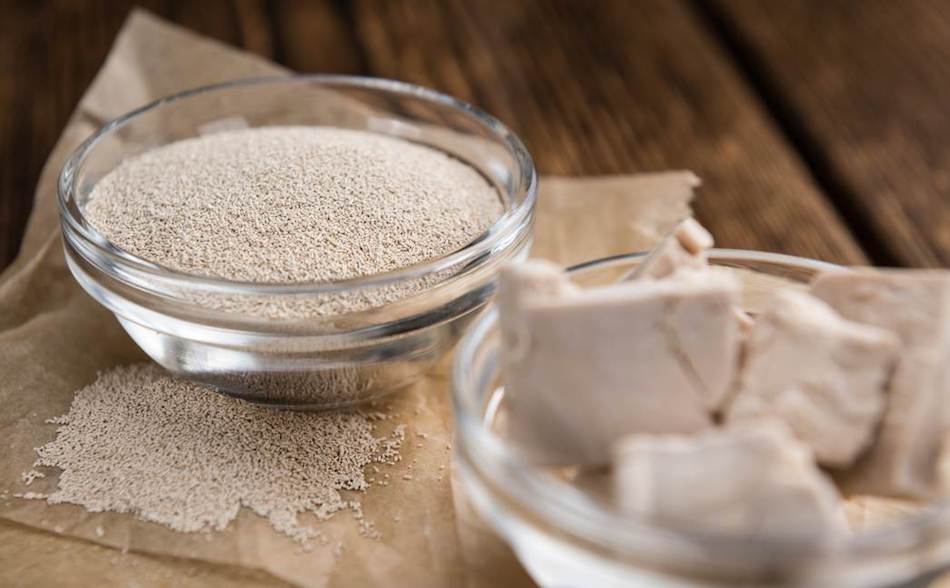
| Instant yeast | 7 g |
| Water | 375 ml |
The Step by Step Guide to Making No Knead Rye Bread
| Step | Description |
|---|---|
| 1 | In a large mixing bowl, combine 500 g of rye flour, 250 g of all-purpose flour, 10 g of salt, and 7 g of instant yeast. |
| 2 | Slowly add 375 ml of water while stirring the mixture until a sticky and shaggy dough forms. |
| 3 | Cover the bowl with plastic wrap and let it sit at room temperature for 8-12 hours, or until the dough has doubled in size. |
| 4 | Preheat the oven to 450°F (230°C) and place a Dutch oven or heavy pot inside to heat up. |
| 5 | Dust a clean surface with flour and gently pour out the dough. Shape it into a round loaf and place it on a piece of parchment paper. |
| 6 | Carefully remove the preheated Dutch oven from the oven and place the dough inside. Cover it and bake for 30 minutes. |
| 7 | Remove the lid and continue baking for an additional 20-30 minutes, or until the crust is golden brown and the loaf sounds hollow when tapped. |
| 8 | Allow the bread to cool completely on a wire rack before slicing and serving. |
Is Kneading Necessary?
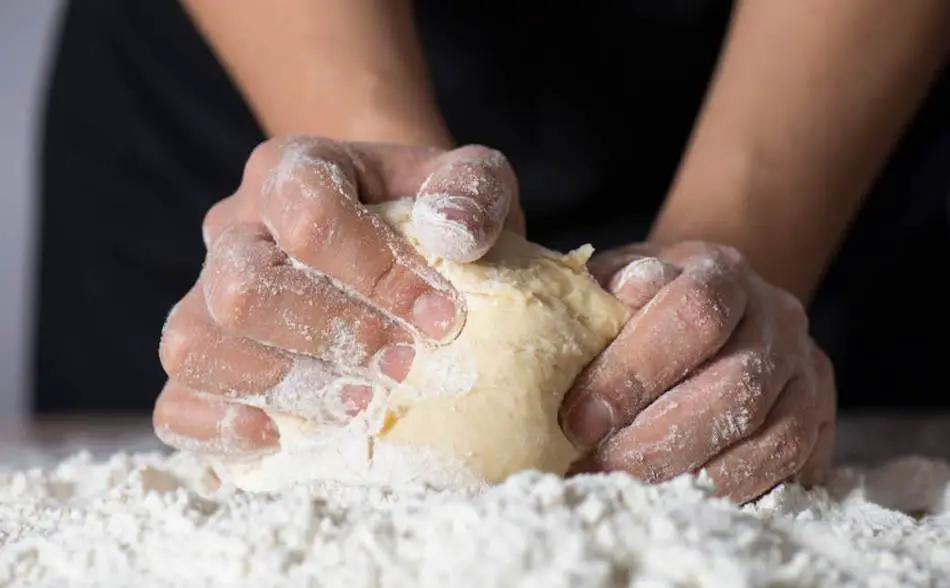
Kneading is the process of working dough by hand, using a dough scraper or your hands, to develop the gluten network in bread dough. This process involves stretching and folding the dough over and over again to activate the gluten, which is what gives bread its structure and allows it to rise.
Whether kneading is necessary or not depends on the recipe and the desired result. For traditional bread recipes, kneading is essential to develop the gluten and achieve the right texture and structure. However, in no knead bread recipes, the extended fermentation time allows the gluten to develop without the need for kneading. This makes no knead bread a more relaxed and low-effort option for home bakers, while still producing a delicious and flavorful loaf.
What are the Alternatives to Kneading?
There are a few alternatives to kneading bread dough:
- No-Knead Method: The most popular alternative to kneading is the no-knead method, which involves mixing the ingredients and letting the dough ferment for several hours or overnight. The long fermentation time allows the gluten to develop without the need for kneading.
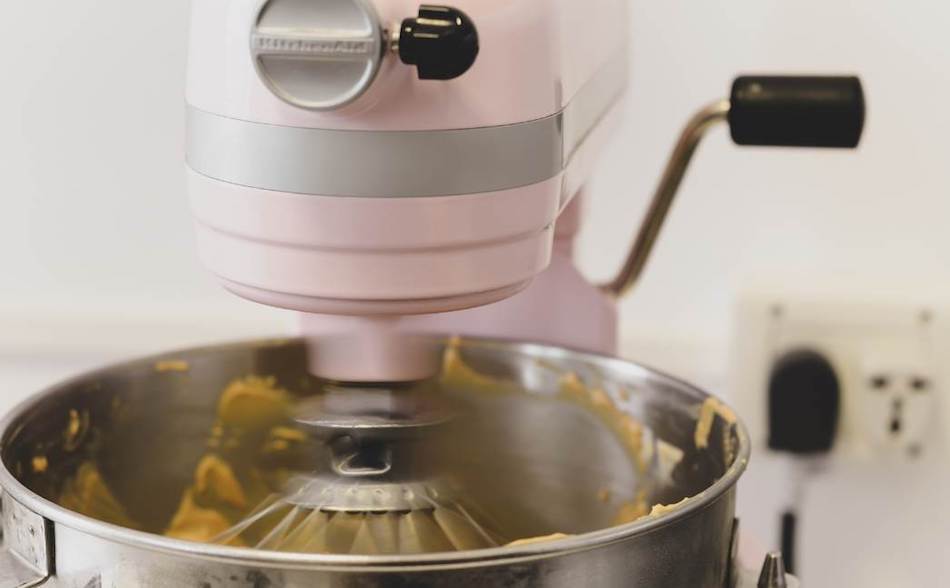
- Stand Mixer Method: Another alternative is to use a stand mixer equipped with a dough hook to mix and knead the dough. This method is faster and requires less physical effort, but can still result in over-kneading if not careful.
- Food Processor Method: The food processor method involves using a food processor to blend the ingredients and develop the gluten. This method is quick and efficient, but care must be taken not to over-process the dough, which can result in a tough and dense loaf.
- Sponge Method: The sponge method involves making a pre-fermented mixture, called a sponge, which is then combined with the rest of the ingredients to make the dough. This method allows for a slow and natural development of the gluten, resulting in a flavorful and tender loaf without the need for kneading.
The No Knead Method for Rye Bread
The “no knead” method is the perfect solution for those who want to enjoy the delicious taste of homemade bread without all the hard work.
With the no knead method, all you need is a mixing bowl, a few simple ingredients, and a bit of patience. That’s right, no need to break a sweat or strain your arms kneading dough. Simply mix the ingredients together, let the dough ferment for several hours, and then shape and bake it to perfection.
This method works because the long fermentation time allows the yeast and bacteria to do their magic, creating the desirable flavor and structure in the bread. And the best part? The no knead method results in a beautifully crusty loaf with a tender crumb that’s sure to impress even the most seasoned bread bakers.
Stand Mixer Method For Rye Bread
If you’re tired of kneading bread dough with your bare hands, well, there is another way. The stand mixer method is a game-changer for those who want to enjoy fresh, homemade bread without all the manual labor.
With the stand mixer method, you simply place all the ingredients into the bowl of your stand mixer, attach the dough hook, and let the mixer do all the hard work for you. In no time at all, you’ll have a perfectly kneaded dough ready for shaping and baking.
However, be careful not to over-knead the dough, as this can result in a tough and dense loaf. The key is to let the mixer run just until the dough comes together and is smooth, and then stop.
Food Processor Method For Rye Bread
A food processor is another quick and efficient way to make bread dough without the hassle of kneading.
With the food processor method, simply place all the ingredients into the bowl of your food processor and let the machine do the work. In just a few quick pulses, you’ll have a perfectly mixed and kneaded dough ready to shape and bake.
However, be careful because over-processing the dough in the food processor can result in a tough and dense loaf. The key is to pulse the dough just until it comes together and then stop.
The Sponge Method For Rye Bread
Another no knead method for rye bread is the sponge method.
With the sponge method, first create a pre-fermented mixture, called a sponge, by mixing together a portion of the ingredients. This sponge is then combined with the rest of the ingredients to make the final dough. The slow fermentation of the sponge allows the yeast and bacteria to work their magic, developing the desirable flavor and structure in the bread.
The sponge method results in a beautifully flavored and tender loaf of bread that’s sure to impress even the most discerning bread lovers. And, because there’s no kneading involved, you can relax and enjoy the process without any physical strain.
Pros of No Knead Rye Bread:
- Ease of preparation: No knead bread is incredibly simple to make, with only a few basic steps and minimal physical effort required.
- Versatility: The no knead method can be adapted to make various types of bread, including rye, and can be easily modified to include different flavors and ingredients.
- Time savings: The long fermentation time in the no knead method allows for a slow and natural development of flavor, while also reducing the overall time needed to make the bread.
- Better flavor: The long fermentation time in the no knead method results in a more complex and delicious flavor compared to traditional bread making methods.
Cons of No Knead Rye Bread:
- Longer preparation time: Although the actual preparation time is minimal, the no knead method requires a longer overall time to make the bread, as the dough needs to ferment for several hours or even overnight.
- Lack of control over dough: The no knead method relies on the yeast and bacteria to do their work, which can result in inconsistent results if the dough is not properly managed.
- Difficulty in shaping: The sticky and wet dough in the no knead method can be challenging to shape and form into the desired loaf shape.
- Potential for over-fermentation: If the dough ferments for too long, it can result in a sour and heavy loaf of bread.
Tips for Successful No Knead Bread Making
Making no knead bread is a true art form. It’s simple, yet it requires patience and a little bit of know-how to get the perfect loaf every time. Here are some tips for successful no knead bread making:
- Use good quality ingredients: Make sure to use the best flour and yeast you can find, as the quality of your ingredients will greatly affect the outcome of your bread.
- Be precise with measurements: The ratio of ingredients is important, so make sure to measure accurately. A kitchen scale is a great tool for this.
- Be patient: No knead bread takes time, so don’t rush the process. Let the dough rise and ferment properly for the best results.
- Experiment with different flours: While all-purpose flour works well, try using a mix of different flours, such as rye or whole wheat, to add depth and flavor to your bread.
- Use a Dutch oven: A heavy pot with a tight-fitting lid is perfect for baking no knead bread, as it helps to create a steamy environment that results in a crisp crust.
- Don’t over-handle the dough: Remember, the no knead method is all about minimal handling, so resist the urge to knead the dough too much.
- Keep a watchful eye: Keep an eye on the bread while it’s baking to avoid over-baking or burning.
No-Knead Rye Bread FAQ’s
Here are some common FAQ’s with answers about rye bread:
- What is rye bread? Rye bread is a type of bread made with rye flour, which gives it a distinct flavor and texture. It is often denser and less sweet than traditional wheat bread.
- What are the health benefits of rye bread? Rye bread is a good source of fiber and nutrients, including iron, magnesium, and potassium. It also has a low glycemic index, which means it releases energy slowly and helps to regulate blood sugar levels.
- Can you make bread with just rye flour? Yes, you can make bread with just rye flour, although it will be denser and less fluffy than bread made with wheat flour. Adding a small amount of all-purpose flour can help to lighten the texture of the bread.
- Is rye bread gluten-free? No, rye bread is not gluten-free. It contains gluten, which is a protein found in wheat, barley, and rye.
- How long does rye bread last? Rye bread can last up to 5-7 days when stored in an airtight container at room temperature. Freezing the bread can extend its shelf life for up to 3 months.
- Can you freeze no knead rye bread? Yes, you can freeze no knead rye bread. Simply wrap it tightly in plastic wrap or aluminum foil and store it in the freezer for up to 3 months. To defrost, let it sit at room temperature for several hours or overnight.
- What is the difference between white and dark rye bread? White rye bread is made with light-colored rye flour and is usually milder in flavor and lighter in color. Dark rye bread is made with a mix of light and dark rye flour and has a stronger flavor and darker color.
- How do I know when my no knead rye bread is done? Your no knead rye bread is done when it has a golden brown crust and sounds hollow when tapped on the bottom. You can also use a thermometer to check the internal temperature of the bread. It should be around 200°F (93°C).
Can I Use Active Dry Yeast Instead of Instant Yeast?
You can use active dry yeast instead of instant yeast when making no knead rye bread. However, it’s important to note that active dry yeast requires a longer proofing time, as it needs to be activated in warm water before being added to the bread dough.
In order to use active dry yeast, simply dissolve it in a small amount of warm water with a pinch of sugar, and let it sit for about 10 minutes until it becomes frothy. This indicates that the yeast is active and ready to use. Then, simply add it to your bread dough as you normally would.
Keep in mind that while active dry yeast is a perfectly acceptable substitute for instant yeast, it can impact the overall flavor and texture of your bread. I personally prefer instant yeast for my no knead rye bread, as it provides a faster and more reliable rise.
How Do I Make a Larger or Smaller Loaf of No Knead Rye Bread?
The size of your no knead rye bread loaf can be easily adjusted to suit your needs. Simply modify the amount of flour, water, yeast, and other ingredients in proportion to the desired size.
For example, if you’d like to make a larger loaf, simply increase the amount of ingredients in the same proportion. Conversely, if you’d like to make a smaller loaf, decrease the ingredients in proportion.
Keep in mind that changing the size of the loaf will also affect the baking time, so be sure to adjust accordingly. A larger loaf may take longer to bake, while a smaller loaf may take less time. The best way to determine if your bread is fully baked is to check the internal temperature with a thermometer. It should be around 200°F (93°C).
What is the Ideal Fermentation Time for No Knead Rye Bread?
The ideal fermentation time for no knead rye bread varies depending on the recipe and the temperature conditions in your kitchen. On average, most no knead rye bread recipes call for a fermentation time of 12 to 24 hours.
During this time, the yeast works to ferment the dough, producing carbon dioxide that makes the dough rise. The longer the dough ferments, the more complex the flavor of the bread will become.
It’s important to note that while a longer fermentation time can enhance the flavor of the bread, it can also lead to over-fermentation and a resulting loss of structure and texture. On the other hand, a shorter fermentation time can result in a bread that is denser and less flavorful.
The key to finding the ideal fermentation time is to keep an eye on your dough. It should double in size, and when you gently poke the surface with a floured finger, the indent should slowly spring back. If the indent springs back too quickly, the dough may have fermented too long. If the indent doesn’t spring back at all, the dough may need more time to ferment.
I always suggest starting with the recommended fermentation time in your recipe and adjusting as needed based on your specific conditions.
Can I Add Other Ingredients to No Knead Rye Bread?
Yes, you can add other ingredients to no knead rye bread to customize the flavor and texture to your liking.
Common additions to no knead rye bread include seeds, nuts, dried fruit, spices, and herbs. These ingredients can be mixed into the dough before fermentation, or sprinkled on top of the loaf before baking to add a crunchy texture and extra flavor.
When adding ingredients, it’s important to keep in mind that they may affect the final result of your bread. For example, adding a large amount of dried fruit can make the dough stickier, while adding nuts can make it more dense. You may need to adjust the amount of flour or water in the recipe to compensate for these changes.
It’s also important to remember that adding ingredients may affect the fermentation time, so be sure to monitor the dough carefully.
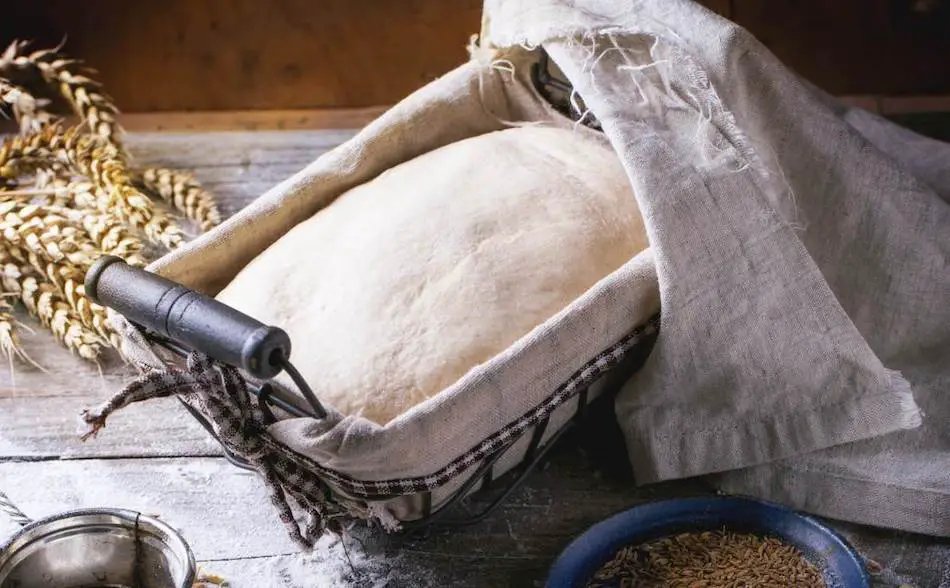
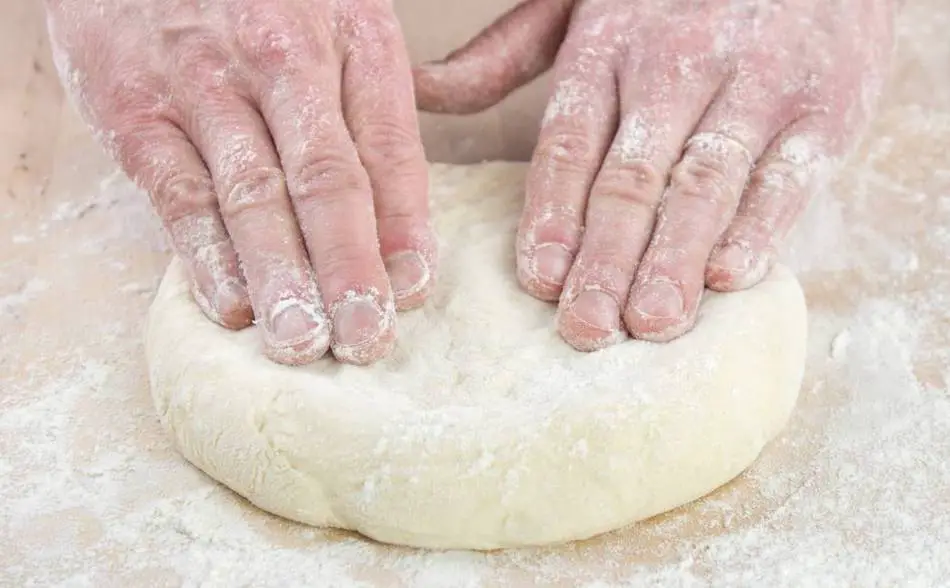
How Do I Shape the Dough for No Knead Rye Bread?
Shaping the dough for no knead rye bread is an important step in creating a beautifully risen and well-formed loaf.
When shaping the dough, it’s important to handle it gently to avoid deflating the air pockets that have developed during fermentation. To shape the dough, first lightly flour your work surface and hands.
Next, gently pour the dough onto the floured surface and use your hands to shape it into a round ball. You may need to dust the dough with a little more flour if it’s too sticky.
Once the dough is shaped into a ball, place it into a floured banneton or a clean kitchen towel, seam-side up. Cover the banneton or towel with plastic wrap and let the dough rest for another 30 minutes to an hour before baking.
I always suggest practicing your shaping technique a few times to get a feel for it. With a little patience and persistence, you’ll be able to shape a beautiful, perfectly round loaf of no knead rye bread.
How Do I Bake No Knead Rye Bread?
Baking no knead rye bread is a simple process that requires only a few key steps.
To begin, preheat your oven to 450°F (230°C) and place a Dutch oven or a heavy baking dish with a lid inside to heat up.
Once the oven is preheated, carefully remove the hot pot from the oven and remove the lid. Place the shaped dough, seam-side up, into the pot and score the top of the loaf with a sharp knife or razor blade.
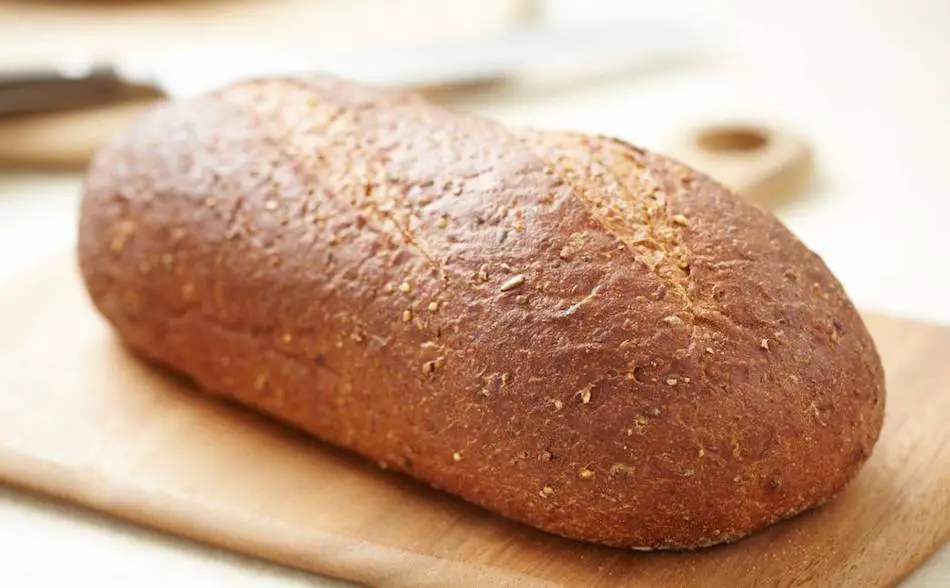
Replace the lid on the pot and return it to the oven. Bake the bread for 30 minutes, then remove the lid and continue baking for another 15 to 20 minutes, or until the bread is golden brown and sounds hollow when tapped.
When the bread is done baking, carefully remove it from the pot and let it cool on a wire rack for at least 30 minutes. This will allow the bread to firm up and the crust to become crunchy.
How Do I Know When the Bread is Done Baking?
Determining when no knead rye bread is done baking can be a little tricky, but there are a few key indicators to look for.
One of the most reliable methods is to tap the bottom of the loaf with your finger. If the bread sounds hollow, it’s likely done baking.
Another indicator is the internal temperature of the bread. A fully baked loaf will have an internal temperature of about 205°F (96°C) when measured with a digital thermometer.
Finally, the crust of the bread should be a deep golden brown color and should feel firm and crispy to the touch.

How Do I Get a Crispy Crust on No Knead Rye Bread?
Getting a crispy crust on no knead rye bread is all about creating steam in the oven during the baking process. Here are a few tips to help you achieve the perfect crust:
- Preheat the baking dish: Preheating the baking dish will help to create a burst of steam when the bread is placed inside, which will help to form a crispy crust.
- Score the dough: Scoring the dough before baking will allow the bread to expand and will also create additional surface area for the crust to form.
- Bake with a lid: Baking the bread with a lid will help to create steam, which will make the crust crispy.
- Remove the lid: After the first 30 minutes of baking, remove the lid and continue baking for another 15-20 minutes to allow the crust to crisp up.
- Brush with water: Just before baking, brush the top of the bread with water. This will help to create steam and will also encourage the crust to form.
Variations on No Knead Rye Bread
No knead rye bread is a versatile recipe that can be easily adapted to suit your tastes. Here are a few variations you can try:
- Whole grain rye bread: Increase the proportion of whole grain rye flour in the recipe to make a denser, nuttier bread.
- Caraway seed bread: Add 1-2 teaspoons of caraway seeds to the dough to give the bread a distinct flavor.
- Onion bread: Add 1/4 cup of diced onions to the dough for a savory twist.
- Cheese bread: Add 1/4 cup of grated cheese to the dough for a cheesy, delicious loaf.
- Seed bread: Add a mixture of sunflower, sesame, and poppy seeds to the top of the bread for a crunchy texture.
- Spiced bread: Add cinnamon, nutmeg, or your favorite spice to the dough for a warm and comforting flavor.
Enjoy the Simplicity and Deliciousness of No Knead Rye Bread
In conclusion, the no knead method for rye bread is a simple and convenient way to enjoy the delicious flavor and texture of a classic bread staple. With its hands-off approach, you can enjoy a fresh and delicious loaf of bread without the need for extensive kneading or complicated techniques.
Whether you prefer a classic loaf, a nutty whole grain bread, or a savory cheese bread, the no knead method is a great option for anyone who loves the taste of freshly baked bread.
Comparing Kneaded and No Knead Rye Bread
| Kneaded Rye Bread | No Knead Rye Bread |
|---|---|
| Require manual kneading | Minimal hands-on time |
| Time-consuming | Quick and easy |
| Develops gluten for chewy texture | Softer, more dense texture |
| Requires skill to achieve desired consistency | More forgiving and accessible to beginner bakers |
| Ideal for professional bakers | Ideal for home bakers with limited time or experience |
Overall, both methods of making rye bread have their own unique benefits and drawbacks. Kneaded rye bread provides a chewy texture with a strong gluten structure, but it requires more time, effort, and skill to make. No knead rye bread is easier and quicker to make, but it has a softer, more dense texture. Both types of bread can be delicious in their own way, so it ultimately comes down to personal preference and experience.
Is There a Taste Difference Between the Two Methods?
The differences in texture and flavor between kneaded and no knead rye bread are often noted by bakers and consumers. Kneaded rye bread typically has a chewy texture with a more complex flavor profile, while no knead rye bread has a softer, more dense texture with a milder flavor. The differences in texture and flavor can be attributed to the differences in the way the dough is mixed and fermented.
The Different Texture between Knead and No Knead Bread
Typically, there is a difference in texture between kneaded and no knead rye bread. Kneaded rye bread has a chewy texture, due to the development of gluten during the kneading process. The gluten structure created by kneading helps trap gases produced by the yeast, resulting in a lighter and airier texture. On the other hand, no knead rye bread has a softer, more dense texture. This is because the dough is not kneaded, and therefore the gluten structure is not as developed. This results in a loaf that is less airy and more dense.
What is Gluten and How is it Influenced by Kneading?
Gluten is a protein found in wheat, barley, and rye flour that provides the elasticity and structure in baked goods. When flour is mixed with water, gluten is formed and creates a web-like structure that traps carbon dioxide produced by yeast, causing the dough to rise.
Kneading is a process that helps to develop gluten. During kneading, the dough is repeatedly stretched and folded, causing the gluten proteins to align and bond with one another. The more the dough is kneaded, the more the gluten structure is developed, leading to a stronger and more elastic dough.
The strength and elasticity of the gluten structure created by kneading will directly impact the texture of the finished baked good. For example, in bread making, a strong and elastic gluten structure will create a lighter and airier bread, while a weak gluten structure will result in a denser, heavier bread.
In the case of no knead bread, the gluten structure is not as developed as it would be if the dough was kneaded, resulting in a softer, denser texture in the finished bread.
How Does Kneading Influence the Structure of Bread?
Kneading is a process that helps to develop the gluten structure in bread dough. Gluten is a protein found in wheat, barley, and rye flour that provides the elasticity and structure in baked goods. When flour is mixed with water, gluten is formed and creates a web-like structure that traps carbon dioxide produced by yeast, causing the dough to rise.
During kneading, the dough is repeatedly stretched and folded, causing the gluten proteins to align and bond with one another. The more the dough is kneaded, the more the gluten structure is developed, leading to a stronger and more elastic dough.
The strength and elasticity of the gluten structure created by kneading will directly impact the structure of the finished bread. For example, a strong and elastic gluten structure will create a lighter and airier bread, while a weak gluten structure will result in a denser, heavier bread.
Also, kneading also helps to distribute the yeast evenly throughout the dough and to evenly distribute any added ingredients, such as salt and sugar. This can impact the overall flavor and texture of the finished bread.
How Much Time Do You Save Without Kneading Bread?
The amount of time saved by making no knead bread compared to traditional kneaded bread can vary depending on the recipe, but typically it is a significant amount.
One of the main benefits of the no knead method is that it eliminates the need for the time-consuming process of kneading the dough. With traditional bread making, the dough is usually kneaded for several minutes by hand or with a stand mixer, which can take up to 10-15 minutes. In contrast, the no knead method only requires a minimal amount of mixing, typically taking just a few minutes to combine the ingredients.
The bulk of the rise and fermentation process is done over several hours or overnight, which allows the gluten to develop without the need for manual intervention.
Therefore, the no knead method can save a significant amount of time compared to traditional kneaded bread, making it an attractive option for busy bakers or those who are looking for a more convenient method.
Does No Knead Bread Alter the Cooking Time?
The cooking time for no knead bread is typically similar to that of traditionally kneaded bread.
The cooking time is determined by several factors such as the size of the loaf, the temperature of the oven, and the type of dough. The cooking time is not affected by whether the bread was kneaded or not kneaded.
In general, no knead bread is usually baked in a preheated Dutch oven or similar heavy-duty pot with a lid to create a moist and steamy environment, which helps to produce a crisp crust and a soft and airy interior. The bread is typically baked for about 30-40 minutes, depending on the size of the loaf and the desired crust.
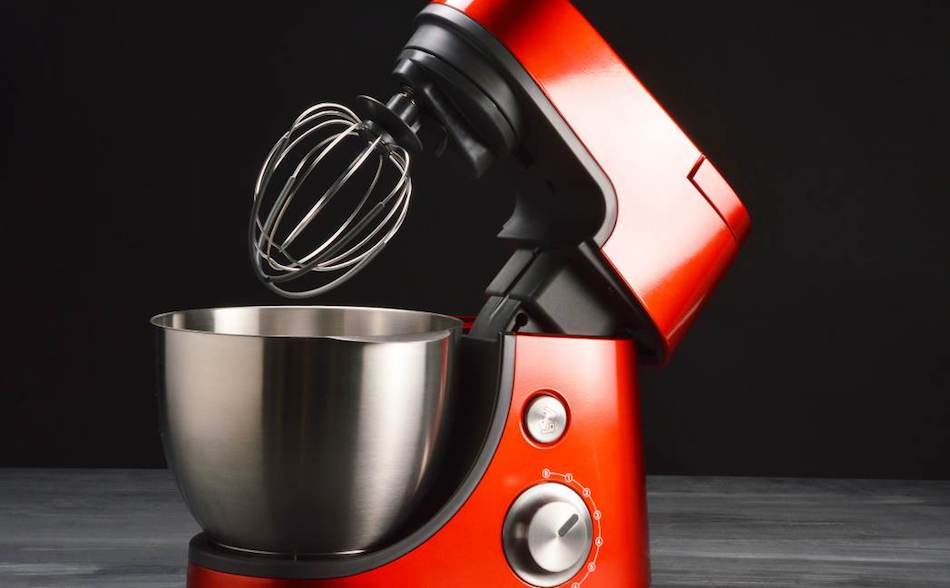
Stand Mixers: The Best Way To Make No-Knead Bread
Stand mixers are a game changer when it comes to making bread. They make the whole process so much easier and efficient, allowing you to create perfectly mixed dough in a matter of minutes.
When it comes to finding the best stand mixer for bread making, there are several factors to consider, including the power of the motor, the size and weight of the mixer, and the availability of attachments and accessories.
One of the top-rated stand mixers on the market today is the KitchenAid Artisan Series 5-Quart Tilt-Head Stand Mixer. With a powerful 325-watt motor and a large 5-quart stainless steel mixing bowl, this mixer is capable of handling even the toughest bread doughs with ease.
Another great option is the Cuisinart SM-50BC 5.5-Quart Stand Mixer, which features a powerful 500-watt motor, 12-speed settings, and a large 5.5-quart mixing bowl.
So, whether you’re a professional baker or just a home cook, investing in a stand mixer can make all the difference when it comes to making bread. Just remember, the best stand mixer is one that fits your specific needs and budget, so be sure to do your research and choose wisely.
Does a Bread Machine Knead Bread?
A bread machine can kneads bread by using its built-in dough hook to mix and knead the dough ingredients together, typically for several minutes.
The kneading process is important for the development of gluten in the dough, which contributes to the bread’s texture and structure. A bread machine can simplify the bread-making process by automating the kneading step, making it a convenient option for those who want to save time and effort.