

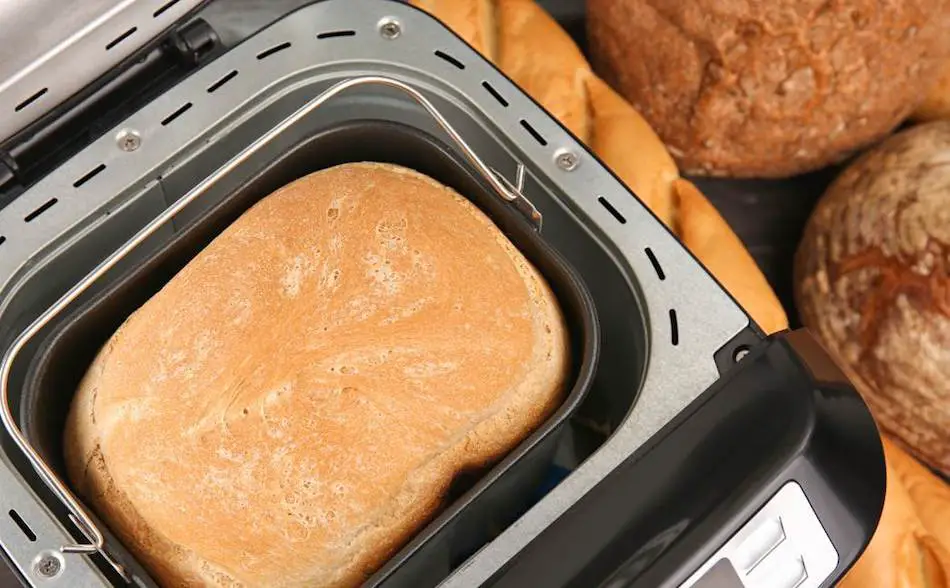
Making bread in a bread machine is a convenient and easy way to enjoy fresh homemade bread. However, one common problem that many bread machine users experience is dough sticking to the pan. This can be frustrating and can ruin the final product. In this article, we will delve into the causes of dough sticking to the pan and provide practical tips and solutions to prevent this from happening. From properly greasing the pan to adjusting the dough consistency, we have got you covered. Don’t let dough sticking ruin your bread-making experience again. Read on to learn how to prevent it from happening.
Bread sticking to the pan in a bread machine is a common issue faced by many bread machine users. This can happen due to a variety of reasons, including improper pan greasing, using the wrong type of pan, incorrect dough consistency, and inadequate measurement of ingredients. It can also be caused by factors such as humidity, yeast, and over-mixing. Preventing bread from sticking to the pan can be achieved by properly greasing the pan with oil or butter, using a non-stick or silicone-coated pan, adjusting the dough consistency, and measuring ingredients accurately.
Key Points
- Understanding the cause of dough sticking to the pan can help to prevent it from happening in the future.
- Properly greasing the pan can help to prevent dough from sticking.
- Using the right type of pan can also help to prevent dough from sticking.
- Adjusting the dough consistency can also help to prevent dough from sticking.
- Properly measuring ingredients can help to prevent dough from sticking.
- Cleaning the pan thoroughly can also help to prevent dough from sticking.
- Using a non-stick pan can also help to prevent dough from sticking.
- Taking the dough out of the pan at the right time can help to prevent dough from sticking.
- Experimenting with different types of flour can also help to prevent dough from sticking.
- Troubleshooting tips for sticking dough can also help to prevent dough from sticking.
- The importance of preheating the bread machine can also help to prevent dough from sticking.
- The role of yeast in dough sticking should be understood.
- Properly kneading bread machine dough can also help to prevent dough from sticking.
- Using a silicone or Teflon-coated pan can also help to prevent dough from sticking.
- The impact of humidity on dough sticking should be understood.
- Alternative methods for shaping dough can also help to prevent dough from sticking.
- Using a dough-rising agent can also help to prevent dough from sticking.
- Properly storing bread machine dough can also help to prevent dough from sticking.
- The effect of over-mixing on dough sticking should be understood.
- Properly cleaning and maintaining a bread machine pan can also help to prevent dough from sticking.
Understanding the Cause of Dough Sticking to the Pan
One of the most frustrating things that can happen in the bread making process is when your dough sticks to the pan. But understanding the cause of this sticking is the first step in preventing it from happening.
The main cause of dough sticking to the pan is a lack of lubrication. When the pan is not properly greased, the dough can easily stick to the surface. This is why it’s important to make sure you are properly greasing the pan before adding the dough.
Another cause of dough sticking to the pan is using the wrong type of pan. Different types of pans have different heat conductivity properties and some may not be suitable for bread making. Be sure to use a pan that is suitable for bread making.
Also, the consistency of the dough can also play a role in sticking. If the dough is too wet, it can be harder to handle and may stick to the pan. Adjusting the dough consistency to the right level can help prevent sticking.
Proper measurement of ingredients is also important. When ingredients are not measured correctly, it can affect the consistency of the dough and lead to sticking.
Lastly, not cleaning the pan thoroughly can also lead to sticking. Any leftover residue from previous batches can cause the dough to stick. So, be sure to clean the pan thoroughly before using it again.
Properly Greasing the Pan
Properly greasing the pan is an essential step in preventing dough from sticking. The type of grease you use is important. Some bakers prefer to use butter, while others prefer oil. Both work well, but the key is to make sure the pan is completely coated. Use a brush to spread the grease evenly over the entire surface of the pan, including the corners and edges.
It’s also important to note that using too much grease can cause the dough to rise unevenly and even burn, so be sure to use the appropriate amount. And be sure to use a fresh batch of grease for every new batch of dough you make.
Also, if you are using a non-stick pan, be sure to check the manufacturer’s instructions for the appropriate type of grease to use, as some non-stick coatings may be damaged by certain types of grease.
Using the Right Type of Pan
When it comes to bread making, using the right type of pan is crucial. It’s not just about having a pan that looks pretty, it’s about having a pan that’s going to give you the best results.
Different types of pans have different heat conductivity properties, and some may not be suitable for bread making. For example, a glass pan may not be the best choice because it doesn’t conduct heat as well as metal. Similarly, a dark-colored pan may conduct heat too well and cause the bottom of your loaf to burn.
So, what’s the best type of pan for bread making? Well, it depends on the recipe and the type of bread you’re making. For example, a loaf pan is great for sandwich bread, while a Dutch oven is great for no-knead bread.
It’s also important to consider the size of the pan. Make sure you’re using a pan that’s the right size for your recipe, otherwise, the bread may not rise properly or cook evenly.
So using the right type of pan is crucial for bread making. It’s not just about having a pan that looks pretty, it’s about having a pan that’s going to give you the best results. Different types of pans have different heat conductivity properties and some may not be suitable for bread making. Make sure you’re using a pan that’s the right size for your recipe and that’s appropriate for the type of bread you’re making.
Adjusting the Dough Consistency
Adjusting the dough consistency is a fundamental aspect of bread making. The dough should have the right texture and elasticity to allow it to rise properly and create a desirable texture in the finished loaf.
The key to achieving the right dough consistency is to pay attention to the recipe’s instructions and make adjustments as needed. For example, if the dough is too wet, you can add a bit more flour. If it’s too dry, you can add a bit more water.
The humidity and temperature of your kitchen can affect the dough consistency. For example, if it’s a particularly humid day, you may need to use less water, as the dough may absorb more moisture from the air.
Another thing to keep in mind is that different types of flour absorb liquids differently. For example, whole wheat flour absorbs more liquid than all-purpose flour. So, when using different types of flour, you may need to make adjustments to the dough consistency.
Properly Measuring Ingredients
Properly measuring ingredients is a crucial step in bread making. A recipe is like a roadmap, and if you don’t follow it correctly, you may end up with a loaf that’s less than satisfactory.
When measuring ingredients, it’s essential to use the right tools. For example, measuring cups and spoons should be used for dry ingredients, while a liquid measuring cup should be used for liquids.
Be precise and accurate with your measurements. When a recipe calls for a cup of flour, it’s essential to use the same cup, not a mug or a different size of measuring cup.
Another thing to keep in mind is that different types of flour have different densities. This means that a cup of one type of flour may weigh more or less than a cup of another type of flour. So, be sure to use the appropriate type of flour for the recipe.

Cleaning the Pan Thoroughly
Cleaning the pan thoroughly before using it again is an often-overlooked step in bread making but it’s a crucial one. Any leftover residue from previous batches can cause the dough to stick, leading to a ruined loaf.
When cleaning the pan, it’s essential to use the right tools. For example, a stiff-bristled brush can be used to remove any caked-on dough, while a sponge or cloth can be used to wipe away any remaining residue.
Make sure that you use the appropriate cleaning solutions. For example, if the pan has a non-stick coating, be sure to use a cleaning solution that’s safe for non-stick surfaces.
Also, it’s also essential to dry the pan completely before using it again. Any leftover moisture can cause the dough to stick.
Using a Non-Stick Pan
Non-stick pans can be a convenient option for bread making, but it’s essential to use them correctly to avoid ruining a loaf.
First, it’s important to note that not all non-stick pans are created equal. Some may be coated with a more durable non-stick material than others. Be sure to check the manufacturer’s instructions for the appropriate use and care of the pan.
Also, it’s essential to use the right type of utensils when using a non-stick pan. For example, metal utensils can scratch the non-stick coating, leading to flaking and eventually, the pan will need to be replaced.
Another thing to keep in mind is that non-stick pans may not conduct heat as well as metal pans. This can affect the way your bread bakes. So, it’s essential to keep an eye on the bread as it bakes and make adjustments as needed.
Taking the Dough out of the Pan at the Right Time
Timing is everything when it comes to bread making, and that includes taking the dough out of the pan at the right time.
When the bread is done baking, it’s essential to let it cool in the pan for a few minutes. This allows the bread to settle and makes it easier to remove it from the pan without it falling apart.
Make sure that you use the right tools to remove the bread from the pan. For example, a spatula can be used to loosen the edges of the bread, while a pair of tongs can be used to lift the bread out of the pan.
Keep in mind is that different types of bread have different cooling times. For example, a loaf of sandwich bread may only need to cool for a few minutes, while a sourdough loaf may need to cool for several hours. So, be sure to check the recipe’s instructions for the appropriate cooling time.
Experimenting with Different Types of Flour
Bread making is a culinary art, and part of that art is experimenting with different types of flour. Flour is the foundation of bread, and it’s essential to understand how different types of flour can affect the final product.
Different types of flour absorb liquids differently, which can affect the dough’s consistency. For example, whole wheat flour absorbs more liquid than all-purpose flour. This means that when using whole wheat flour, you may need to use less water or add more flour to achieve the right dough consistency.
Also, different types of flour also have different protein levels, which can affect the bread’s texture. For example, bread flour has a higher protein level than all-purpose flour, which can result in a chewier texture.
Different types of flour have different flavors. For example, whole wheat flour has a nuttier flavor than all-purpose flour. So, it’s essential to consider the flavor profile of the flour when choosing it for a recipe.

Troubleshooting Tips for Sticking Dough
Let’s face it, sometimes dough can be a stubborn son of a gun and stick to the pan, ruining a perfectly good loaf of bread. But, don’t despair, there are troubleshooting tips to help prevent sticking dough.
First, make sure the pan is properly greased. This is a crucial step that should not be overlooked. Use a brush to spread the grease evenly over the entire surface of the pan, including the corners and edges.
Another thing to keep in mind is the dough consistency. If the dough is too wet, it may stick to the pan. Make sure to adjust the dough consistency by adding more flour or water as needed.
Also, make sure that you are using the right type of pan. Different types of pans have different heat conductivity properties, and some may not be suitable for bread making. For example, a glass pan may not be the best choice because it doesn’t conduct heat as well as metal.
Lastly, take the dough out of the pan at the right time. Let the bread cool in the pan for a few minutes, use the right tools to remove the bread from the pan and check the recipe’s instructions for the appropriate cooling time.
The Importance of Preheating the Bread Machine
Bread machines are a convenient tool for bread making, but it’s essential to preheat the machine before using it.
Preheating the bread machine allows it to reach the appropriate temperature for the dough to rise properly. If the machine is not preheated, the dough may not rise correctly, resulting in a poorly-baked loaf.
Also, it’s also essential to follow the manufacturer’s instructions for preheating the machine. For example, some machines may require a certain amount of time to preheat, while others may not require preheating at all.
Another thing to keep in mind is that different types of bread may require different preheating times. For example, a quick bread may not require preheating, while a sourdough loaf may require a longer preheating time. So, be sure to check the recipe’s instructions for the appropriate preheating time.
The Role of Yeast in Dough Sticking
Yeast is a key ingredient in bread making, and it plays a vital role in the dough’s rise and texture. Yeast consumes sugar and releases carbon dioxide, which causes the dough to rise. But when it comes to dough sticking, yeast also plays a role.
If the yeast is expired or too old, it may not be as active and may not release enough carbon dioxide to cause the dough to rise properly. This can lead to a denser, heavier loaf that may be more prone to sticking to the pan.
If the dough rises too much before baking, the gluten structure may be over-developed, which can lead to a loaf that collapses or sticks to the pan.
Another thing to keep in mind is the temperature of the dough and the yeast. Yeast is a living organism, and it needs to be kept at the right temperature for it to be active. If the dough is too cold, the yeast may not be active enough, and if it’s too warm, it can cause the dough to rise too quickly.
How to Properly Knead Bread Machine Dough
Kneading dough is an essential step in bread making, and it’s important to do it correctly to achieve a good loaf. When using a bread machine, the kneading process is done by the machine, but it’s still essential to do it correctly.
First, make sure the dough ingredients are properly measured and mixed. A bread machine can only work with the ingredients you give it, and if they’re not mixed correctly, the kneading process will be affected.
Another thing to keep in mind is the dough consistency. If the dough is too wet or too dry, it may not knead correctly. Make sure to adjust the dough consistency by adding more flour or water as needed.
The right type of dough setting on the bread machine. Different types of bread may require different kneading times and settings. For example, a quick bread may not require as much kneading as a sourdough loaf. So, be sure to check the recipe’s instructions for the appropriate kneading setting.
Monitor the kneading process. Some bread machines have a window to observe the dough, if not, you can open the lid to check the consistency of the dough, if needed make adjustments to the dough consistency.
Using a Silicone or Teflon-Coated Pan
Silicone or Teflon-coated pans can be a convenient option for bread making, but it’s essential to use them correctly to avoid ruining a loaf.
First, it’s important to note that not all silicone or Teflon-coated pans are created equal. Some may be coated with a more durable material than others. Be sure to check the manufacturer’s instructions for the appropriate use and care of the pan.
Silicone or Teflon-coated pans may not conduct heat as well as metal pans. This can affect the way your bread bakes. So, it’s essential to keep an eye on the bread as it bakes and make adjustments as needed.
Make sure to use the right type of utensils when using a silicone or Teflon-coated pan. For example, metal utensils can scratch the non-stick coating, leading to flaking and eventually, the pan will need to be replaced.
The Impact of Humidity on Dough Sticking
Humidity is an often overlooked factor in bread making, but it can have a significant impact on dough sticking.
High humidity can cause dough to stick to the pan because it can make the dough more sticky and difficult to handle. It can also affect the dough’s rise, causing it to rise too quickly or not at all.
Low humidity can cause dough to become dry and crumbly, making it difficult to shape and causing it to stick to the pan. Low humidity can also affect the bread’s texture, causing it to be dense and heavy.
Keep an eye on the humidity levels in your kitchen and make adjustments as needed. For example, if the humidity is too high, you can reduce the amount of water used in the dough, and if the humidity is too low, you can increase the amount of water used in the dough.
Alternative Methods for Shaping Dough
Shaping dough is an essential step in bread making, and it’s important to do it correctly to achieve a good loaf. There are a few alternative methods to the traditional hand-kneading method that can be used to shape dough.
One alternative method is using a stand mixer fitted with a dough hook. This method can save time and energy, and it can be especially useful for shaping larger batches of dough.
Another alternative method is using a food processor fitted with a dough blade. This method can also save time and energy, and it can be especially useful for shaping dough with wet or sticky consistencies.
Using a rolling pin is another alternative method, it’s great for shaping dough for flatbreads, pizzas, and pastries. This method is especially useful for shaping dough into a uniform thickness and shape.
Using a bench scraper is another alternative method, it’s great for shaping dough for rustic breads, shaping dough into a ball and also for dividing dough into portions before shaping them.
In bread making, there is no one-size-fits-all method, so it’s essential to experiment with different shaping methods and find what works best for you and the type of bread you’re making.
Using a Dough-Rising Agent
Using a dough-rising agent is a common technique in bread making, and it can be a useful tool for achieving a good loaf. Dough-rising agents, such as yeast, are added to dough to make it rise. These agents come in different forms, such as instant yeast, active dry yeast and sourdough starter.
Instant yeast is a quick-acting yeast that can be added directly to the dough, it’s perfect for those who want to make bread quickly.
Active dry yeast is a more traditional yeast that needs to be activated before use by dissolving it in water. It’s perfect for those who want to make bread in a more traditional way.
Sourdough starter is a naturally occurring yeast that is made by fermenting flour and water. It’s perfect for those who want to make bread with a more complex flavor profile.
When using a dough-rising agent, it’s essential to follow the manufacturer’s instructions for the appropriate use and care of the product. Additionally, it’s important to keep in mind that different types of bread may require different rising times, so be sure to check the recipe’s instructions for the appropriate rising time.
Using a dough-rising agent can be a useful tool for achieving a good loaf, but it’s essential to follow the manufacturer’s instructions for the appropriate use and care of the product, and check the recipe’s instructions for the appropriate rising time.
How to Properly Store Bread Machine Dough
Properly storing bread machine dough is an essential step in bread making, and it can be the difference between a good loaf and a bad one.
First and foremost, it’s essential to keep the dough at the right temperature. The dough should be stored in a cool, dark place, ideally around 60-70 degrees Fahrenheit. This will prevent the dough from rising too quickly or too slowly.
Another thing to keep in mind is the duration of storage. The dough should be used within 24-48 hours of being made to ensure the best results. If you can’t use the dough within that time frame, it’s best to refrigerate the dough to slow down the fermentation process and prolong the life of the dough.
When storing dough in the refrigerator, it’s essential to keep it airtight to prevent it from drying out. Also, it’s important to bring the dough back to room temperature before using it.
Lastly, when storing the dough, it’s important to remember that the dough should be stored in a way that allows it to maintain its shape. For example, if the dough is shaped into a ball, it should be stored in a way that maintains that shape.
Properly storing bread machine dough is an essential step in bread making, it’s essential to keep the dough at the right temperature, use the dough within 24-48 hours, keep it airtight when storing in the refrigerator, and store the dough in a way that allows it to maintain its shape.
The Effect of Over-Mixing on Dough Sticking
Over-mixing dough is a common mistake in bread making, and it can have a significant impact on dough sticking.
When dough is over-mixed, the gluten in the dough becomes over-developed, causing the dough to become elastic and difficult to handle. This can make it more likely to stick to the pan and can also affect the bread’s texture, making it dense and heavy.
Also, over-mixing can also cause the dough to rise too quickly, leading to a poorly-shaped loaf.
To avoid over-mixing, it’s essential to follow the recipe’s instructions for the appropriate mixing time. It’s also important to keep an eye on the dough as you mix it and stop as soon as it comes together.
Find the right balance between under-mixing and over-mixing. Over-mixing can have a significant impact on dough sticking, cause the dough to become elastic and difficult to handle, affect the bread’s texture, and cause the dough to rise too quickly. To avoid over-mixing, follow the recipe’s instructions for the appropriate mixing time, and stop as soon as the dough comes together.
How to Properly Clean and Maintain a Bread Machine Pan
Properly cleaning and maintaining a bread machine pan is crucial for achieving a good loaf.
First and foremost, it’s essential to clean the pan thoroughly after each use. This includes removing any dough that may have stuck to the pan, as well as any crumbs or residue. The pan can be cleaned using warm soapy water, and a non-abrasive sponge.
Make sure the pan is completely dry before using it again. Moisture can cause dough to stick to the pan and can also cause the bread to become soggy.
Keep in mind is that some bread machine pans are not dishwasher safe, so it’s important to check the manufacturer’s instructions for the appropriate cleaning method.
It’s important to keep an eye on the condition of the pan. If the pan is showing signs of wear or damage, it’s best to replace it. A damaged or worn pan can cause dough to stick, and it can also affect the bread’s shape.
Properly cleaning and maintaining a bread machine pan is crucial for achieving a good loaf. It’s essential to clean the pan thoroughly after each use, make sure the pan is completely dry before using it again, check the manufacturer’s instructions for the appropriate cleaning method, and keep an eye on the condition of the pan and replace it if needed.