

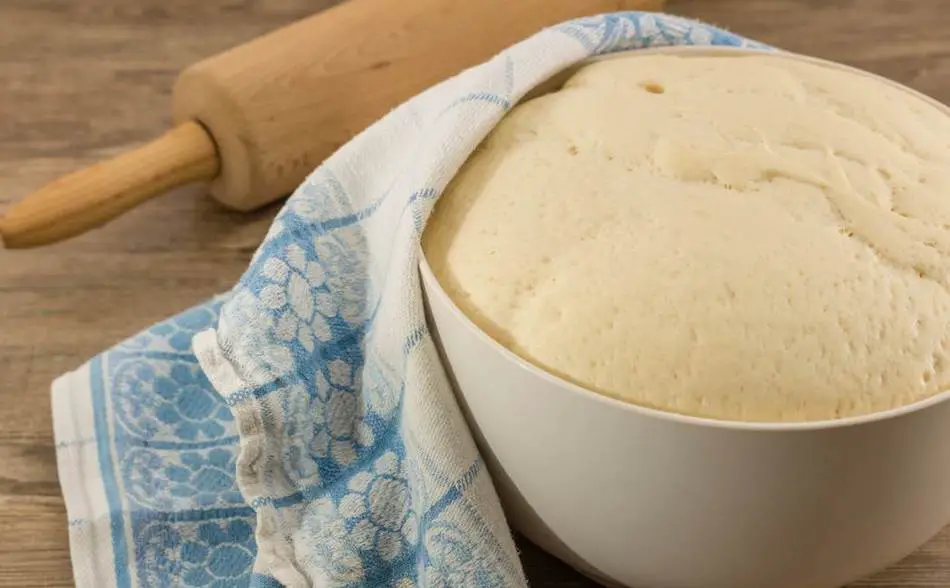
Bread making is a time-honored tradition that has been passed down through generations. One of the most important steps in the bread making process is the proofing, or rising, stage. This is when the yeast activates and causes the dough to rise and become light and fluffy. But how long should you let your bread dough proof? The answer to this question is not as simple as it may seem, as it depends on several factors, including the type of yeast, the temperature and humidity of your kitchen, and the recipe you are using. In this article, we will explore the science behind proofing bread dough and provide guidelines for determining the ideal proofing time for your homemade bread.
Proofing time for homemade bread depends on several factors such as the type of yeast, the temperature and humidity of your kitchen and the recipe you are using. Generally, the dough should be proofed until it has doubled in size and a finger-dent test (where you press gently on the dough with your finger and if the indentation remains, the dough is ready) reveals a slight spring back. However, it’s recommended to use a kitchen thermometer to check the temperature of your dough and a timer to keep track of the time, as these will give you a more accurate indication of when the dough is ready to be shaped and baked.
Understanding the Role of Yeast in Proofing Bread Dough
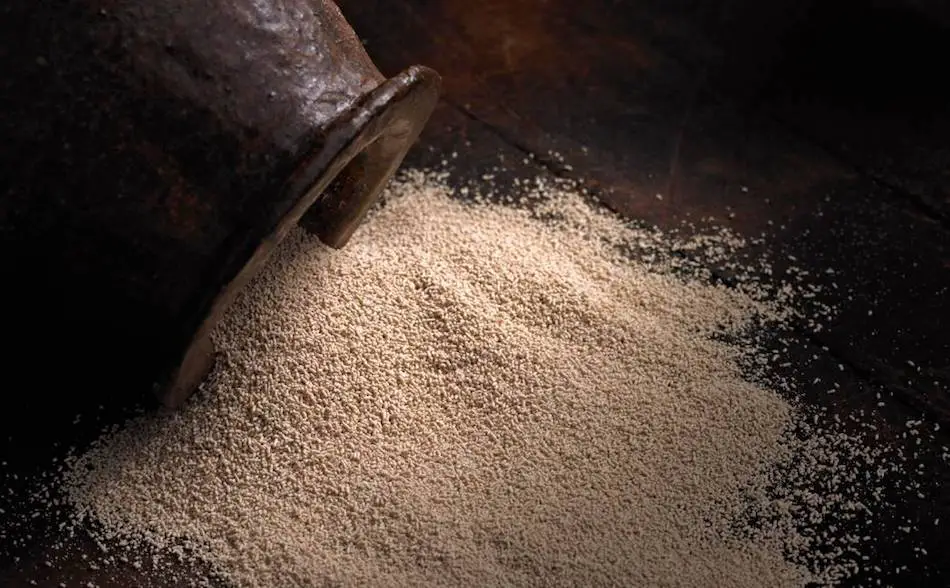
As someone who bakes a lot of bread, I can tell you that yeast is a crucial component in the proofing process of bread dough. Yeast, a living microorganism, is responsible for causing the dough to rise and develop its characteristic texture and flavor.
When yeast comes into contact with warm liquid, it begins to ferment, producing carbon dioxide and alcohol. This fermentation process causes the dough to rise, creating the characteristic air pockets that give bread its light, fluffy texture.
There are two types of yeast commonly used in bread making: fresh yeast and dry yeast. Fresh yeast is highly perishable and must be kept refrigerated, whereas dry yeast can be stored at room temperature for several months. Both types of yeast can be used interchangeably, but the amount required will vary depending on the recipe.
It’s important to note that yeast is a living organism and its activity can be affected by temperature, humidity, and the presence of other ingredients. For example, salt can inhibit yeast growth, so it’s often added at the end of the mixing process. Sugar, on the other hand, can promote yeast growth, so it’s often added at the beginning of the mixing process.
In bread making, it’s essential to understand the role of yeast and how it behaves in order to achieve the perfect rise, texture and flavor. With the right knowledge and techniques, you can create delicious homemade bread that is the envy of all your friends and family.
How Temperature and Humidity Affect Proofing Time
Temperature and humidity play a significant role in the proofing process of bread dough. Yeast is a living organism and its activity can be affected by the environment in which it’s placed.
When it comes to temperature, yeast thrives in a warm environment. Ideally, the temperature for proofing bread dough should be between 75-85°F (24-30°C). If the temperature is too cold, the yeast will not be active enough to cause the dough to rise properly. On the other hand, if the temperature is too hot, the yeast will become overactive and can cause the dough to rise too quickly, resulting in a less desirable texture and flavor.
Humidity also plays a role in proofing bread dough. Yeast needs a certain amount of moisture to be active, and too little humidity can cause the dough to dry out and inhibit yeast growth. On the other hand, too much humidity can cause the dough to become too moist, resulting in a sticky and difficult to handle dough.
As a general rule, it’s important to keep your kitchen at a consistent temperature and humidity level while proofing bread dough. A kitchen thermometer and hygrometer can be helpful in monitoring these levels and ensuring that your dough is proofing in the optimal environment.

The Importance of Accurate Measuring in Proofing Bread Dough
I can tell you that accurate measuring is one of the most important aspects of the proofing process of bread dough. Yeast is a living organism and its activity can be affected by the ratio of ingredients used in the dough.
When it comes to flour, for example, using too much flour can lead to a dense, heavy loaf of bread, while using too little flour can result in a loaf that does not hold its shape and collapses during baking. The same is true for other ingredients such as yeast, sugar, and salt. The wrong ratio of these ingredients can affect the dough’s ability to rise and its final texture and flavor.
Accurate measuring is not only important for the yeast’s activity but also for the final product. A precise measurement of ingredients guarantees that the dough will rise properly, have the correct texture and taste.
Using a kitchen scale is the best way to ensure accurate measuring of ingredients. It allows you to measure ingredients by weight, which is more precise than measuring by volume. This will help you to achieve the right balance of ingredients and create a perfect loaf of bread every time.
How to Test if Your Bread Dough is Fully Proofed
Testing if your bread dough is fully proofed is an important step in the bread-making process. Properly proofed bread dough will have a desirable texture, flavor and rise.
One of the most common methods to test if the dough is fully proofed is the “finger-dent test” where you press gently on the dough with your finger. If the indentation remains, the dough is ready to be shaped and baked.
Another test is the “windowpane test”, where you take a small piece of dough, stretch it gently between your fingers, and check if it becomes translucent without tearing. This test ensures that gluten has developed enough to produce a desirable texture in the bread.
Also, you can also check the dough’s volume. Fully proofed dough should have doubled in size.
It’s important to keep in mind that proofing time can vary depending on the temperature and humidity of your kitchen, as well as the type of yeast and recipe you are using. So, it’s always recommended to use a timer and keep track of the time, and use a kitchen thermometer to check the dough’s temperature.
How to Properly Store and Retard Your Proofed Bread Dough
Properly storing and retarding proofed bread dough is an important step in the bread-making process. The right storage technique can help maintain the ideal texture, flavor, and rise of your bread.
Once the dough has been proofed and shaped, it can be stored in the refrigerator for several hours or overnight. This process is known as retarding. Retarding slows down the yeast’s activity, allowing the dough to develop more flavor and a better texture. It also makes it easier to handle and shape the dough when you’re ready to bake it.
When storing the dough in the refrigerator, it’s important to keep it tightly covered to prevent it from drying out. You can use plastic wrap or a plastic bag to cover the dough.
It’s also important to note that not all bread dough can be stored in the refrigerator. Some breads, such as sourdough breads, benefit from a longer fermentation period at room temperature, and should not be refrigerated.
How to Correctly Shape and Form Your Proofed Bread Dough
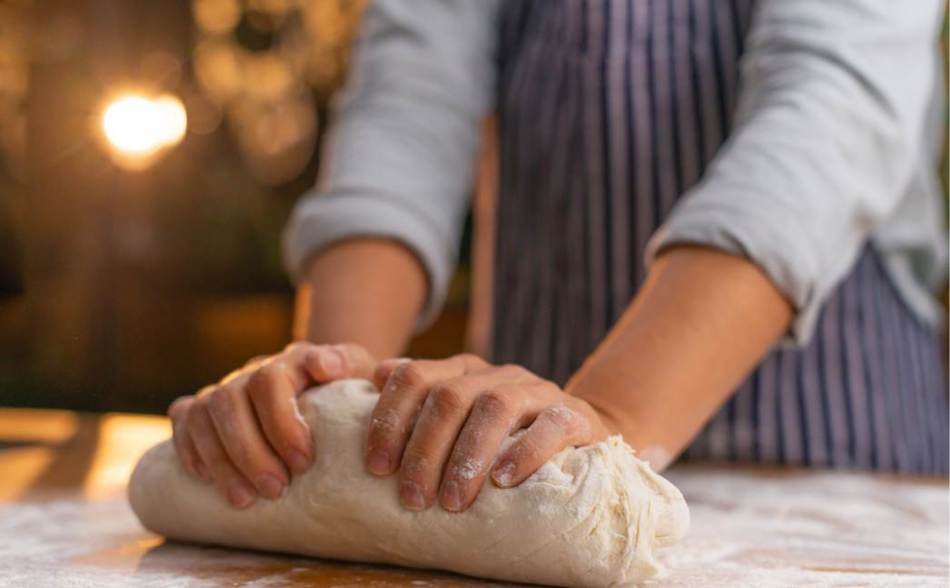
Shaping and forming your proofed bread dough is a crucial step in the bread-making process. The correct shaping and forming will ensure that your bread has the ideal texture, flavor, and rise.
When shaping your proofed bread dough, it’s important to handle it gently to preserve the air pockets that have formed during the proofing process. The dough should be gently stretched and formed into the desired shape.
For round loaves, the dough should be shaped into a smooth ball by pulling the edges of the dough towards the center and pinching them together. For long loaves, the dough should be rolled and stretched into the desired shape.
It’s also important to use the right tools when shaping and forming your bread dough. Bannetons, or proofing baskets, are traditionally used to shape round loaves, while a couche, a heavy linen cloth, is used to shape long loaves.
For a good crust, some breads are scored or slashed with a sharp blade before baking. This allows the bread to expand during baking and also creates a decorative pattern on the crust.
How to Properly Preheat Your Oven for Baking Proofed Bread
Preheating your oven for baking proofed bread is an essential step in the bread-making process. The correct oven temperature and preheating time will ensure that your bread has the ideal texture, flavor, and rise.
When baking bread, it’s important to preheat your oven to the correct temperature. Most bread recipes call for a temperature of 425-450°F (220-230°C). It’s important to use an oven thermometer to check the temperature, to ensure that it is accurate.
It’s also important to allow enough time for the oven to fully preheat before placing the bread dough in the oven. This can take anywhere from 15 to 30 minutes, depending on the oven.
Also, for a good crust, it is recommended to add steam to the oven during the first few minutes of baking. You can do this by placing a tray of water on the bottom of the oven or by using a spray bottle to mist the oven with water.
So just remember, preheating your oven for baking proofed bread is an essential step in the bread-making process. The correct oven temperature and preheating time will ensure that your bread has the ideal texture, flavor, and rise. Use an oven thermometer to check the temperature, allow enough time for the oven to fully preheat, and consider adding steam to the oven during the first few minutes of baking for a good crust.
How to Troubleshoot Common Proofing Problems
Some of the most common issues that can arise during proofing include overproofing, underproofing, and uneven rising.
Overproofing occurs when the dough has risen too much and becomes too puffy and delicate to handle. This can cause the bread to collapse during baking and result in a dense, heavy loaf. To prevent overproofing, it’s important to keep an eye on the dough during the proofing process and to use the finger-dent test or the windowpane test to determine when the dough is fully proofed.
Underproofing occurs when the dough has not risen enough and results in a bread that is dense and heavy. To prevent underproofing, it’s important to use the right amount of yeast and to keep the dough at the correct temperature during the proofing process.
Uneven rising occurs when the dough rises unevenly, resulting in a loaf that is misshapen or has large air pockets. To prevent uneven rising, it’s important to handle the dough gently during the shaping and forming process and to ensure that the dough is proofed in a warm, humid environment.
Troubleshooting common proofing problems is an important part of the bread-making process. Some of the most common issues that can arise during proofing include overproofing, underproofing, and uneven rising. To prevent these issues, it’s important to keep an eye on the dough during the proofing process, use the finger-dent test or the windowpane test, handle the dough gently during the shaping and forming process, and to ensure that the dough is proofed in a warm, humid environment.
How to Use a Kitchen Thermometer for Measuring Proofing Time
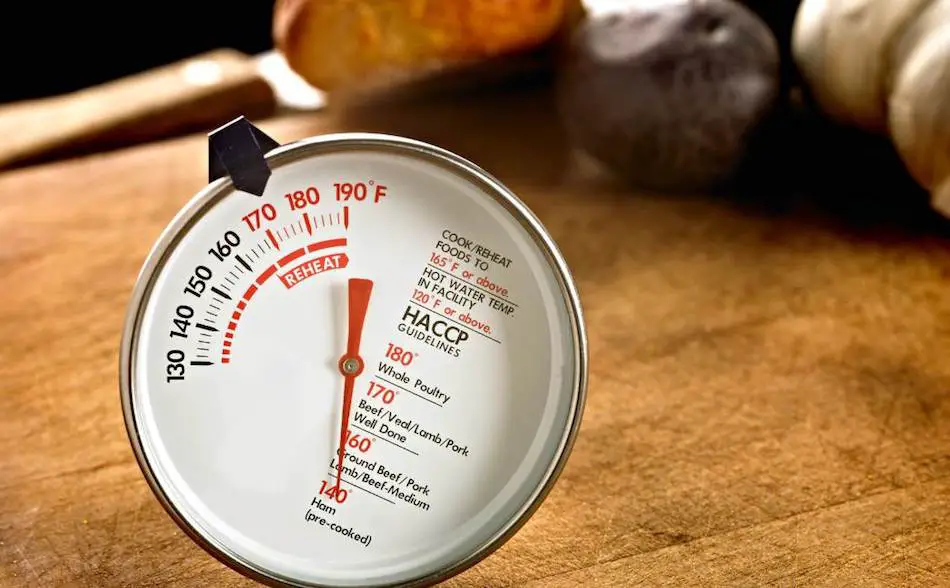
As a regular bread maker, I can tell you that using a kitchen thermometer to measure proofing time is an important step in the bread-making process. Temperature is a crucial factor that affects the proofing time of bread dough, and a thermometer can help you to determine the ideal proofing temperature for your dough.
When using a kitchen thermometer for measuring proofing time, you can insert it into the dough to check the temperature. Ideally, the temperature for proofing bread dough should be between 75-85°F (24-30°C). If the temperature is too cold, the yeast will not be active enough to cause the dough to rise properly. On the other hand, if the temperature is too hot, the yeast will become overactive and can cause the dough to rise too quickly.
Be aware that the temperature of the dough can vary depending on the location in the kitchen, and it’s recommended to take multiple readings in different areas of the dough.
In addition to measuring the temperature of the dough, a kitchen thermometer can also be used to check the temperature of your kitchen, oven and other equipment. This will help you to create the ideal environment for proofing bread dough.
So remember, using a kitchen thermometer for measuring proofing time is an important step in the bread-making process. Temperature is a crucial factor that affects the proofing time of bread dough, and a thermometer can help you to determine the ideal proofing temperature for your dough, as well as measuring the temperature of your kitchen, oven and other equipment.
How to Use a Timer for Keeping Track of Proofing Time
Using a timer for keeping track of proofing time is an important step in the bread-making process. Proofing time can vary depending on the type of yeast, the temperature and humidity of your kitchen, and the recipe you are using, so it’s important to keep track of the time to ensure that your bread dough is fully proofed and ready to be shaped and baked.
When using a timer for keeping track of proofing time, set it for the estimated time recommended by your recipe or the time you expect the dough to be fully proofed. Check the dough’s progress regularly, and when the timer goes off, perform the finger-dent test or the windowpane test to check if the dough is fully proofed.
Proofing time can vary depending on the location in the kitchen and it’s recommended to take multiple readings in different areas of the dough.
In addition to keeping track of the proofing time, a timer can also be used to keep track of other important steps in the bread-making process, such as fermentation time, rising time, and baking time.
How to Use a Hygrometer for Measuring Humidity in Your Kitchen
By using a hygrometer for measuring humidity in your kitchen is an important step in the bread-making process. Humidity plays a significant role in the proofing process of bread dough, and a hygrometer can help you to determine the ideal humidity level for your dough.
When using a hygrometer for measuring humidity in your kitchen, you can place it in various locations to get an accurate reading of the humidity level. Ideally, the humidity level for proofing bread dough should be between 60-70%. High humidity can cause the dough to become too moist, resulting in a sticky and difficult to handle dough, while low humidity can cause the dough to dry out and inhibit yeast growth.
Humidity level can vary depending on the location in the kitchen, and it’s recommended to take multiple readings in different areas of the kitchen.
As well as measuring the humidity level in your kitchen, a hygrometer can also be used to check the humidity level of your fermentation chamber, which will help you to create the ideal environment for fermentation and proofing of your bread dough.
So using a hygrometer for measuring humidity in your kitchen is an important step in the bread-making process. Humidity plays a significant role in the proofing process of bread dough, and a hygrometer can help you to determine the ideal humidity level for your dough. Additionally, a hygrometer can also be used to check the humidity level of your fermentation chamber, which will help you to create the ideal environment for fermentation and proofing of your bread dough.
How to Use a Scale for Accurate Measuring of Ingredients
A scale for accurate measuring of ingredients is an important step in the bread-making process. Accurate measuring of ingredients is vital for achieving the right balance of ingredients and creating a perfect loaf of bread every time.
When using a scale for measuring ingredients, you can place a bowl or container on the scale, reset it to zero and add your ingredients in the required amounts. This will ensure that you’re using the right amount of ingredients, it’s more precise than measuring by volume, and it will help you to achieve the right balance of ingredients.
Different types of flour can have different densities, so measuring by weight is more precise than measuring by volume. Also, using a scale will help you to measure small quantities of ingredients such as yeast and salt which are crucial for bread-making process.
As well as measuring ingredients, a scale can also be used to weigh your dough, to make sure you are dividing it into equal portions for shaping.
How to Use a Dutch Oven for Baking Proofed Bread
A Dutch oven for baking proofed bread is an excellent technique that can result in a perfectly baked loaf with a crispy crust and a moist interior. A Dutch oven is a heavy pot with a tight-fitting lid that creates a steamy environment, similar to a professional bread oven, allowing bread to rise and develop a crispy crust.
When using a Dutch oven for baking proofed bread, the first step is to preheat the oven to the desired temperature, usually between 425-450°F (220-230°C). Then, carefully place the proofed bread dough in the Dutch oven, making sure to avoid burning yourself. The lid of the Dutch oven is then placed on top, trapping the steam inside and creating a humid environment that helps the bread to rise and develop a crispy crust.
It’s important to note that the dough should be placed in a preheated Dutch oven, and the lid should be put on as soon as the bread dough is placed inside, to create the steamy environment. Also, the Dutch oven should be preheated at the same time as the oven.
So using a Dutch oven for baking proofed bread is an excellent technique that can result in a perfectly baked loaf with a crispy crust and a moist interior. It creates a steamy environment similar to a professional bread oven, allowing bread to rise and develop a crispy crust. The dough should be placed in a preheated Dutch oven, and the lid should be put on as soon as the bread dough is placed inside, to create the steamy environment.
How to Use a Banneton for Shaping and Proofing Bread Dough
A Banneton, also known as a proofing basket, for shaping and proofing bread dough is a traditional technique that can result in a beautifully shaped loaf with a crispy crust. A Banneton is a basket made of natural materials such as willow, cane, or rattan and it’s used to shape and support the dough during the proofing process.
When using a Banneton for shaping and proofing bread dough, the first step is to dust the Banneton generously with flour. Then, shape the dough into a round or oval shape, depending on the shape of the Banneton, and place it seam-side up in the basket. Cover the dough with a towel and let it proof in a warm and humid place.
Bannetons come in various sizes and shapes, so choose the one that matches the shape of your loaf. Also, it’s important to dust the Banneton generously with flour to avoid sticking and ensure the dough slides out easily when it’s ready to be baked.
Using a Banneton for shaping and proofing bread dough is a traditional technique that can result in a beautifully shaped loaf with a crispy crust. It’s made of natural materials such as willow, cane, or rattan, and it’s used to shape and support the dough during the proofing process. It’s important to dust the Banneton generously with flour to avoid sticking and ensure the dough slides out easily when it’s ready to be baked, and choose the one that matches the shape of your loaf.
How to Use a Lame for Scoring Proofed Bread Dough
I can tell you that using a lame, also known as a bread scoring knife, for scoring proofed bread dough is an essential technique for achieving a beautiful, professional-looking loaf of bread. Scoring the bread dough before baking allows the bread to expand during baking and also creates a decorative pattern on the crust.
When using a lame for scoring proofed bread dough, it is important to select the right blade for the type of bread you are making. A straight blade is best for scoring round loaves, while a curved blade is best for scoring long loaves. The key is to make sure the blade is sharp and clean to make precise cuts.
It’s also important to score the bread dough at the right time. The dough should be fully proofed and ready to be baked. The scoring should be done quickly, and with confidence to avoid deflating the dough.
So by using a lame for scoring proofed bread dough is an essential technique for achieving a beautiful, professional-looking loaf of bread. Scoring the bread dough before baking allows the bread to expand during baking and also creates a decorative pattern on the crust. It’s important to select the right blade for the type of bread you are making and to make sure the blade is sharp and clean to make precise cuts, and also to score the bread dough at the right time, when it’s fully proofed and ready to be baked.
How to Use a Proofing Box for Controlled Proofing of Bread Dough
By using a proofing box, also known as a proofing cabinet, for controlled proofing of bread dough is an excellent technique that can result in a perfectly proofed loaf every time. A proofing box allows you to create a controlled environment for your dough to rise, ensuring that the temperature and humidity levels are optimal for the yeast to work.
When using a proofing box for controlled proofing of bread dough, the first step is to set the temperature and humidity levels according to the recipe you’re using. Place the dough inside the box, and close the lid. The proofing box will maintain the temperature and humidity levels, allowing the dough to rise and ferment at the optimal conditions.
It’s important to note that the proofing time may vary depending on the type of yeast and recipe you’re using, so it’s essential to check the dough’s progress regularly.
A proofing box for controlled proofing of bread dough is an excellent technique that can result in a perfectly proofed loaf every time. It allows you to create a controlled environment for your dough to rise, ensuring that the temperature and humidity levels are optimal for the yeast to work. It’s important to set the temperature and humidity levels according to the recipe you’re using, and to check the dough’s progress regularly, since the proofing time may vary depending on the type of yeast and recipe.
How to Use a Sourdough Starter for Proofing Bread Dough
How to Use a Sourdough Starter for Proofing Bread Dough: A sourdough starter is a mixture of flour and water that has been fermented with wild yeast and bacteria. It is used as a natural leavening agent for bread dough. To use a sourdough starter for proofing bread dough, you will need to maintain and feed your starter regularly. When ready to use, add a portion of the starter to your bread dough, along with flour, water, and other ingredients, and allow the dough to rise and ferment before shaping and baking.
| Pre-Ferment | Description | Preparation |
|---|---|---|
| Sourdough Starter | A mixture of flour and water fermented with wild yeast and bacteria | Maintain and feed regularly |
| Poolish | Equal parts flour, water and a small amount of yeast | Mix flour, water and yeast and ferment |
| Biga | Similar to a poolish, made of flour, water, and a small amount of yeast | Mix flour, water and yeast and ferment |
How to Use a Poolish for Proofing Bread Dough
- How to Use a Poolish for Proofing Bread Dough: A poolish is a pre-ferment made of equal parts flour and water, along with a small amount of yeast. It is used as a natural leavening agent for bread dough. To use a poolish for proofing bread dough, you will need to prepare the poolish in advance by mixing flour, water, and yeast and allowing it to ferment. Once the poolish is ready, add it to your bread dough, along with flour, water, and other ingredients, and allow the dough to rise and ferment before shaping and baking.
| Pre-Ferment | Steps |
|---|---|
| Sourdough Starter | 1. Maintain and feed your starter regularly. 2. Add a portion of the starter to your bread dough, along with flour, water, and other ingredients. 3. Allow the dough to rise and ferment before shaping and baking |
| Poolish | 1. Prepare the poolish in advance by mixing flour, water, and yeast and allowing it to ferment. 2. Once the poolish is ready, add it to your bread dough, along with flour, water, and other ingredients. 3. Allow the dough to rise and ferment before shaping and baking |
| Biga | 1. Prepare the biga in advance by mixing flour, water, and yeast and allowing it to ferment. 2. Once the biga is ready, add it to your bread dough, along with flour, water, and other ingredients. 3. Allow the dough to rise and ferment before shaping and baking |
How to Use a Biga for Proofing Bread Dough
- How to Use a Biga for Proofing Bread Dough: A biga is a type of pre-ferment similar to a poolish, made of flour, water, and a small amount of yeast. It is used as a natural leavening agent for bread dough. To use a biga for proofing bread dough, you will need to prepare the biga in advance by mixing flour, water, and yeast and allowing it to ferment. Once the biga is ready, add it to your bread dough, along with flour, water, and other ingredients, and allow the dough to rise and ferment before shaping and baking.
A Sourdough starter, Poolish and Biga are different types of pre-ferments that can be used as natural leavening agents for bread dough, allowing the dough to rise and ferment before shaping and baking. Each pre-ferment has its unique characteristics and requires different preparation methods, but all of them help to achieve a better flavor and texture of the bread.