

Do you want to learn how to create the perfect environment for your dough to rise and develop its flavor? Whether you are a beginner or an experienced baker, a bread proofer can be a valuable addition to your kitchen. I’ll explain everything there is to know about proofers and how they can help you make delicious, artisanal breads at home. In this article, I will discuss the benefits of using a bread proofer and how to use one.
To use a bread proofer, first prepare your dough according to your recipe. Place the dough in the proofer and close the lid. Adjust the temperature and humidity settings on the proofer to the levels recommended in your recipe or desired for the type of dough you are using. Allow the dough to rise in the proofer until it has reached the desired size and texture. This can take anywhere from a few hours to a day or more, depending on the type of dough and the desired outcome. Once the dough has risen, remove it from the proofer and shape it as desired. Then bake the bread according to your recipe.
Here is a table that compares some of the key aspects of proofing bread:
| Aspect | Proofed Bread | Unproofed Bread |
| Texture | Light and airy | Dense and heavy |
| Flavor | Complex | Bland |
| Gluten development | High | Low |
| Fermentation process | Active | Inactive |
| Rise during baking | High | Low |
Proofing bread results in a lighter, more flavorful, and more well-developed dough compared to unproofed bread.
What Is A Bread Proofer?
A bread proofer is a device that provides a warm, moist environment for dough to rise in. This is often used in the production of bread, as it helps to create a soft and fluffy texture. In a home kitchen, a bread proofer can be a useful tool for making artisanal breads, as it provides the ideal conditions for the dough to rise and develop its flavor. The temperature and humidity levels in a bread proofer can be controlled, allowing the baker to create the perfect conditions for different types of dough.
Do All Breads Need A Proofer?
Not all breads require a proofer. In fact, many breads can be made without the use of a proofer, and some bakers even prefer to let their dough rise at room temperature. However, a bread proofer can be useful for certain types of bread, particularly those that require a long rising time or a specific temperature and humidity level to develop their flavor and texture. For example, breads made with sourdough starter or other types of natural leavening may benefit from being proofed in a warm, moist environment. Additionally, breads that are made with high-protein flours, such as bread flour or whole wheat flour, may require a longer rising time and a proofer can help to create the ideal conditions for this. Overall, whether or not to use a proofer will depend on the type of bread you are making and your personal preferences.
Here are the steps involved in proofing bread:
- Add yeast to the dough, which ferments the dough and produces carbon dioxide gas.
- The gas gets trapped in the dough, causing it to rise.
- The warmth and moisture of the dough help to activate the yeast and promote the fermentation process.
- This process creates the light and airy texture of bread.
What Are The Pros And Cons Of Proofing Bread?
Here are some potential pros and cons of proofing bread:
Pros:
- Proofing bread results in a lighter and airier texture, as well as a more complex flavor.
- Proofing helps to develop the gluten in the dough, resulting in a more elastic and resilient structure.
- Proofing allows the bread to rise more effectively and retain more gas bubbles during baking.
- Proofing can improve the nutritional value of the bread by breaking down some of the complex carbohydrates in the dough into simpler sugars that are more easily digestible.
Cons:
- Proofing takes time, so it requires planning and patience.
- If the proofing process is not carefully controlled, it can result in over-proofed or under-proofed bread. Over-proofed bread may collapse or have a poor structure, while under-proofed bread may be dense and heavy.
- Proofing can be affected by factors such as the temperature and humidity of the environment, which can be difficult to control consistently.
- Some people may be sensitive to the yeasts used in proofing, which can cause allergic reactions or digestive issues.
How To Use A Proofer
- Begin by preparing your dough according to your recipe.
- Place the dough in the bread proofer and close the lid.
- Adjust the temperature and humidity settings on the proofer as needed.
- Allow the dough to rise in the proofer until it reaches the desired size and texture.
- Once the dough has risen, remove it from the proofer and shape it as desired.
- Bake the bread according to your recipe.
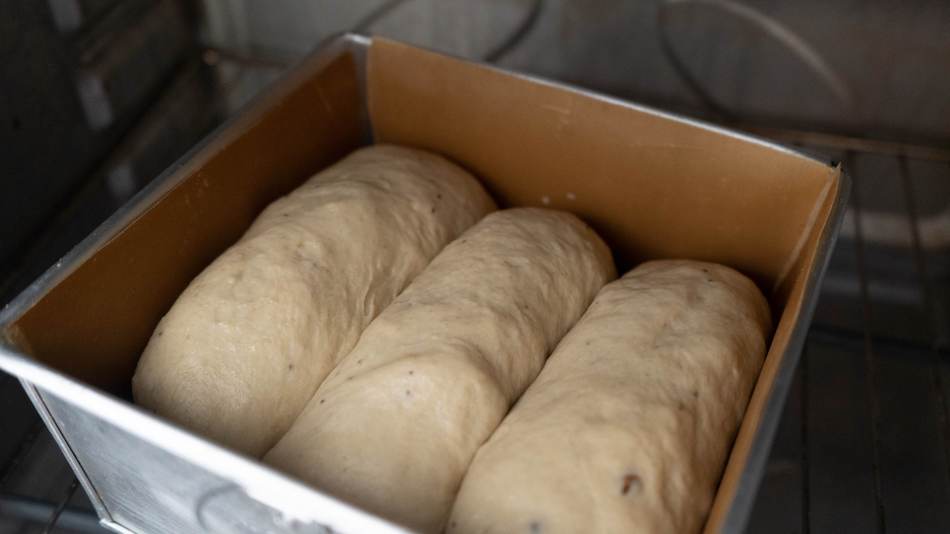
What Do Proofers Look Like?
Bread proofers can come in a variety of shapes and sizes, but they generally have a similar design. Most bread proofers are enclosed boxes or cabinets with a heating element and a humidifier to create the warm, moist environment that is ideal for dough to rise in. Some bread proofers are small and compact, and can be placed on a countertop, while others are larger and may be more suitable for commercial bakeries. The interior of a bread proofer is typically made of a non-reactive material, such as stainless steel or plastic, to prevent the dough from reacting with the surface. Some bread proofers may also have shelves or racks inside to hold the dough, and some may have a window or other transparent material to allow the baker to see the dough as it rises.
Proofed vs Unproofed Bread
Bread that has been proofed with a proofer will typically have a lighter and airier texture, as well as a more complex flavor, compared to bread that has not been proofed. This is because the fermentation process that occurs during proofing helps to develop the gluten in the dough, which creates a more elastic and resilient structure. This, in turn, allows the bread to rise more effectively and retain more gas bubbles, resulting in a lighter and airier texture. The fermentation process also helps to create a more complex flavor by breaking down the starches in the dough and producing a variety of flavor compounds. In contrast, bread that has not been proofed will have a denser and less flavorful texture.
Are Bread Proofers Expensive?
The cost of a bread proofer can vary depending on its size, features, and brand. Some bread proofers are small and compact, and can cost as little as $50 or $100, while others are larger and more sophisticated, and can cost several hundred dollars or more. In general, a bread proofer can be a worthwhile investment for bakers who are serious about making high-quality bread, as it can help to create the ideal conditions for the dough to rise and develop its flavor. However, if you are just starting out with bread making, you may want to try using a regular oven or a warm spot in your kitchen before deciding whether a bread proofer is worth the investment.
Can You Make A Proofer At Home?
It is possible to make a bread proofer at home, although the results may not be as consistent or reliable as a commercially-made proofer. To make a bread proofer at home, you will need a container with a tight-fitting lid, such as a large plastic storage container or a cooler. You will also need a heat source, such as a heating pad or a light bulb, and a way to create moisture, such as a wet towel or a bowl of water. Place the dough in the container and position the heat source and the moisture source so that they create a warm, moist environment for the dough to rise in. Monitor the temperature and humidity levels carefully, and adjust the heat and moisture sources as needed to maintain the ideal conditions for the dough.
Do All Breads Need A Proofer?
Not all breads require a proofer, and some bakers may even prefer to let their dough rise at room temperature. However, a bread proofer can be useful for certain types of bread, particularly those that require a long rising time or a specific temperature and humidity level to develop their flavor and texture. For example, breads made with sourdough starter or other types of natural leavening may benefit from being proofed in a warm, moist environment. Additionally, breads that are made with high-protein flours, such as bread flour or whole wheat flour, may require a longer rising time and a proofer can help to create the ideal conditions for this. Overall, whether or not to use a proofer will depend on the type of bread you are making and your personal preferences.