Sourdough bread is known for its complex flavor and chewy texture, and making it at home can be a rewarding and satisfying experience. However, many home bakers are intimidated by the idea of making sourdough bread, as it can be a bit more challenging than traditional yeast breads. In this guide, we will walk you through the process of making sourdough bread in a loaf pan, step by step. From preparing your sourdough starter to shaping and baking your loaf, we will provide you with all the tips and tricks you need to make a delicious and beautiful loaf of sourdough bread. Whether you’re a seasoned bread baker or a complete beginner, this guide will help you make a sourdough bread that you can be proud of.
To make sourdough in a loaf pan, you will need to first create a sourdough starter by mixing flour and water and allowing it to ferment for several days. Once the starter is active and bubbly, you will mix it with additional flour and water to create the dough. The dough should be left to rise for several hours, until it has doubled in size. After it has risen, you will shape the dough into a loaf and place it in a greased loaf pan. The loaf should be left to rise again, until it has risen above the top of the pan. Finally, the loaf is baked in a preheated oven until it is golden brown and sounds hollow when tapped on the bottom.
Preparing Your Sourdough Starter for a Loaf Pan Bread
When it comes to making a delicious loaf of sourdough bread, the first step is to make sure your starter is ready to go. Your starter is the living, breathing component of your bread, and it needs to be well-fed and active before you begin mixing your dough. So, let’s start by getting your starter in tip-top shape.
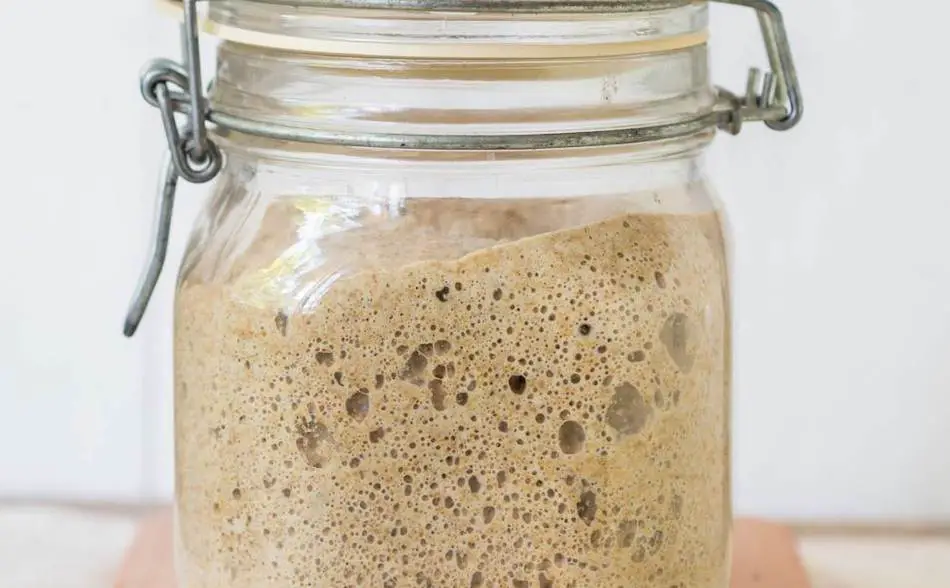
First, take a look at your starter. It should have a consistent texture and should be bubbly. If it’s looking a bit sluggish or has a lot of liquid on top, it’s time to feed it.
To do this, simply add equal parts flour and water (by weight) to your starter and stir it in. Let it sit at room temperature for about 4-6 hours, or until it becomes active and bubbly again.
Once your starter is looking lively, it’s time to begin preparing your dough. You’ll need to use a portion of your starter in your dough, so take out the amount you need and return the rest to the refrigerator.
Make sure your starter is at room temperature before using it in your dough, as it will be much easier to work with.
Now you’re ready to move on to the next step and mix your dough. Remember, a well-fed starter is key to a delicious loaf of sourdough bread, so take the time to properly prepare it before diving into the rest of the recipe.

Mixing and Kneading Your Sourdough Dough for a Loaf Pan
Now that your starter is ready to go, it’s time to mix and knead your dough. This is where things start to get exciting, and you’ll see your bread begin to take shape.
First, gather all your ingredients and measure them out. You’ll need flour, water, salt, and of course, your active starter.
In a large mixing bowl, combine the flour and water and mix them together until they’re well combined. Then, add in your starter and mix it in until it’s fully incorporated.
Next, it’s time to knead the dough. This is where the gluten in the flour starts to develop and gives your bread its structure.
You can knead the dough by hand or by using a stand mixer with a dough hook attachment. Knead the dough for about 10-15 minutes, or until it becomes smooth and elastic.
As you knead, keep an eye on the dough. It should be slightly sticky, but not overly so. If it’s too wet, add a bit more flour. If it’s too dry, add a bit more water.
The goal is to achieve a dough that is smooth and elastic. This will ensure that your bread will rise properly and have a good structure.
Now, you are ready to shape your dough and let it rise. Remember, the key to great sourdough bread is to take your time and pay attention to the dough as you work with it.

Shaping and Rising Your Sourdough Loaf for a Pan
Alright, now that you’ve mixed and kneaded your dough, it’s time to shape it and let it rise. This is where things start to get really fun and you’ll see your bread start to take its final shape.
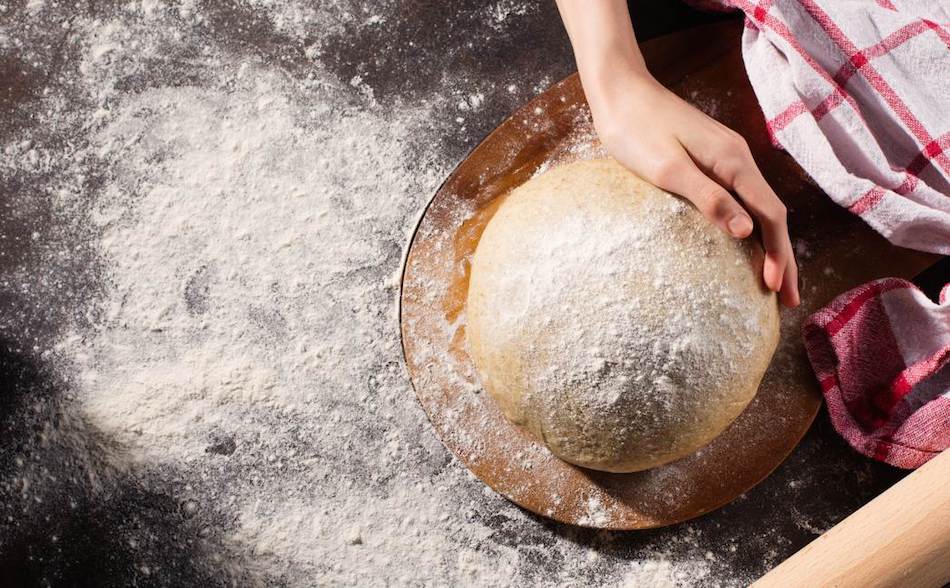
First, take your dough out of the bowl and place it on a lightly floured surface. Gently shape it into a rough rectangle.
Then, take the top edge of the dough and fold it down to the middle. Take the bottom edge of the dough and fold it up to the middle.
Then, take the left edge of the dough and fold it over to the middle and do the same with the right edge.
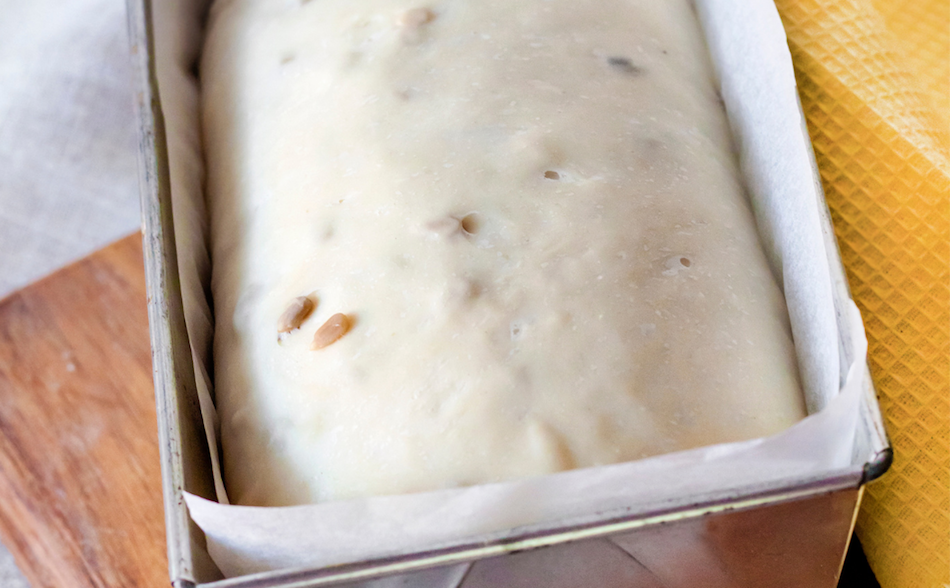
Now, you should have a nice tight ball of dough. Take this ball and place it in a greased loaf pan. Press the dough down a bit to ensure it’s evenly distributed in the pan.
Then, cover the pan with a towel or plastic wrap and let the dough rise until it’s about 1/2-inch above the rim of the pan.
As the dough rises, it’s important to keep it in a warm and draft-free place. The ideal temperature for rising sourdough bread is around 80-85°F.
Be patient, and it might take anywhere between 4-24 hours depending on the temperature and the humidity of your kitchen.
Once your dough has risen, it’s ready to be scored and baked. Remember, shaping and rising the dough is a crucial step in making great sourdough bread.
Take your time and be mindful of your dough as it rises, and you’ll be rewarded with a beautiful and delicious loaf.
Scoring and Baking Your Sourdough Bread in a Loaf Pan
We are finally at the last step of making a delicious and beautiful loaf of sourdough bread in a loaf pan. It’s time to score and bake your bread.
This step is crucial, as it allows the bread to rise properly in the oven and create a beautiful crust.
First, you’ll need to score the bread. This means making a shallow cut on the top of the bread, about 1/4-inch deep. This cut allows the bread to expand as it bakes, and also helps create a beautiful crust.
You can make any design you like, but a simple straight or diagonal line is usually enough.
Next, it’s time to bake the bread. Preheat your oven to 450°F (230°C) and place the loaf pan in the oven. You can also place a tray of water at the bottom of the oven to create steam, which will help create a crispy crust.
Bake the bread for about 30-40 minutes, or until it’s golden brown and sounds hollow when tapped on the bottom.
Once the bread is done, remove it from the oven and let it cool in the pan for about 5 minutes. Then, take it out of the pan and transfer it to a wire rack to cool completely.
Your bread is now ready to be served, and you can enjoy the fruits of your labor. Remember, scoring and baking is the final step to great sourdough bread, so take your time and pay attention to the bread as it bakes.
How to Troubleshoot Common Sourdough Bread Baking Issues in a Loaf Pan
Baking sourdough bread can be a bit tricky, and it’s not uncommon to run into a few issues along the way. But don’t worry, with a little bit of troubleshooting, you can fix most problems and end up with a delicious loaf of bread. Here are some common issues you might encounter and how to fix them.
- Flat bread: If your bread is coming out of the oven looking a bit flat, it’s likely that your dough wasn’t given enough time to rise. Make sure to give your dough plenty of time to rise, and be patient.
- Heavy bread: If your bread is coming out of the oven heavy and dense, it’s likely that you didn’t knead the dough enough. Make sure to knead the dough for the recommended amount of time, or until it becomes smooth and elastic.
- Soggy bottom: If your bread has a soggy bottom, it’s likely that it was over-proofed. Make sure to keep an eye on your dough as it rises, and bake it as soon as it’s ready.
- Uneven rise: If your bread is coming out of the oven with an uneven rise, it’s likely that your dough wasn’t shaped properly. Make sure to shape your dough into a tight ball, and place it in the loaf pan evenly.
- Tough crust: If your crust is coming out of the oven tough and chewy, it’s likely that the bread was over-baked. Make sure to keep an eye on the bread as it bakes, and take it out of the oven as soon as it’s ready.
Tips for Maintaining Your Sourdough Starter for Loaf Pan Breads
Baking sourdough bread can be a bit tricky, and it’s not uncommon to run into a few issues along the way. But don’t worry, with a little bit of troubleshooting, you can fix most problems and end up with a delicious loaf of bread. Here are some common issues you might encounter and how to fix them.
- Flat bread: If your bread is coming out of the oven looking a bit flat, it’s likely that your dough wasn’t given enough time to rise. Make sure to give your dough plenty of time to rise, and be patient.
- Heavy bread: If your bread is coming out of the oven heavy and dense, it’s likely that you didn’t knead the dough enough. Make sure to knead the dough for the recommended amount of time, or until it becomes smooth and elastic.
- Soggy bottom: If your bread has a soggy bottom, it’s likely that it was over-proofed. Make sure to keep an eye on your dough as it rises, and bake it as soon as it’s ready.
- Uneven rise: If your bread is coming out of the oven with an uneven rise, it’s likely that your dough wasn’t shaped properly. Make sure to shape your dough into a tight ball, and place it in the loaf pan evenly.
- Tough crust: If your crust is coming out of the oven tough and chewy, it’s likely that the bread was over-baked. Make sure to keep an eye on the bread as it bakes, and take it out of the oven as soon as it’s ready.
The Science of Sourdough: Understanding the Fermentation Process in a Loaf Pan Bread
The science of sourdough bread is fascinating and it’s important to understand the fermentation process to be able to make a delicious loaf.
Fermentation is a process that occurs when wild yeast and lactic acid bacteria naturally present in flour, convert sugars into carbon dioxide and alcohol.
This process gives sourdough bread its characteristic tangy flavor and chewy texture.
When making sourdough bread, you start by creating a sourdough starter, which is a mixture of flour and water. Over time, wild yeast and lactic acid bacteria present in the flour and in the air, will colonize the mixture, creating a living culture.
This culture is then used as the leavening agent in your bread dough instead of commercial yeast.
During the fermentation process, the yeast and bacteria consume the sugars in the flour and release carbon dioxide, which causes the dough to rise.
The lactic acid bacteria produce lactic acid, which gives sourdough bread its characteristic tangy flavor. The longer the fermentation process, the more acidity and flavor will be developed.
When shaping and rising the dough, it’s important to pay attention to the dough’s temperature, humidity and timing, as these factors will affect the fermentation process.
Once the dough is ready, it should be scored, and baked in a loaf pan at a high temperature, that allows the bread to rise and develop a crust.
By understanding the science behind sourdough bread, you’ll be able to make a delicious and beautiful loaf, every time.
Variations on Sourdough Bread in a Loaf Pan: Adding Herbs, Nuts, and Seeds
Sourdough bread is a versatile bread that can be flavored with a variety of herbs, nuts, and seeds. These ingredients can be added to the dough to give it an extra burst of flavor and texture.
Herbs like rosemary, thyme or sage, can be added to the dough before shaping, to give it a unique aroma and taste.
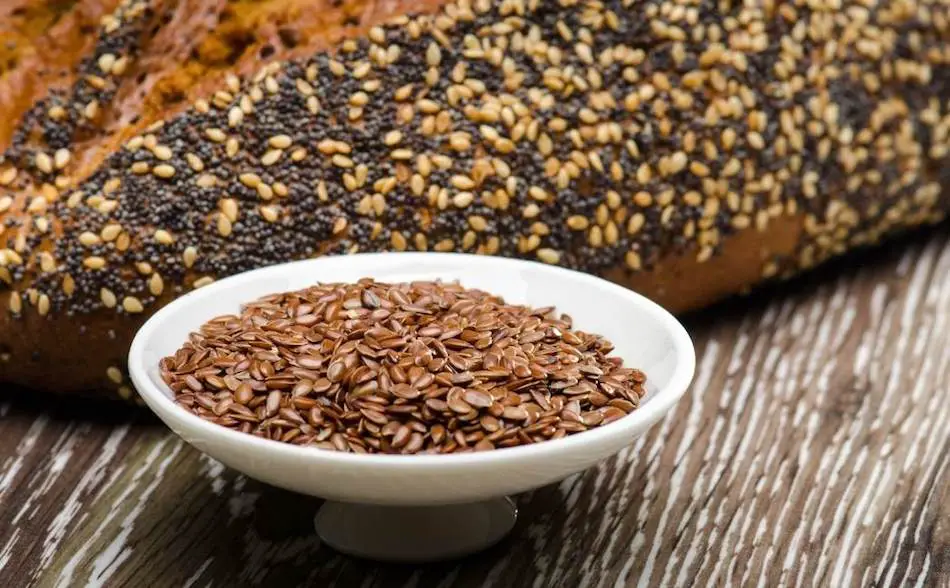
Nuts like almonds, walnuts or pecans, can be added to the dough to give it a crunchy texture and a nutty flavor. Seeds like flax, sunflower or pumpkin, can be added to the dough to give it a nutty flavor and a crunchy texture.
When adding herbs, nuts, and seeds to your sourdough dough, it’s important to keep in mind that these ingredients will absorb some of the liquid, so you might need to adjust the amount of liquid in the recipe.
You can start by adding 1/4 cup of herbs, nuts, or seeds and see how the dough behaves, and adjust accordingly.
Another option is to create a seed or nut coating, by mixing equal parts of seeds or nuts with flour, and roll the shaped dough in it, before rising it. This will give a nice crust to the bread and add a nice crunch to it.
When baking, you can also add some of the ingredients on top of the loaf before baking, this will give the bread an extra crunch and a nice presentation.
By experimenting with different herbs, nuts, and seeds, you can create a variety of delicious sourdough breads, each with its own unique flavor and texture.

How to Store and Reheat Sourdough Bread from a Loaf Pan
Properly storing and reheating sourdough bread is essential to maintaining its flavor and texture. Here are a few tips on how to store and reheat your sourdough bread from a loaf pan.
Storing: Sourdough bread is best stored at room temperature, wrapped in a clean towel or in a bread bag. Avoid storing it in plastic bags as it can trap moisture and make the bread soggy.
If you’re not going to eat the bread within a day or two, it’s best to freeze it. To freeze the bread, wrap it tightly in plastic wrap and place it in a resealable plastic bag. It will keep for up to 3 months.
Reheating: To reheat the bread, take it out of the freezer and let it thaw for about an hour. Then, place it in a preheated 350F (175C) oven for about 10-15 minutes, or until it’s warm and the crust is crispy again. You can also reheat the bread in a skillet on medium heat, for about 1-2 minutes per side, or until warm and crispy.
If you prefer a softer crust, you can reheat the bread by wrapping it in foil and reheating it in the oven for about 10-15 minutes.
Sourdough Bread Baking Safety Tips for Using a Loaf Pan
When baking sourdough bread in a loaf pan, it’s important to keep safety in mind to avoid any accidents or injuries. Here are a few tips to help keep you safe while baking:
- Use oven mitts: The loaf pan and the oven will be hot, so always use oven mitts or potholders to handle them.
- Use a kitchen thermometer: To ensure that your oven temperature is accurate, use a kitchen thermometer to check the temperature before baking.
- Keep an eye on the bread: While baking, keep an eye on the bread and check it regularly to avoid over-baking or burning.
- Be careful when scoring the bread: Scoring the bread involves making a shallow cut on the top of the bread, which can be sharp. Be sure to use a sharp and clean blade, and always use caution when handling it.
- Keep the kitchen clean: Keep your kitchen clean, and wipe up any spills or messes to prevent slips or falls.
Sourdough bread with a crispy crust – How to achieve it in a loaf pan
Achieving a crispy crust on your sourdough bread is the ultimate goal for many bread enthusiasts, and it’s definitely possible to do it in a loaf pan. Here are a few tips to help you achieve a crispy crust on your sourdough bread:
- Use a Dutch oven or a cloche: A Dutch oven or a cloche is a great way to create steam in the oven. The steam will help create a crispy crust by forming a barrier between the bread and the dry air of the oven.
- Preheat the loaf pan: Preheating the loaf pan before adding the dough will also help create a crispy crust by starting the baking process from a hot surface.
- Score the bread: Scoring the bread is important as it allows the bread to rise and form a crispy crust. Make sure to score the bread using a sharp blade, and score it deep enough to allow the bread to rise properly.
- Brush with water: Before baking, brush the top of the bread with water, this will help the crust to form a nice crust.
- Bake at a high temperature: Baking at a high temperature is crucial for achieving a crispy crust. Aim for a temperature of around 450°F (230°C) or even higher.
By following these tips, you’ll be well on your way to achieving a crispy crust on your sourdough bread in a loaf pan.
Remember, baking bread is a process that takes practice and patience, but with a little bit of know-how and a lot of love, you’ll be able to make a delicious and beautiful loaf of sourdough bread every time.
Sourdough bread with a soft crumb – How to achieve it in a loaf pan
Achieving a soft crumb on your sourdough bread is a goal for many bread enthusiasts, and it’s definitely possible to do it in a loaf pan. Here are a few tips to help you achieve a soft crumb on your sourdough bread:
- Use a high-hydration dough: A high-hydration dough, with more water in proportion to flour, will give you a softer crumb. Aim for a dough that is around 80-85% hydration.
- Use a long fermentation time: A long fermentation time will help to break down the gluten in the dough, resulting in a softer crumb. Give your dough plenty of time to rise, and don’t rush the fermentation process.
- Be gentle when shaping the dough: When shaping the dough, handle it gently to avoid over-working it, which can make the crumb tough.
- Use a loaf pan with a non-stick surface: A loaf pan with a non-stick surface can help release the bread easily, resulting in a softer crumb.
- Avoid over-baking: Over-baking can make the crumb tough, so be sure to keep an eye on the bread as it bakes and take it out of the oven as soon as it’s done.
How to use a Dutch Oven to achieve a perfect crust in your Sourdough loaf pan bread
A Dutch oven is a great way to achieve a perfect crust on your sourdough loaf pan bread. The Dutch oven creates a humid environment inside the oven which helps to form a crispy crust on the bread. Here’s how you can use a Dutch oven to achieve a perfect crust:
- Preheat the Dutch oven: Preheat the Dutch oven in the oven at the same temperature as you will be baking your bread. This will ensure that the Dutch oven and the loaf pan are hot when you put the dough in.
- Place the loaf pan inside the Dutch oven: Once the Dutch oven is preheated, remove it from the oven and carefully place the loaf pan with the dough inside.
- Cover the Dutch oven: Place the lid on top of the Dutch oven, making sure that it seals tightly. This will create steam inside the Dutch oven, which will help to form a crispy crust on the bread.
- Bake the bread: Place the Dutch oven back in the oven and bake the bread as per the recipe instructions.
- Remove the lid: After 20-30 minutes of baking, remove the lid from the Dutch oven, this will allow the bread to develop a nice crust.
- Check the bread: Keep an eye on the bread as it bakes, and take it out of the oven as soon as it’s done.
How to make a Sourdough bread with a variety of grains using a loaf pan
Making sourdough bread with a variety of grains is a great way to add flavor, texture, and nutrition to your bread. Here’s how you can make a delicious and nutritious sourdough bread with a variety of grains using a loaf pan.
- Choose your grains: You can use a variety of grains such as whole wheat, rye, oats, barley, and spelt. Each grain will add its own unique flavor and texture to the bread.
- Mix the grains with your sourdough starter: Before mixing the grains with your sourdough starter, you can soak them in water overnight. This will soften the grains and make them easier to work with.
- Knead the dough: Knead the dough thoroughly, this will help the gluten to develop, and the bread to rise.
- Shape the dough: Shape the dough into a loaf and place it in a greased loaf pan.
- Rise the dough: Cover the pan with a towel or plastic wrap and let the dough rise until it’s about 1/2-inch above the rim of the pan. The rising time can vary depending on the temperature and humidity of your kitchen.
- Bake the bread: Once the dough has risen, bake the bread in a preheated oven at 450°F (230°C) for about 30-40 minutes or until it’s golden brown and sounds hollow when tapped on the bottom.
How to make a Sourdough bread with a variety of flours using a loaf pan
Making sourdough bread with a variety of flours is a great way to add flavor, texture, and nutrition to your bread. Here’s how you can make a delicious and nutritious sourdough bread with a variety of flours using a loaf pan.
- Choose your flours: You can use a variety of flours such as whole wheat, rye, barley, spelt, and buckwheat. Each flour will add its own unique flavor and texture to the bread.
- Mix the flours with your sourdough starter: Before mixing the flours with your sourdough starter, you can soak them in water overnight. This will soften the flours and make them easier to work with.
- Knead the dough: Knead the dough thoroughly, this will help the gluten to develop, and the bread to rise.
- Shape the dough: Shape the dough into a loaf and place it in a greased loaf pan.
- Rise the dough: Cover the pan with a towel or plastic wrap and let the dough rise until it’s about 1/2-inch above the rim of the pan. The rising time can vary depending on the temperature and humidity of your kitchen.
- Bake the bread: Once the dough has risen, bake the bread in a preheated oven at 450°F (230°C) for about 30-40 minutes or until it’s golden brown and sounds hollow when tapped on the bottom.

