Sourdough bread is a staple in many households and creating your own starter from scratch can be a fun and rewarding experience. But what do you do when your starter seems to have lost its life? In this post, we’ll be exploring how to revive a dry sourdough starter, and ensure that it stays hydrated and healthy for future baking adventures. From understanding the science behind a dry starter to step-by-step troubleshooting tips, we’ve got you covered.
A dry sourdough starter is a common problem faced by many home bakers. It occurs when the starter is not properly hydrated and fed, resulting in a lack of activity and a dense consistency. This can be fixed by properly hydrating the starter, increasing the frequency of feedings, and maintaining the right consistency. It is also important to store, discard, and replace the starter properly. Using the right flour, a digital scale, kitchen thermometer, hydrometer, microscope, and pH meter can also help in reviving and maintaining a healthy starter.
Key Points
- Hard and crumbly texture
- Lack of bubbles or activity
- Difficulty incorporating liquid
- Difficulty forming a cohesive ball
- Strong or off-putting odor
- Mold growth
- Slow or no rise in bread dough
- Solutions: Hydrate the starter, feed the starter regularly, maintain a consistent temperature, use a spatula or dough scraper to incorporate liquid, add more water, discard the starter and start fresh, use digital scale for precise measurements, be consistent with the temperature and feeding schedule to maintain a healthy starter.
| Symptoms of a Too Dry Starter | Solutions |
|---|---|
| Hard and crumbly texture | Hydrate the starter with equal parts water and flour by weight |
| Lack of bubbles or activity | Feed the starter regularly and maintain a consistent temperature |
| Difficulty incorporating liquid | Use a spatula or dough scraper to break up the starter and incorporate liquid |
| Difficulty forming a cohesive ball | Add more water to the starter, a tablespoon at a time, until it forms a cohesive ball |
| Strong or off-putting odor | Discard the starter and start fresh with new flour and water |
| Mold growth | Discard the starter and thoroughly clean the container and utensils before starting a new one |
| Slow or no rise in bread dough | Discard the starter and start fresh or revive with regular feedings before using in bread dough |
Understanding why your starter is dry
Sourdough bread is a staple in any bakery and creating your own starter is an essential part of the process. But when that starter goes dry, it’s like a slap in the face. So let’s talk about how to avoid that and make sure your starter is always in tip-top shape.
First things first, understanding why your starter is dry. It’s simple, it’s not getting enough love and attention. If you’re not giving it enough water or feeding it enough, of course it’s going to dry out. It’s just like any living organism, it needs to be taken care of.

How to properly hydrate your starter
Properly hydrating your starter is crucial. You can’t just dump water in there and call it a day. You have to be precise and use the right amount of water to flour ratio. I recommend using a digital scale for that. And don’t use tap water, use filtered or spring water.
How often to feed your starter
So how often to feed your starter? This is also crucial, you don’t want to overfeed it or underfeed it. The general rule of thumb is to feed it once a day, but it depends on the temperature and humidity of your kitchen. If it’s hot and humid, you might need to feed it more, if it’s cold, then less.
How to maintain the right consistency of your starter
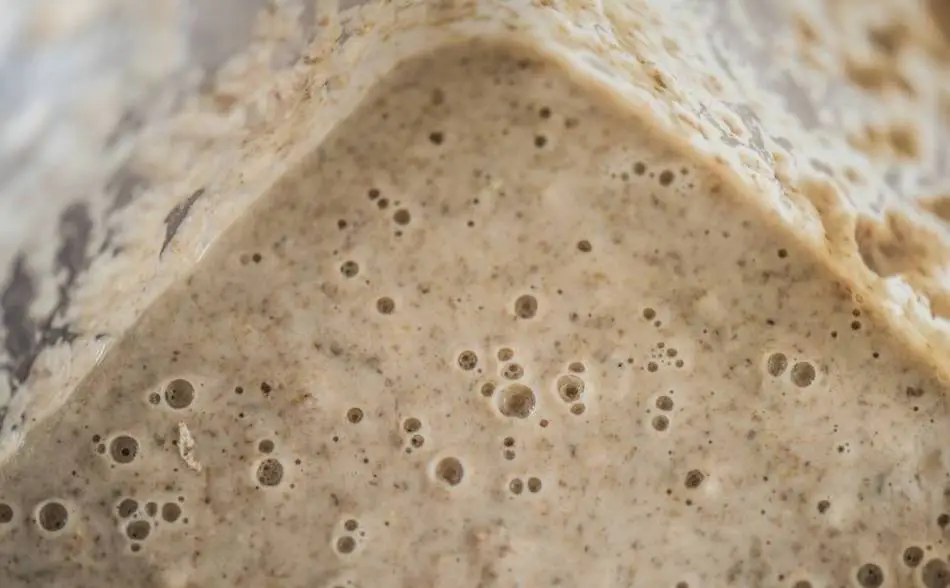
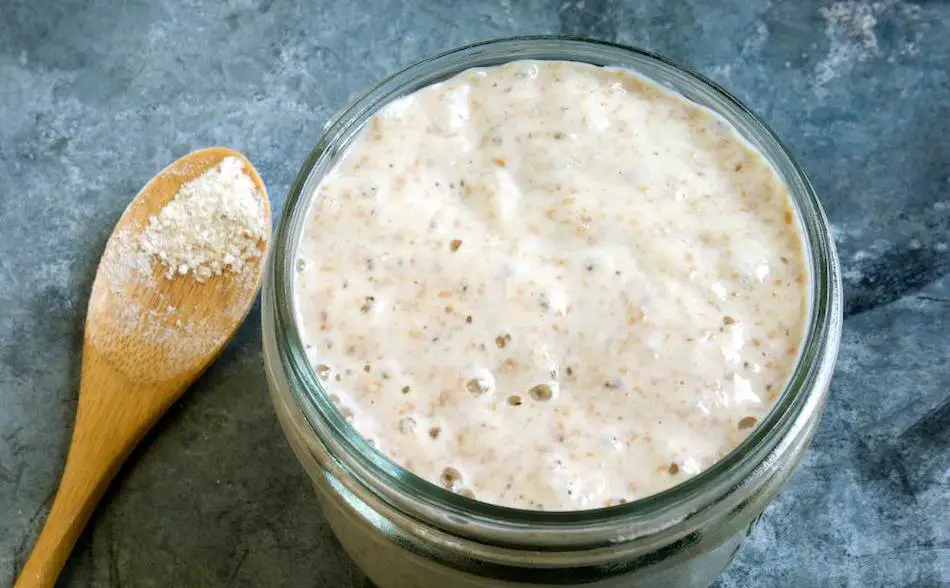
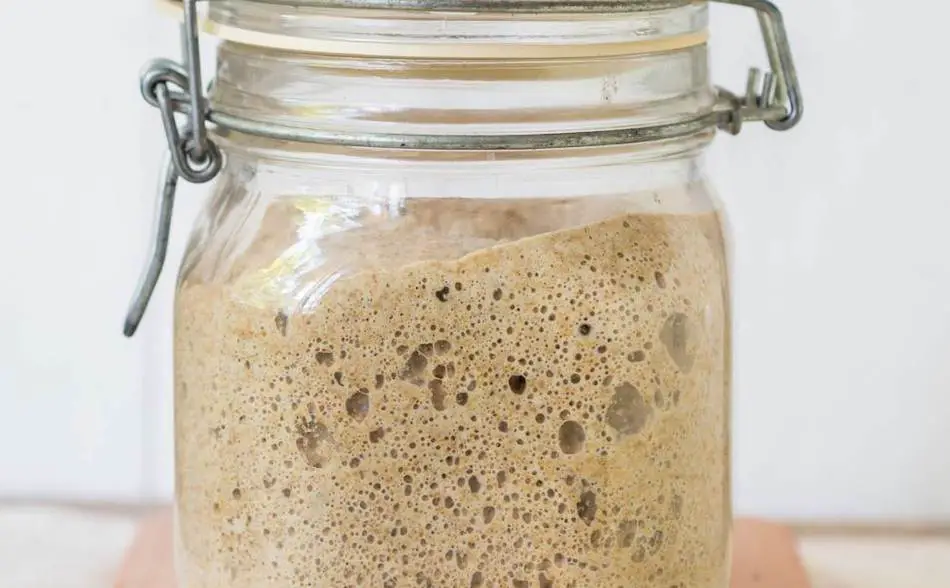
Maintaining the right consistency of your starter is key. You want a starter that is alive and active, not a dense and inactive one. So pay attention to the texture, it should be bubbly and have a nice consistency. And don’t be afraid to discard some of the starter if it’s not looking right. It’s better to start fresh than to waste time and ingredients on a bad starter.

How to store your starter
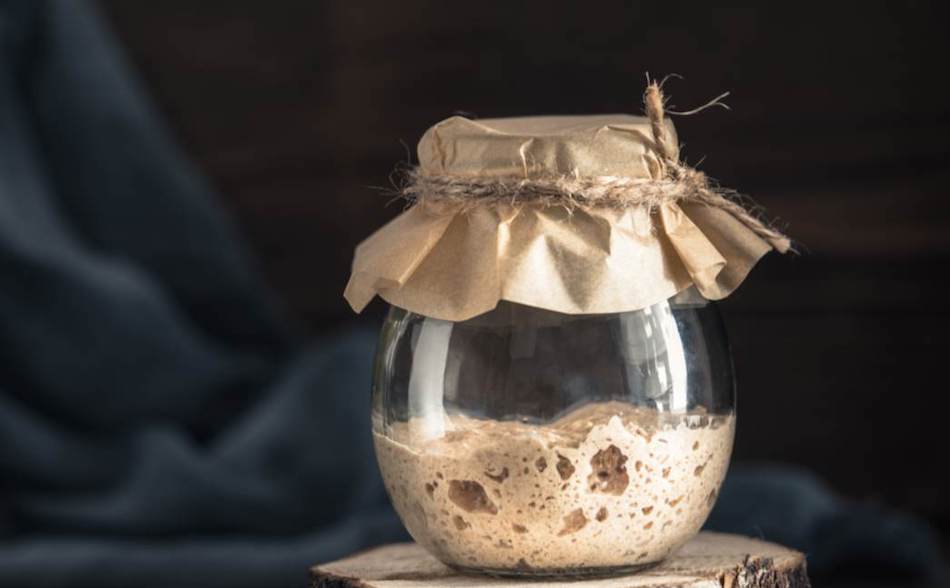
Storing your starter correctly is crucial. You don’t want to just leave it out on the counter or in the fridge uncovered. It needs to be sealed properly to maintain its moisture. I recommend using a glass jar with a tight-fitting lid. And don’t forget to label it with the date you last fed it.
Check out this sourdough starter jar on Amazon
How to tell if your starter is too dry
So how do you tell if your starter is too dry? It’s simple, just take a look at it. If it’s dense and not bubbly, it’s too dry. And if it smells off or has mold, it’s definitely too dry and needs to be discarded.
The difference between a dry and a dormant starter
So how do you tell the difference between a dry and a dormant starter? A dry starter is one that has been neglected and has lost its activity, while a dormant starter is one that has been stored in the fridge and needs to be revived before using it again.
How to revive a starter that has been left unused for a long period of time
How do you revive a starter that has been left unused for a long period of time? This is also crucial, you don’t want to just start using it again without reviving it first. First, take it out of the fridge and let it come to room temperature.
Then give it a good feeding and wait for it to become active again. And don’t be afraid to discard some of it if it’s not looking right. Like I always say, better to start fresh than to waste time and ingredients on a bad starter.
How to troubleshoot common issues with dry starters
When it comes to sourdough starters, it’s not always sunshine and rainbows. Sometimes things can go wrong and you might have to troubleshoot some common issues. But don’t worry, I’m here to guide you through it.
First up, how to troubleshoot common issues with dry starters. This can range from bad smell, to mold, to just not looking right. First, check the consistency and smell, if it’s dense and not bubbly, it’s too dry. If it smells off or has mold, it’s definitely too dry and needs to be discarded. And don’t be afraid to discard some of it if it’s not looking right. Like I always say, better to start fresh than to waste time and ingredients on a bad starter.
How to properly discard and replace a dry starter
This is crucial, you don’t want to just throw it away without properly discarding it. First, take it out of the container and discard the bulk of it, leaving just a small amount in the container. Then give it a good feeding and wait for it to become active again before using it again.

The importance of using the right flour for your starter
This is key, you want to use flour that is high in protein and gluten, like bread flour or high-gluten flour. This will give your starter the proper nutrients to grow and maintain its activity.
How to use a digital scale for precise measurements
Make sure you use a digital scale for precise measurements. This is crucial, you don’t want to just wing it and use cups or spoon measurements. A digital scale will give you precise measurements for the water to flour ratio, ensuring that your starter is properly hydrated.
So remember, a good sourdough starter is the foundation of a good loaf of bread. And trust me, I know a thing or two about bread. Treat it right and it will treat you right.
How to use a kitchen thermometer to ensure the right temperature
When it comes to sourdough starters, precision is key. And that’s why using the right tools is essential. You can’t just go by looks or smell, you need to use the right equipment to ensure your starter is in top shape.
To use a kitchen thermometer to ensure the right temperature, make sure the temperature of your starter and the environment it’s in is ideal for growth. The ideal temperature for a sourdough starter is around 75-78F (24-26C). Use the thermometer to check the temperature and adjust accordingly.
How to use a kitchen hydrometer to measure your starter’s hydration
You want to make sure your starter has the right amount of water in it. A hydrometer will give you a precise reading of the water to flour ratio.
A hydrometer is a tool that measures the specific gravity of a liquid. In bread making, it’s used to measure the hydration level of your sourdough starter.
The hydration level, or the ratio of water to flour, is crucial to the health and activity of your starter. A hydrometer will give you a precise reading of the water to flour ratio, allowing you to adjust it as needed. This will ensure your starter is properly hydrated and will have the right consistency for baking.
How to use a microscope to check your starter’s health
Thirdly, how to use a microscope to check your starter’s health. This is an optional step but if you want to be extra sure of the health of your starter, you can use a microscope to check the number of live yeast cells in your starter. The more yeast cells, the healthier your starter is.
How to use a pH meter to check your starter’s acidity
Finally, how to use a pH meter to check your starter’s acidity. This is also key, you want to make sure your starter has the right acidity levels. A pH meter will
A pH meter is a tool that measures the acidity level of a liquid. In bread making, it’s used to measure the acidity level of your sourdough starter.
The acidity level, or pH level, is crucial to the flavor and texture of your bread. A pH meter will give you a precise reading of the acidity level of your starter, allowing you to adjust it as needed.
This will ensure your starter has the right acidity level for baking. The ideal pH level for a sourdough starter is around 4-4.5. A pH meter is also useful for testing the acidity levels of other ingredients like water, honey, molasses, and more.
17 Sourdough Starter Tips
- Keep your starter at a consistent temperature of 75-78F (24-26C) for optimal growth.
- Feed your starter regularly, at least once a day, with equal parts flour and water by weight.
- Use flour that is high in protein and gluten, like bread flour or high-gluten flour, for optimal nutrition.
- Measure your ingredients precisely using a digital scale.
- Use filtered or spring water for your starter, as chlorine and other chemicals in tap water can inhibit growth.
- Keep your starter in a glass or ceramic container with a loose-fitting lid to allow for proper ventilation.
- Keep your starter in a warm, draft-free location, away from direct sunlight.
- Avoid using metal utensils or containers, as they can react with the acidity of the starter.
- Keep your starter covered with a damp cloth or plastic wrap to prevent drying out.
- Discard a portion of your starter regularly to prevent it from becoming too thick and unmanageable.
- Use a kitchen thermometer to check the temperature of your starter and the environment it’s in.
- Use a kitchen hydrometer to check the hydration level of your starter.
- Use a microscope to check the health of your starter by counting the number of live yeast cells.
- Use a pH meter to check the acidity level of your starter.
- Don’t be afraid to discard a starter that has mold or a bad smell, it’s better to start fresh.
- Revive a dormant starter by regularly feeding it until it becomes active again.
- Experiment with different flours, water sources, and feeding schedules to find the perfect combination for your starter.
History and uses of Sourdough Starter
Sourdough starter, also known as a leaven, is a natural fermentation of flour and water that is used as a leavening agent for bread. The process of creating a sourdough starter involves mixing flour and water together, creating an environment for wild yeasts and bacteria to thrive.
Over time, the starter becomes populated with a diverse and active population of microorganisms that can be used to make bread rise.
The history of sourdough starter can be traced back to ancient civilizations, where people would use natural wild yeasts to ferment dough.
The process of using sourdough starter is likely as old as bread making itself. Sourdough starter was used by the ancient Egyptians, Greeks, and Romans, and has been passed down through the generations.
Sourdough starter is used in making traditional sourdough bread, which is characterized by its tangy flavor and chewy texture. Sourdough bread is made by mixing flour, water, and a small amount of starter together, allowing it to rise, and then baking it.
The microorganisms in the starter ferment the dough, creating carbon dioxide which causes the dough to rise.
Sourdough starter is also used in other fermented food products such as crackers, pancakes, and flatbreads. It can also be used to make sourdough starter pancakes, flatbreads, and more.
Sourdough starter can be a great addition to your kitchen and it’s easy to make it at home, it’s a fun and rewarding experience to make your own bread.
How to use a microscope to check your starter’s health
Using a microscope to check the health of your sourdough starter can provide valuable insight into the activity of the microorganisms that make up your starter.
By viewing a sample of your starter under a microscope, you can identify the different types of yeast and bacteria that are present and assess their overall health.
How to use a microscope to check your starter’s health
To use a microscope to check your starter’s health, you will need to prepare a sample of your starter by mixing a small amount of flour and water together.
Allow the mixture to sit for a few hours or overnight, until bubbles form and the mixture becomes active. Then, take a small sample of the mixture and place it on a microscope slide.
Add a drop of water to the sample and place a coverslip on top. View the sample under the microscope, adjusting the focus and magnification as needed.
How to use a pH meter to check your starter’s acidity
Using a pH meter to check the acidity of your starter can provide valuable information about the health and activity of your starter. The pH of your starter can indicate the level of acidity and can indicate if the starter is too acidic or too alkaline. A healthy starter should have a pH between 4-5.
How to use a pH meter to check your starter’s acidity
To use a pH meter, you will need to prepare a sample of your starter by mixing a small amount of flour and water together. Allow the mixture to sit for a few hours or overnight, until bubbles form and the mixture becomes active.
Then, take a small sample of the mixture and place it in a container. Dip the pH meter in the container and take the reading.
It’s important to note that using a microscope and pH meter to check the health of your starter requires some technical knowledge and equipment. It’s recommended to use these tools if you are an experienced sourdough baker or if you are trying to troubleshoot specific issues with your starter.
More Tips
here are a few additional tips on keeping, starting, storing, or using sourdough starter that haven’t been covered in this post:
- When starting a new sourdough starter, it’s important to use high-quality, unbleached flour and filtered water. Avoid using chlorine or chloramine-treated water, as these chemicals can inhibit the growth of the wild yeast and bacteria in your starter.
- Keep your starter at room temperature (around 70-75 degrees Fahrenheit) in a container with a loose-fitting lid or cover. This will allow the starter to breathe and prevent it from becoming too moist or too dry.
- Feed your starter regularly to maintain its health and vitality. A good rule of thumb is to feed it once a day, or at least every 12 hours, with equal parts flour and water by weight.
- When storing your starter, you can keep it in the refrigerator for longer periods of time. However, be sure to take it out of the refrigerator and let it come to room temperature before using it, and also feed it before using it.
- When using your starter in bread dough, you should use a portion of the starter that is at its peak of activity. This usually happens just before or just after feeding, when the starter is bubbly and active.
- You can also use your starter to make other fermented foods like pancakes, crackers, and even pizza dough.
- Keep in mind that even if you are following all the guidelines and tips, sometimes the starter may not work out. This is normal, and you can always start a new one.
- Lastly, always remember to keep your equipment and work space clean and sanitized to avoid contamination and to ensure that your starter remains healthy and active.
Steps to make a sourdough starter:
| Step | Description |
|---|---|
| 1 | Mix together equal parts flour (rye or whole wheat is ideal) and filtered water (chlorine and chloramine can inhibit growth) in a clean, non-reactive container. |
| 2 | Cover the container with a clean kitchen towel or lid and let it sit at room temperature (around 70-75 degrees Fahrenheit) for 24 hours. |
| 3 | After 24 hours, discard half of the mixture and feed it with equal parts flour and water. Stir well to combine. |
| 4 | Cover the container again and let it sit for another 24 hours. |
| 5 | Repeat step 3 and 4 for about a week or until the starter becomes bubbly and active. |
| 6 | Once the starter is active, it is ready to use. Feed it once a day or every 12 hours with equal parts flour and water. Keep it at room temperature. |

