

Shaping your sourdough loaf is a crucial step in the process and can greatly impact the final result. A well-shaped loaf will have a crispy crust and a delicate, airy crumb structure. In this thread, we will explore the different methods of shaping sourdough bread, the tools and techniques needed, and the impact of humidity and proofing on the final product. This guide will help you achieve optimal crust and crumb texture in your sourdough bread.
Shaping sourdough bread is the process of forming the dough into its desired shape before baking. It involves gently handling the dough to create tension on the surface, which helps to maintain its shape during the final proofing and baking stages. There are several different shaping techniques that can be used, including round loaves, rectangular loaves, and oval loaves.
The best method for shaping sourdough depends on the desired final result and personal preference. To achieve the best results, it’s important to handle the dough gently and create enough tension on the surface to maintain its shape. Proofing the shaped dough in a cool environment and monitoring the humidity levels can also have a significant impact on the final outcome. With practice and patience, shaping sourdough can become a satisfying and enjoyable part of the bread making process.
Quick Tips
- Shaping sourdough bread involves forming the dough into a desired shape before baking.
- The technique of shaping involves creating tension on the surface of the dough to help it maintain its shape during final proofing and baking.
- Different shaping techniques include round loaves, rectangular loaves, and oval loaves.
- To achieve the best results, it’s important to handle the dough gently and create enough tension on the surface to maintain its shape.
- The final proofing should be done in a cool environment and the humidity levels should be monitored.
- The method of shaping chosen will depend on personal preference and desired final result.
- With practice and patience, shaping sourdough can become an enjoyable and satisfying part of the bread making process.
What are the Different Methods for Shaping Sourdough?
| Method | Description |
|---|---|
| Round Loaf | Shaped into a tight ball |
| Boule | Shaped into a round loaf with specific tension technique |
| Batard | Shaped into an oval or oblong loaf |
| Baguette | Long, thin loaf shaped by rolling and stretching the dough |
| Ciabatta | Large, rectangular loaf with open crumb structure |
| Rustic Loaf | Free-form loaf shaped into an irregular shape |
| Sticking Loaf | Loaf shaped like a stick or cylinder, often used for sandwiches |
| Pullman Loaf | Rectangular shaped loaf with straight sides and uniform shape, often used for sandwiches |
How to Shape Sourdough
Shaping sourdough bread is all about confidence, finesse, and a bit of flair. It’s the final step before baking and can make all the difference in the look and texture of your loaf. Here’s how to do it like a pro:
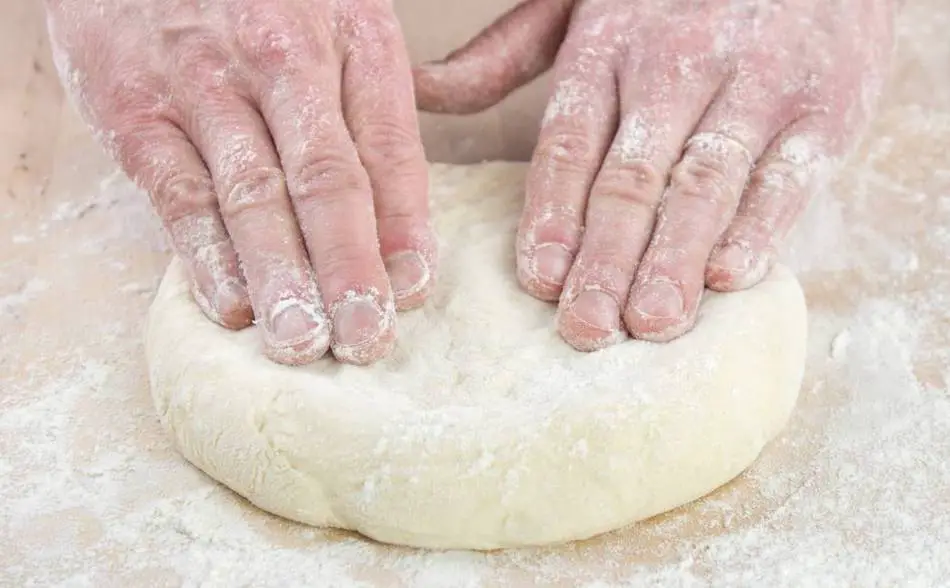
- Dust your work surface with flour, then gently tip out the dough from the proving basket onto the surface.
- Gently pat down the dough to knock out any large pockets of air, but don’t overwork it or you’ll lose the structure.
- Shape the dough into a tight round, rectangular or oval shape, depending on the loaf you want to make, using a light touch.
- Use your hands to create tension on the surface of the dough, gently pulling and stretching the dough to tighten the skin.
- Place the shaped dough into a floured banneton, or a floured tea towel if you don’t have one, and cover with a plastic wrap.
- Chill the dough in the fridge for 1-2 hours before baking to allow it to settle and the gluten structure to relax.
- When you’re ready to bake, preheat the oven, dust the top of the loaf with flour, then place it onto a hot baking stone or a preheated baking tray.
- Bake until the crust is golden and the loaf sounds hollow when you tap it on the bottom.
How Many Ways to Shape Sourdough?
There are many ways to shape sourdough bread, and the number of methods can vary depending on the baker’s preferences, the type of loaf being made, and the desired outcome. Some of the most common ways to shape sourdough include:
- Round Loaf – the dough is shaped into a tight ball
- Boule – the dough is shaped into a round loaf with a specific technique that creates tension in the surface
- Batard – the dough is shaped into an oval or oblong loaf
- Baguette – a long thin loaf, typically shaped by rolling and stretching the dough
- Ciabatta – a large, rectangular loaf with an open crumb structure
- Rustic Loaf – a free-form loaf that is shaped into an irregular shape
- Sticking Loaf – a loaf shaped like a stick or cylinder, often used for making sandwiches
- Pullman Loaf – a rectangular shaped loaf with straight sides and a uniform shape, often used for making sandwiches
These are just a few examples of the many different ways that sourdough can be shaped. The options are virtually endless, and bakers can use a variety of techniques and tools to create unique and creative loaves.
What Tools do I need to Shape Sourdough Bread?
Shaping sourdough bread is an art and you need the right tools to get it right. Here’s what you’ll need:
- A large, clean work surface: You need a flat surface to work on that’s big enough to handle the dough. A wooden board is great, but any flat surface will do. Just make sure it’s clean!
- Flour: You’ll need plenty of flour to dust your work surface and prevent the dough from sticking.
- A bench scraper: This handy tool will help you shape the dough and remove any excess flour.
- Banneton or proving basket: A banneton is a woven basket used to help shape and support the dough as it rises. It helps create a nice round shape and also leaves a lovely pattern on the crust. If you don’t have one, don’t worry, you can use a clean, floured bowl or a cloth napkin.
- Lame or sharp knife: A lame or sharp knife is used to score the dough before baking. This helps control the expansion of the bread and also creates a pretty design on the crust.
How to Prepare your Work Surface for Shaping Sourdough
When preparing your work surface for shaping sourdough, you want to make sure it’s clean and well-floured. Here’s what you need to do:
- Clean your work surface: Wipe down your surface with a damp cloth to remove any dirt or debris.
- Dust with flour: Sprinkle a generous amount of flour over your work surface. This will prevent the dough from sticking as you shape it.
- Spread the flour evenly: Use your hand or a bench scraper to spread the flour evenly over your work surface. Make sure there are no clumps or bare spots.
- Check the consistency: You want the surface to be well-floured, but not so much that it’s caked on. The dough should glide over the surface without sticking, but not slide around.
By preparing your work surface properly, you’ll have a better experience shaping your sourdough and avoid any frustration from dough that sticks to the surface.
Knocking Back and Shaping the Dough: Tips and Tricks
When knocking back and shaping sourdough, it’s important to handle the dough gently to maintain its structure and ensure the best rise. Here are some tips and tricks to keep in mind:
- Be gentle: When knocking back the dough, handle it gently to avoid deflating it too much. Use your hands or a spatula to release the air, but avoid squishing the dough.
- Dust with flour: Before shaping, dust the dough with a little bit of flour to prevent it from sticking to your hands or the work surface.
- Shape on a floured surface: As mentioned earlier, make sure your work surface is well-floured to prevent sticking.
- Create tension: When shaping into a round loaf, use your hands to gently stretch and tuck the dough to create a tight surface. This will help create a nice round shape and also prevent the dough from collapsing during the rise.
- Proof in a banneton or floured cloth: After shaping, place the dough in a banneton or floured cloth to help maintain its shape and prevent it from drying out.
- Cover and let rise: Cover the dough with a clean cloth and let it rise in a warm, draft-free place until it’s doubled in size.
How to Create Tension on the Surface of the Dough
Creating tension on the surface of the dough is important for shaping and maintaining the structure of the loaf. Here’s how to do it:
- Dust the dough with flour: Lightly dust the surface of the dough with flour to prevent it from sticking to your hands.
- Use your hands: Place your hands on opposite sides of the dough and gently stretch the dough outwards.
- Fold the edges in: Once the dough has been stretched, fold the edges inwards towards the center of the dough.
- Turn the dough over: Turn the dough over so that the folded edges are on the bottom and the smooth surface is facing upwards.
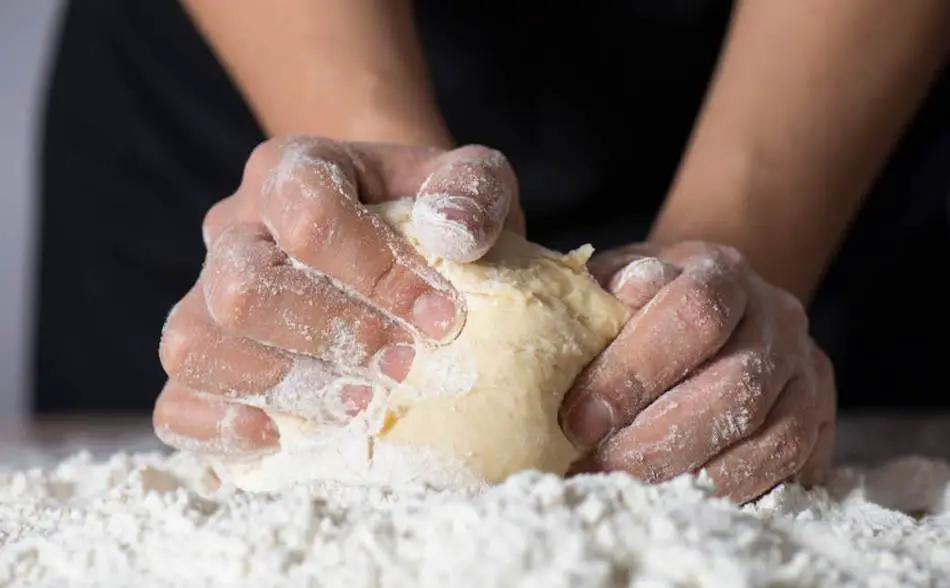
- Repeat the stretching and folding: Repeat the stretching and folding process several times, gently tucking the edges of the dough under the center. This will create tension on the surface and help form a tight ball.
- Final shape: Once you’ve finished stretching and folding, shape the dough into a tight ball by cupping your hands around it and gently pulling the edges towards the center.
How to Shape a Round Loaf
Shaping a round loaf is a key step in the sourdough bread-making process. Here’s how to do it:
- Dust the dough with flour: Lightly dust the surface of the dough with flour to prevent it from sticking to your hands.
- Create tension: Use your hands to gently stretch and fold the dough, as described in the previous answer, to create tension on the surface.
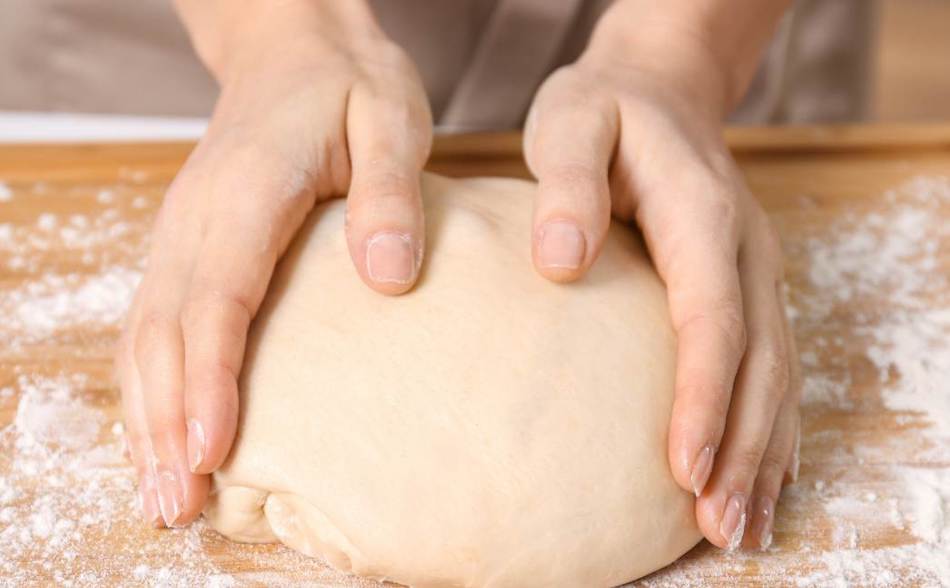
- Cup your hands: Once you’ve created tension, cup your hands around the dough and gently pull the edges towards the center.
- Turn the dough over: Turn the dough over so that the smooth surface is facing upwards.
- Repeat the cupping: Repeat the cupping process several times, gently pulling the edges of the dough towards the center each time. This will help form a tight ball.
- Final shape: Once you’ve finished cupping, place the dough in a banneton or floured cloth, with the smooth surface facing upwards. Cover with a clean cloth and let the dough rise until it’s doubled in size.
How to Shape a Rectangular Loaf
Shaping a rectangular loaf is a little different from shaping a round loaf, but it’s still a straightforward process. Here’s how to do it:
- Dust the dough with flour: Lightly dust the surface of the dough with flour to prevent it from sticking to your hands.
- Shape into a rough rectangle: Use your hands to gently shape the dough into a rough rectangle.
- Roll the dough: Using a rolling pin, gently roll the dough into a long, even rectangle.
- Fold the dough: Fold the dough in thirds, like a letter, by folding the bottom third up, then the top third down. Repeat this process several times to create tension and help develop the gluten structure.
- Final shape: Once you’ve finished folding, place the dough in a greased loaf pan, with the seam facing downwards. Cover with a clean cloth and let the dough rise until it’s doubled in size.
How to Shape an Oval Loaf
Shaping an oval loaf is a unique way to showcase your sourdough skills and create a beautiful loaf. Here’s how to do it:
- Dust the dough with flour: Lightly dust the surface of the dough with flour to prevent it from sticking to your hands.
- Create tension: Use your hands to gently stretch and fold the dough, as described in a previous answer, to create tension on the surface.
- Roll the dough: Once you’ve created tension, gently roll the dough into a long, sausage-like shape.
- Shape into an oval: Place your hands at either end of the dough, with your thumbs touching, and gently stretch the dough outwards to form an oval shape.
- Final shape: Once you’ve shaped the dough into an oval, place it on a lightly floured surface and cover with a clean cloth. Let the dough rise until it’s doubled in size.
Alternatives to a Banneton for Shaping Sourdough
A banneton is a traditional tool for shaping sourdough, but there are many alternatives that you can use if you don’t have one. Here are a few options:
- A floured cloth: Line a bowl with a clean cloth and dust it with flour. Place the shaped dough in the bowl, seam side up, and cover with the cloth.
- A colander: Line a colander with a clean cloth and dust it with flour. Place the shaped dough in the colander, seam side up, and cover with the cloth.
- A mixing bowl: Line a mixing bowl with a clean cloth and dust it with flour. Place the shaped dough in the bowl, seam side up, and cover with the cloth.
- A loaf pan: If you’re making a rectangular loaf, simply shape the dough to fit in a greased loaf pan. Cover with a clean cloth and let the dough rise until it’s doubled in size.
How to Proof your Shaped Sourdough
Proofing your shaped sourdough is an important step in the bread-making process, as it allows the dough to rise and develop its flavor and structure. Here’s how to proof your shaped sourdough:
- Choose a warm, draft-free location: The ideal temperature for proofing sourdough is around 78°F (26°C). Avoid placing the dough near a drafty window or in a cold room, as this can slow down the proofing process.
- Cover the dough: Place the shaped dough in a proofing basket or in a floured cloth, cover with a clean cloth, and let it rest. You can also use a large mixing bowl or a loaf pan, as described in a previous answer.
- Monitor the dough: Check the dough every 30 minutes to see if it has doubled in size. If it hasn’t doubled yet, let it continue to proof. The proofing time can vary depending on the temperature and humidity of your kitchen, so it’s important to keep an eye on the dough.
- Bake the bread: Once the dough has doubled in size, it’s ready to be baked. Gently transfer the dough to a preheated Dutch oven or baking stone, and bake as directed in your recipe.
The Importance of a Cold Proof in Shaping Sourdough
A cold proof, also known as a refrigeratoration proof, is an optional step in shaping sourdough bread that can enhance its flavor and texture. Here’s why a cold proof is important:
- Flavor development: During a cold proof, the yeast continues to ferment the dough at a slow pace. This extended fermentation process allows the dough to develop a deeper, more complex flavor profile.
- Improved texture: A cold proof can also improve the texture of your sourdough bread. The dough will become firmer and easier to handle, which makes shaping it easier and results in a tight crumb structure.
- Longer shelf life: Breads that are cold proved often have a longer shelf life than those that are only room-temperature proved. This is because the slower fermentation process allows the bread to retain moisture for a longer period of time.
To perform a cold proof, simply shape your sourdough as you normally would, cover it, and place it in the refrigerator overnight. The next day, take the dough out of the refrigerator and let it warm up to room temperature for 1-2 hours before baking.
Keep in mind that a cold proof is not necessary for all sourdough breads, and some recipes may not call for it. However, it’s a great option to consider if you want to enhance the flavor and texture of your sourdough.
How to Handle the Dough During Shaping Without Overworking It
Handling the dough during shaping is an important step in the sourdough bread-making process, as overworking the dough can lead to a tough, dense loaf. Here’s how to handle the dough without overworking it:
- Be gentle: When shaping the dough, handle it as gently as possible. Use a light touch and avoid pressing too hard or pulling the dough too tight.
- Use floured hands: Dust your hands with flour to prevent sticking, but be careful not to add too much flour, as this can also lead to overworking the dough.
- Work quickly: Try to shape the dough as quickly as possible. The longer the dough is handled, the more likely it is to become overworked.
- Use a bench scraper: A bench scraper is a useful tool for handling dough during shaping. Use it to gently lift and turn the dough, rather than pulling or pushing it with your hands.
- Avoid kneading: Shaping the dough is not the same as kneading. During shaping, you want to maintain the air bubbles that have formed in the dough during the rise. Kneading the dough will deflate the air bubbles, leading to a dense loaf.
By following these tips, you can handle your sourdough dough with care and avoid overworking it. This will result in a light, airy, and flavorful loaf of bread.
Common Mistakes to Avoid when Shaping Sourdough
Here are some common mistakes to avoid when shaping sourdough bread:
- Overworking the dough: As mentioned earlier, overworking the dough during shaping can lead to a tough, dense loaf. Handle the dough gently, use floured hands, work quickly, and avoid kneading.
- Not creating enough tension: Creating tension on the surface of the dough is important for shaping and helps to create a tight crumb structure. Make sure to use the right techniques to create tension when shaping your dough.
- Not using enough flour: Dusting your hands and work surface with flour is important to prevent sticking, but be careful not to add too much flour. Excessive flour can also cause the dough to overwork, leading to a dense loaf.
- Not proofing long enough: Proofing is an important step in sourdough bread-making, and not proofing the dough long enough can result in a loaf that doesn’t rise properly. Make sure to follow the recipe’s proofing instructions, and monitor the dough to ensure that it has risen enough before shaping.
- Not using the right container for proofing: A banneton is a traditional proofing basket that helps to create a round, oval, or rectangular shape for your sourdough loaf. If you don’t have a banneton, you can use a bowl lined with a tea towel dusted with flour.
By avoiding these common mistakes, you can shape your sourdough with confidence and bake a delicious, crusty loaf of bread.
The Science Behind Shaping and its Impact on the Final Product
Shaping is a critical step in the sourdough bread-making process, as it has a significant impact on the final product. Here’s the science behind shaping and its impact on the final product:
- Tension and Structure: Shaping creates tension on the surface of the dough, which helps to form a tight crumb structure. This results in a loaf with an open, airy texture and large, irregular holes.
- Fermentation: The yeast and bacteria in the sourdough starter continue to ferment the dough during the proofing stage. Shaping the dough helps to distribute the yeast and bacteria evenly, which results in a more even rise and a more consistent flavor.
- Gluten Development: Shaping helps to develop the gluten in the dough, which is what gives bread its structure and elasticity. Proper shaping techniques, such as creating tension and avoiding overworking the dough, help to develop the gluten in a way that results in a tender, light loaf.
- Surface Area: The shape of the loaf also affects the surface area, which can impact the crust. A round loaf will have less surface area than a rectangular loaf, for example, which means that the round loaf will have a softer crust.
By understanding the science behind shaping and its impact on the final product, you can make informed decisions about how to shape your sourdough loaf to achieve your desired result. Whether you want a crusty, round loaf or a soft, rectangular loaf, shaping is a key factor in achieving the perfect bread.
Shaping Techniques for Different Types of Sourdough Loaves
Here are some shaping techniques for different types of sourdough loaves:
- Round Loaf: To shape a round loaf, gently deflate the proofed dough, then gently tuck the edges of the dough under itself until it forms a tight ball. Place the shaped dough in a floured banneton or a bowl lined with a tea towel dusted with flour.
- Rectangular Loaf: To shape a rectangular loaf, gently deflate the proofed dough, then roll it out into a rectangular shape. Tuck the edges of the dough under itself to create tension on the surface, then place the shaped dough on a floured baking sheet or in a bread tin.
- Oval Loaf: To shape an oval loaf, gently deflate the proofed dough, then roll it out into a long, thin sausage shape. Join the two ends of the dough together, then tuck the edges under to form an oval shape. Place the shaped dough in a floured banneton or a bowl lined with a tea towel dusted with flour.
- Boule: A boule is a round loaf that has a distinctive, rustic look. To shape a boule, gently deflate the proofed dough, then tuck the edges of the dough under itself until it forms a tight ball. Place the shaped dough on a floured baking sheet or in a bread tin.
- Batard: A batard is a loaf that is oval in shape, but longer and narrower than a boule. To shape a batard, gently deflate the proofed dough, then roll it out into a long, thin sausage shape. Join the two ends of the dough together, then tuck the edges under to form an oval shape. Place the shaped dough on a floured baking sheet or in a bread tin.
By practicing these shaping techniques, you can create a variety of sourdough loaves with different shapes, sizes, and textures. Whether you prefer a crusty round loaf, a soft rectangular loaf, or a distinctive oval loaf, the right shaping technique can help you achieve the perfect bread.
The Role of Humidity in Shaping Sourdough
Humidity plays a crucial role in shaping sourdough bread, as it affects the texture and structure of the dough. Too much humidity can cause the dough to become sticky and difficult to work with, while too little humidity can cause the dough to dry out and lose its elasticity.
Here are some ways in which humidity affects sourdough shaping:
- Stickiness: High humidity can cause the dough to become sticky, making it difficult to shape. This can result in a misshapen loaf and an uneven texture.
- Elasticity: Humidity affects the elasticity of the dough, which is essential for shaping. A lack of humidity can cause the dough to lose its elasticity, making it difficult to form a tight ball or other shapes.
- Proofing time: Humidity also affects the proofing time of the dough. In high humidity, the dough may proof faster, while in low humidity, it may take longer. This can impact the final texture and flavor of the bread.
- Surface tension: The surface tension of the dough is crucial for shaping, as it helps to create a tight skin on the surface of the loaf. High humidity can cause the surface tension to be lost, resulting in a weak, misshapen loaf.
To achieve the best results when shaping sourdough, it’s important to monitor the humidity levels in your kitchen and adjust accordingly. This may involve adding moisture to the air with a humidifier, or using a plastic cover over the dough during proofing to trap moisture.
By understanding the role of humidity in shaping sourdough, you can take steps to ensure that your loaves turn out perfectly every time.