


The art of bread making is a delicate balance of science and intuition. And at the heart of it all lies the crucial step of bread proofing. A step that separates the amateurs from the professionals. A step that takes simple ingredients and transforms them into something truly magical. A step that will elevate your bread from good to great. Join us as we dive into the world of bread proofing, where we will explore the science behind it, the techniques for mastering it and the secrets for elevating your bread game to new heights.
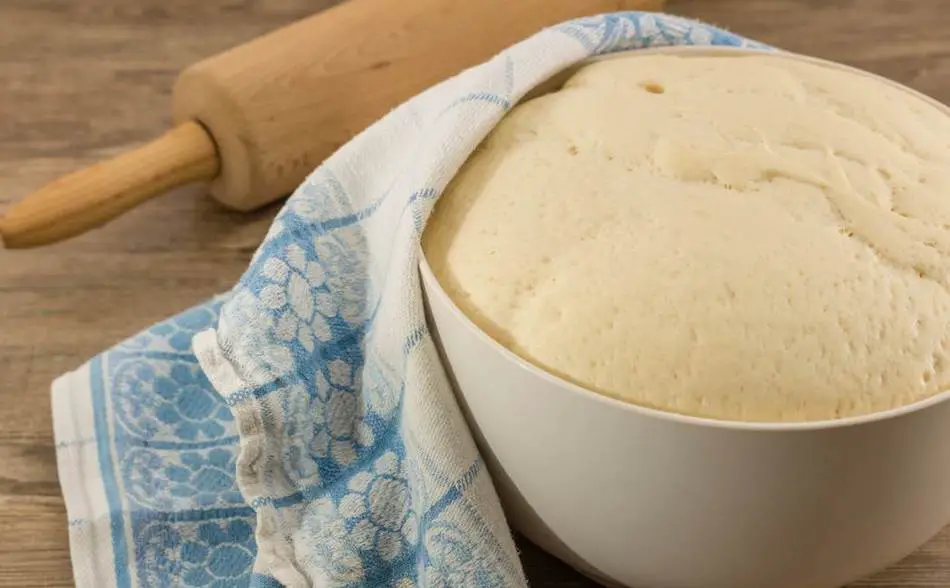
Bread proofing is the process of allowing a fermented dough to rise before baking. It is the final fermentation stage in bread making, where yeast and bacteria ferment the sugars in the dough, creating carbon dioxide and alcohol. The carbon dioxide causes the dough to rise, creating a desirable texture in the final product. Proper proofing allows the gluten in the dough to develop and gives bread its desired chewiness and structure. The length of proofing, temperature, and humidity all affect the rate of fermentation and the final outcome of the bread. It is an essential step in bread making and requires proper attention to ensure the desired result.
| Quick Tips | Description |
|---|---|
| Keep yeast fresh and active | Yeast plays a crucial role in fermentation and its freshness affect the outcome |
| Create warm and humid environment for dough to rise | Temperature and humidity are important factors in fermentation process |
| Experiment with different amounts of sugar and fat to find the right balance | sugar and fat affect the fermentation process and the final outcome |
| Use pre-ferments to add depth and complexity to the final product | Pre-ferments are a great way to enhance the flavor and structure of the bread |
| Proper scoring and shaping helps with high rise and texture | Shaping and scoring affect the rise and texture of the bread |
| Don’t rush fermentation, let dough rise at its own pace | Fermentation takes time and rushing the process will affect the final outcome |
| Be resourceful and use alternative methods when necessary | Be open to new ways of proofing and troubleshooting if needed |
| Keep an open mind and always be willing to experiment | Be open to try new ingredients and techniques, that’s how you will improve and create unique bread |
| Practice, practice, practice to achieve great bread | Keep on experimenting and practicing to achieve great bread. |
Key Points
- Bread proofing is the process of allowing dough to rise before baking
- Yeast is crucial for fermentation during bread proofing
- Temperature and humidity affect bread proofing
- Different types of bread have specific proofing requirements
- Dough hydration impacts bread proofing
- Proper shaping and proofing technique results in delicious homemade bread
- Avoid common mistakes during bread proofing
- Know when bread is fully proofed
- Pre-ferments add flavor and complexity to bread
- Sourdough bread requires specific proofing techniques
- Use a home oven to proof bread
- Bulk fermentation and final proofing serve different purposes
- Store and freeze dough for later proofing
- Troubleshoot common bread proofing problems
- Use natural leaveners for authenticity and flavor
- Tips for achieving high rise and well-textured bread
- Proof bread without a proofing basket using alternative methods
- Experiment with different ingredients, techniques and environment to achieve desired outcome
- Pay attention to details and understand the needs of the dough for a great bread
- Keep an open mind, be resourceful and don’t be afraid to make mistakes
- Practice makes perfect.
What is bread proofing and why is it important?
Bread proofing is the critical step in the bread making process that separates the amateurs from the professionals. It’s the point where the dough gets to take a nap, and the yeast gets to do its thing.
Yeast ferments the sugars in the dough, creating carbon dioxide and alcohol, which gives bread its lift and flavor. And let me tell you, without that fermentation, your bread would be a sad, dense and flavorless. So, you want to make bread? You’ve got to learn to proof it properly, or don’t even bother. It’s that simple.
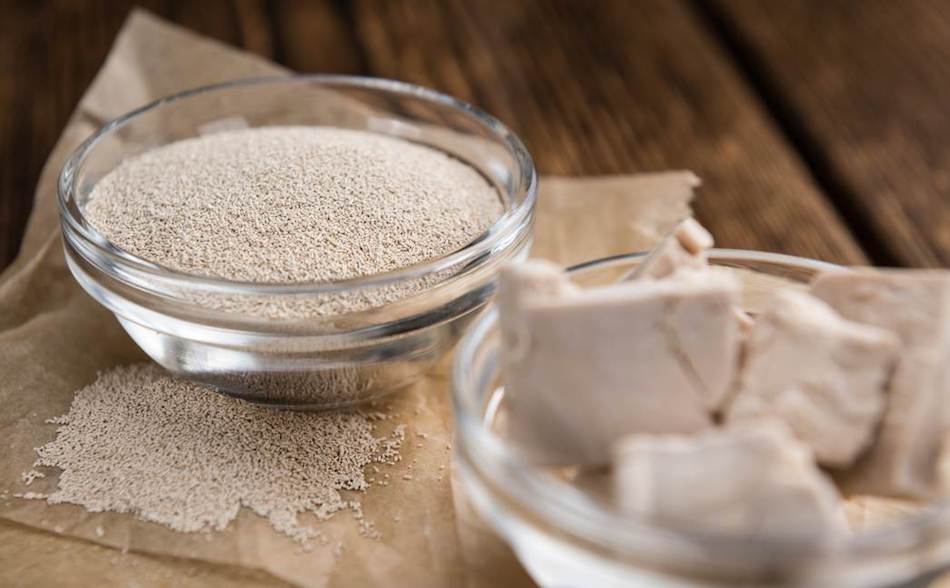
The role of yeast in bread proofing
Yeast is the unsung hero of the bread-making process. Without it, you got nothing. Yeast is a living organism, and when it’s added to the dough, it goes to work fermenting the sugars, creating carbon dioxide and alcohol, which makes the dough rise, and gives bread its unique flavor.
Yeast is the reason why bread has that nice airy texture and why it smells so damn good. But yeast can be tricky too. If you use too much, you can run your bread.
Yeast is the magic, the alchemy that turns flour, water, and salt into something magical and it’s the key to proofing. So, respect the yeast, and it will reward you with a perfect loaf of bread.
How temperature and humidity affect bread proofing
Temperature and humidity, they may seem like small details, but they can make or break your bread proofing game. See, yeast is a living organism and it likes to be in a specific environment to do its magic.
If the temperature is too hot or too cold, the yeast will either slow down or die, and that’s the last thing you want. Same thing goes for humidity, if it’s too dry, the dough will dry out and crack, too humid, and the dough will become too sticky and won’t rise properly.
So, you need to pay attention to these details, find the sweet spot, and create the perfect environment for your yeast to ferment and grow. It’s all about balance, my friends, and that’s what sets a great bread apart from an average one. Temperature and humidity, they may be small details but they are crucial, and you ignore them at your own risk.
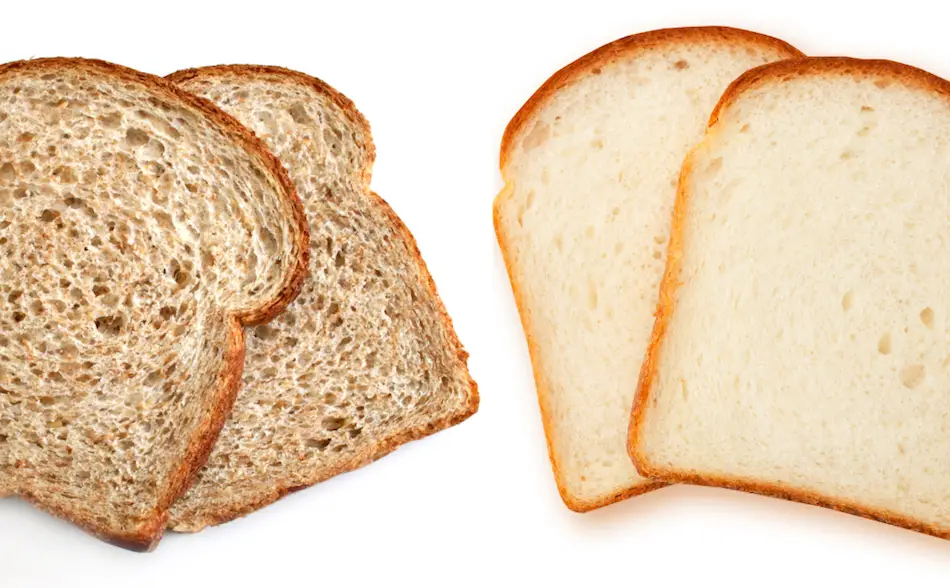
Different types of bread and their proofing requirements
Different bread, different proofing needs. It’s like people, each one is unique and needs to be treated accordingly. You got your classic French baguette, it needs a light and airy crumb, so that means a short and intense proof.
Then you got your sourdough, that baby needs a long, slow proof, to develop all that tangy flavor. And you got your brioche, that’s a whole different ballgame, it needs a lot of butter and sugar, so it needs a longer proof to rise properly. And don’t even get me started on ciabatta, that’s a whole different animal, it needs a very wet dough and a lot of humidity during proofing to get that open crumb.
The point is, each bread is unique and requires a different approach when it comes to proofing. It’s important to understand the specific needs of the bread you’re making and adjust your proofing accordingly.
Whether it’s the temperature, humidity, duration or method, each bread will have its own set of requirements to achieve the perfect rise and flavor. It’s all about understanding the characteristics of each bread and adapting your proofing technique to achieve the best possible results.
The impact of dough hydration on bread proofing
Dough hydration, it’s a fancy term for how wet or dry your dough is, and let me tell you, it’s a game changer when it comes to proofing. You see, the amount of water in your dough directly affects the fermentation process.
A wetter dough ferments faster, and a drier dough ferments slower. And that’s important because it’s all about timing, you want the dough to rise at the right time, so it has the right structure and flavor.
A wet dough will give you a light and airy crumb, but it’s also harder to handle and shape. A drier dough will give you a more open crumb, but it takes longer to proof.
So, you got to find the right balance, the right hydration level for the bread you’re making, and that’s where the magic happens. And remember, it’s not just about the amount of water, but also how you add it, when you add it, and how you mix it in.
Techniques for shaping and proofing bread dough
Shaping and proofing, it’s the final dance before the bread goes in the oven. It’s where you take that beautiful blob of dough and turn it into a work of art. And let me tell you, it’s not just about aesthetics, it’s also about structure.
Proper shaping and proofing will give your bread the right rise and the right texture. Now, there’s a lot of different techniques out there, and you got to find the one that works best for you.
There’s classic French baguette shaping, where you roll and stretch the dough to create those iconic lines. You got your boule, where you shape the dough into a round ball, it’s simple, but it works.
Then you got your batard, that’s a hybrid between a baguette and a boule, it’s the best of both worlds. And don’t forget the ciabatta, that’s a whole different animal, it’s all about creating a very slack dough and then letting it proof in a humid environment.
The point is, you got to experiment, try different techniques, and find what works best for you and the bread you’re making. It’s all about understanding the dough, and giving it the structure and support it needs to rise and develop properly.

How to create the ideal proofing environment
Proofing environment, it’s like a bread’s second home, and you got to make sure it’s just right. Yeast is a living organism and it needs the right temperature, humidity, and atmosphere to do its thing.
Create the perfect environment for your bread to rise and develop properly. Now, you can’t control the weather outside, but you can control the environment inside. You want to aim for a warm and humid environment, around 75-80 degrees Fahrenheit, and around 75% humidity.
Now, you can achieve this by using a proofing box, a large plastic container with a lid, or even a plastic bag. Just make sure to put a damp towel on the bottom to create humidity.
You can also use a oven with a light on, or a microwave with a cup of hot water inside. The point is, you got to find a way to create the right environment for your bread to proof, and that’s what makes a great bread.
Common Mistakes to Avoid During Bread Proofing
Proofing, it’s a tricky thing, and it’s easy to make mistakes. But, mistakes are how we learn, and that’s why I’m here to give you a heads up on the most common mistakes people make during proofing, so you don’t make them too.
First of all, don’t let your dough proof too long or too short. Yeast needs the right amount of time to ferment, too long and the dough will collapse, too short, and the bread will be dense.
Second, don’t let your dough proof in a place that is too hot or too cold. Yeast likes it warm and humid, not too hot or too cold.
Third, don’t use too much or too little yeast. Yeast is the key to fermentation, but too much or too little, and you’ll mess up the balance. Fourth, don’t forget to preheat your oven. A cold oven will shock the dough, and it will collapse.
These are just some of the most common mistakes people make during proofing, but the point is, pay attention to your dough, pay attention to the environment, and pay attention to the timing. And above all, don’t be afraid to make mistakes, it’s how we learn.
How to Know When Bread is Fully Proofed
Knowing when your bread is fully proofed, it’s like a sixth sense, you develop it with practice. But, there are a couple of tell-tale signs that will give you an idea.
First of all, the “finger-poke test”. Take your index finger and gently poke the dough, if it springs back quickly, it’s not ready. If it springs back slowly, it’s ready.
Second, the “windowpane test”. Take a small piece of dough and stretch it gently, if it stretches easily and becomes translucent, it’s ready. If it tears or doesn’t stretch, it’s not ready.
Third, the “volume test”. Look at the dough, it should have doubled in size and have visible bubbles on the surface.
These are just some of the ways you can tell if your bread is fully proofed, but the point is, you got to pay attention to your dough, pay attention to the signs, and pay attention to your instincts. And above all, don’t rush the process, let the dough proof at its own pace.
Tips for Successfully Proofing Sourdough Bread
Sourdough bread, it’s a different beast, it needs a different approach when it comes to proofing. You can’t rush sourdough, you gotta let it take its time, and that’s what makes it so good. First of all, you gotta understand your starter.
Sourdough bread relies on a natural leavener, a starter, and it needs to be healthy and active. Make sure to feed it regularly and keep it at the right consistency. Second, you gotta be patient. Sourdough takes longer to proof than regular bread, so don’t rush it.
Let it rise slowly, and let it develop all that tangy flavor. Third, you gotta create the right environment. Sourdough likes it warm and humid, so make sure to keep the dough covered and in a warm place. Fourth, you gotta shape it properly.
Sourdough is a wet dough, so don’t overhandle it, and make sure to use a floured surface and a lot of flour when shaping it.
These are just some tips for successfully proofing sourdough bread, but the point is, you need to understand the nature of sourdough and respect it.
It’s all about patience, attention to details, and understanding the needs of your dough. And above all, don’t rush it, let it take its time, and that’s what makes a great sourdough bread.
How to Revive Over-Proofed Bread Dough
Over-proofed dough, it’s a common mistake, and it can be frustrating. But, don’t worry, all is not lost, there are ways to revive it.
First of all, you can try reshaping the dough and letting it proof again. This can help redistribute the yeast and carbon dioxide, and give it another chance to rise.
Secondly, you can try gently deflating the dough and adding more flour to firm it up. This will help strengthen the structure of the dough and give it more support.
Thirdly, you can try baking it immediately, even if it’s not fully risen. The residual heat and steam in the oven can help it continue to rise and develop structure.
These are just some ways to revive over-proofed dough, but the point is, don’t give up on it, and with a little bit of creativity and experimentation, you can still make a great bread even from over-proofed dough.
The Difference Between Bulk Fermentation and Final Proofing
Bulk fermentation and final proofing, two important steps in the bread-making process, but they are not the same thing.
Bulk fermentation, also known as the first rise, is the initial stage of fermentation where the yeast and bacteria ferment the sugars in the dough. It’s where the dough takes on flavor and structure. This step is usually done at room temperature and lasts for several hours.
Final proofing, also known as the second rise, is the last stage of fermentation before baking. It’s where the dough is shaped and left to rise again before it goes in the oven.
This step is done at a warmer temperature, usually around 75-80 degrees Fahrenheit, and lasts for a shorter period of time, usually around 1-2 hours.
The point is, bulk fermentation and final proofing are two different steps, they serve different purposes, and they require different conditions. Bulk fermentation is all about developing flavor, final proofing is all about developing structure.
How to Proof Bread in a Home Oven
Proofing bread in a home oven, it’s not as hard as you think. It’s all about creating the right environment and using the right technique.
First things first, preheat your oven to its lowest setting, usually around 200 degrees Fahrenheit, and then turn it off. This will create a warm and humid environment for your bread to rise.
Next, place a tray of hot water on the bottom of the oven, this will create more humidity. Then place your bread dough on a baking tray and cover it with a damp towel or a plastic bag.
Pop it in the oven, and let it rise, it should take around 1-2 hours, depending on the type of bread you’re making. And that’s it, you got yourself a homemade proofing box.
It’s not rocket science, it’s all about creating the right environment for your dough to rise, and using your oven is a great way to achieve it.
The Difference Between Bulk Fermentation and Final Proofing
Bulk fermentation and final proofing, two important steps in the bread-making process, but they’re not the same thing, not by a long shot.
Bulk fermentation, also known as the first rise, is where the dough gets to take a nap and the yeast gets to do its thing. It’s where the dough develops flavor, structure and texture. This step is usually done at room temperature and lasts for several hours.
Final proofing, also known as the second rise, is where the dough gets its final shape and takes its last nap before it goes in the oven. It’s where the dough develops its final structure, and rises to its full potential. This step is done at a warmer temperature, usually around 75-80 degrees Fahrenheit, and lasts for a shorter period of time, usually around 1-2 hours.
The point is, bulk fermentation and final proofing are two different steps, they serve different purposes, and they require different conditions. Bulk fermentation is all about developing flavor, final proofing is all about developing structure.
The Use of Pre-Ferments in Bread Proofing
Pre-ferments, they’re like secret ingredients in bread making, they add depth and complexity to the final product. They’re like a chef’s secret weapon, and they’re all about developing flavor.
A pre-ferment is a mixture of flour, water, and yeast that is made in advance and left to ferment for a certain amount of time, usually overnight. It’s then added to the final dough to give it more flavor and complexity.
There are a few different types of pre-ferments, like biga, poolish, levain, and so on, each one with its own characteristics and flavor profile. It’s all about experimenting and finding the right one for the bread you’re making. It’s not just about adding flavor, pre-ferments also improve the structure and the texture of the bread, and they also increase the shelf life of the bread. It’s all about attention to details and understanding the needs of the bread.
The Impact of Sugar and Fat on Bread Proofing
Sugar and fat, they’re not just ingredients, they’re also players in the game of bread proofing. They’re like the wild cards, they can change the game and make a big impact. Sugar, it’s not just for sweetness, it also helps with browning and it also speeds up fermentation.
Fat, it’s not just for flavor, it also helps with tenderness and it also slows down fermentation. It’s all about balance, too much sugar and the dough will ferment too fast, too much fat and the dough will ferment too slow. It’s all about understanding the needs of the dough and the bread you’re making.
And it’s also about experimenting, try different amounts of sugar and fat and find the right balance for the bread you’re making.
How to Store and Freeze Bread Dough for Proofing Later
Storing and freezing bread dough for proofing later, it’s like putting the dough to sleep, so it can wake up and surprise you later. It’s all about convenience and flexibility.
First, you gotta make sure the dough is properly shaped and fermented, then you gotta let it cool down completely. Then you can store it in an airtight container, in the fridge, for up to 3 days.
Just make sure to take it out of the fridge and let it warm up to room temperature before you proof it. If you want to store it longer, you can also freeze it. Just make sure to wrap it tightly in plastic wrap and then put it in a freezer bag. It will last for up to 3 months in the freezer.
When you’re ready to proof the dough, just take it out of the freezer, let it thaw, and then let it warm up to room temperature before you proof it. It’s all about convenience, and having the flexibility to have fresh bread whenever you want.
How to Troubleshoot Common Bread Proofing Problems
Troubleshooting bread proofing problems, it’s like being a bread detective, you gotta pay attention to the clues and figure out what’s going wrong.
First of all, if your bread is not rising, it could be a problem with the yeast, make sure it’s fresh and active. It could also be a problem with the temperature, make sure the dough is in a warm and humid place. If your bread is over-proofed and collapsing, it means that it fermented for too long.
It could be a problem with the timing, or the temperature, or both. If your bread is under-proofed and dense, it means that it fermented for too little. It could be a problem with the timing, or the temperature, or both. It’s all about paying attention to the dough, the environment, and the timing, and making adjustments as needed.
The Use of Natural Leaveners in Bread Proofing
Natural leaveners, they’re like bread’s fairy godmothers, they make magic happen. They’re all about tradition and authenticity. A natural leavener, also known as a sourdough starter, is a mixture of flour, water, and wild yeast that is made from the natural yeast found in the air.
It’s used to ferment bread dough and create a natural fermentation process. The use of natural leaveners in bread proofing, it’s all about tradition, authenticity, and flavor. It’s also about creating a more natural fermentation process and avoiding the use of commercial yeast.
It’s a slower process, but the end result is a bread with a deeper, more complex flavor, and a chewier texture. It’s all about understanding the traditional methods, respecting the process, and creating a unique bread. And that’s what makes a great bread.
How to Proof Bread Without a Proofing Basket
Proofing bread without a proofing basket, it’s like making a steak without a grill, it’s not impossible, it just requires some creativity. It’s all about creating a suitable environment for the dough to rise, and you don’t need a fancy proofing basket to do it.
You can use a mixing bowl, lined with a floured towel, and covered with a plastic wrap or a damp towel, this will create a warm and humid environment for the dough to rise.
You can also use a colander lined with a floured towel, and covered with a plastic wrap or a damp towel, this will also create a warm and humid environment for the dough to rise.
You can also use a loaf pan lined with a floured towel, and covered with a plastic wrap or a damp towel, this is a good option for shaping and proofing sandwich bread.
Tips for Achieving a High Rise and a Well-Textured Bread
Achieving a high rise and a well-textured bread, it’s like hitting a home run, it’s all about timing, technique and a little bit of magic.
First of all, you’ve got to use the right amount of yeast, not too much, not too little. Yeast is the key to fermentation, and it needs to be in balance.
Secondly, pay attention to the temperature and humidity, they play a crucial role in fermentation. Yeast likes it warm and humid, so make sure to create the right environment for the dough to rise.
Thirdly, pay attention to the dough hydration, the right amount of water is crucial for the structure and texture of the bread.
Fourthly, you gotta pay attention to the timing, fermentation takes time, don’t rush it, let the dough rise at its own pace.
Fifthly, you must pay attention to the shaping and scoring, a well-shaped and well-scored bread will rise better and have a better texture.