

Baking sourdough bread at home is a fun and rewarding experience. With the right tools and equipment, you can create delicious, healthy bread that’s packed with probiotics and other health benefits. In this article, we’ll provide a beginner’s guide to the essentials you’ll need to get started. From Dutch ovens to bannetons, we’ll cover all the tools you’ll need to make your own sourdough bread.
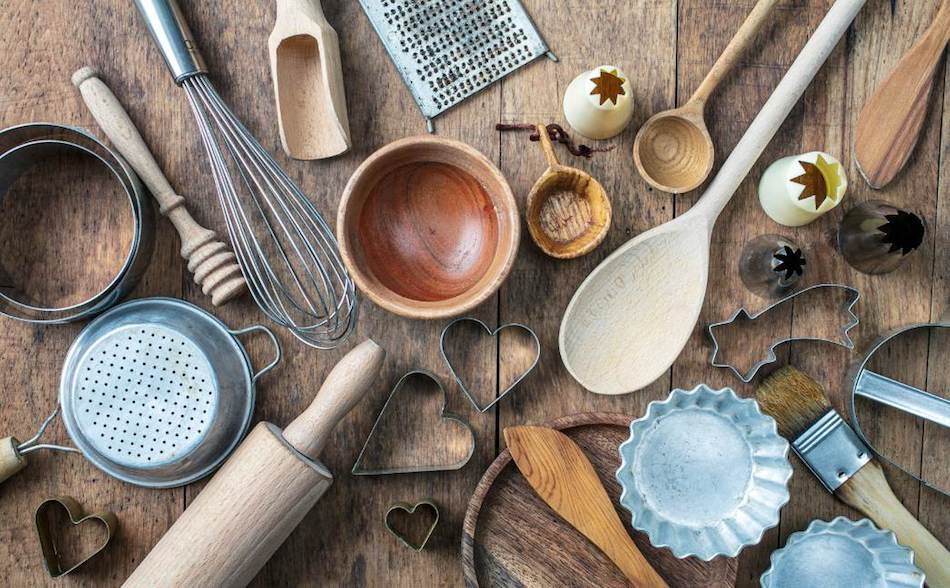
To bake sourdough bread at home, you will need a few essential tools and equipment such as a Dutch oven, banneton, sourdough starter, flour, water, salt, a digital scale, measuring cups and spoons, a dough scraper, a bench knife or a sharp knife, a thermometer, and a baking stone or a baking sheet. Additionally, you may find useful to have a kitchen towel, a bowl or proofing container, a timer, and an oven thermometer for accurate temperature readings.

Everything you need to make sourdough at home
| Item | Description |
|---|---|
| Sourdough starter | A mixture of flour and water that has been fermented with wild yeast and bacteria. Can be purchased or made at home. |
| Flour | A type of wheat flour, usually bread flour or all-purpose flour, used to make the dough. |
| Water | Used to hydrate the dough and activate the yeast in the starter. |
| Salt | Used to flavor the bread and control the fermentation process. |
| Bowl | Used to mix and hold the dough while it ferments. |
| Mixing spoon | Used to mix the dough. |
| Banneton or proofing basket | Used to shape and support the dough during the final rise before baking. |
| Dutch oven or cast iron pot | Used to bake the bread and create steam in the oven. |
| Lame or sharp blade | Used to score the bread before baking. |
| Oven thermometer | To check the oven temperature |
| Scale | To measure the ingredients |
| Kitchen timer | To time the fermentation and baking process. |
Different ways to bake sourdough
There are several ways to bake sourdough bread, each with its own unique technique and resulting in a different texture and crust. The most popular methods include baking in a Dutch oven, which creates a crispy crust, baking on a baking stone, which gives a more rustic texture, and baking in a cast iron skillet, which produces a bread with a thicker and chewier crust. Some bakers also prefer to preheat their oven with a steam pan to create a more humid environment to help the bread rise, and to score the bread with a sharp knife before baking to allow for an even rise. Another technique is to use a bread cloche to trap the steam that’s released during the baking process, which results in a bread with a lighter crust and a fluffy interior. The method you choose will depend on your personal preference and the equipment you have available.
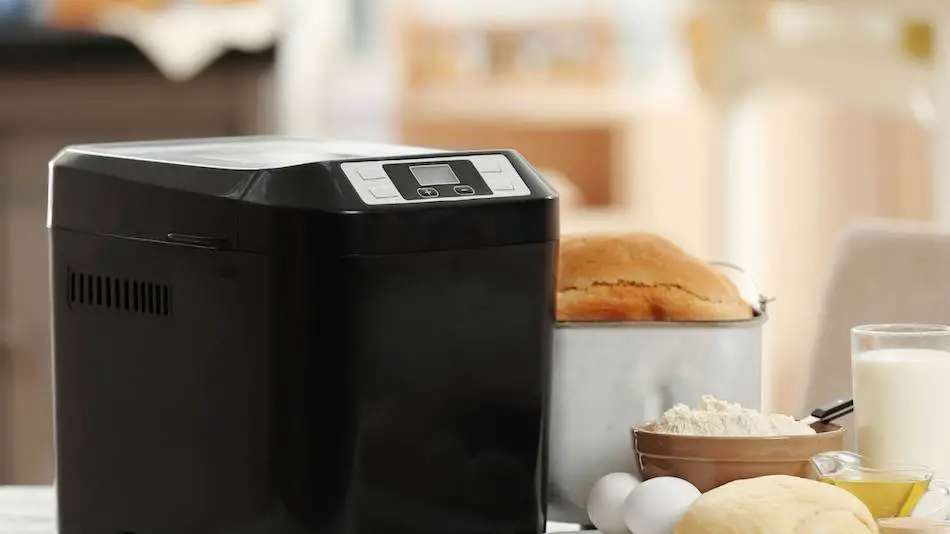
Bread Machine
First, we have the bread machine method. This is a great option for those who want to set it and forget it. Simply add all of the ingredients to the bread machine, set the program for sourdough bread, and let the machine do all the work for you. The only downside is that you won’t get that crispy crust that you get from traditional baking methods.
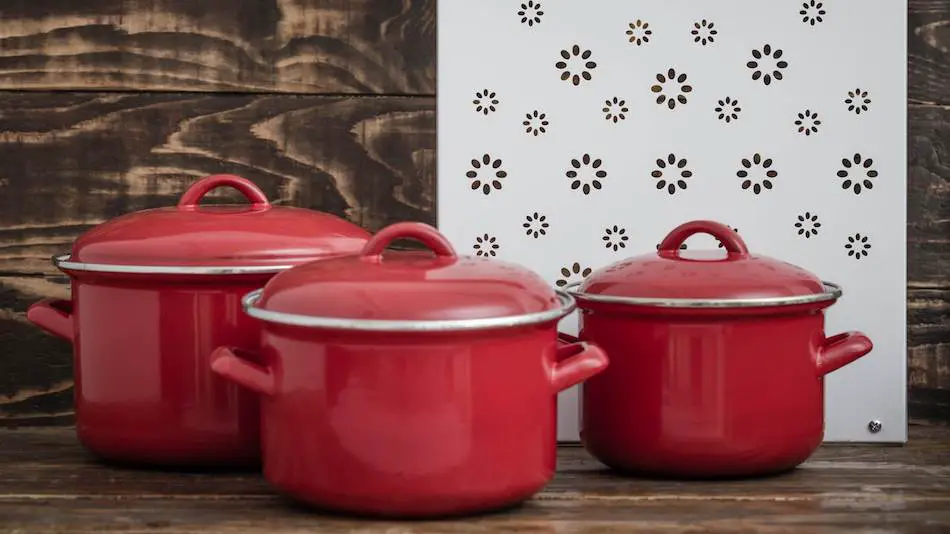
Dutch Oven
Next, we have the Dutch oven method, which is one of my personal favorites. This method creates a steamy environment in the oven, which helps to create that beautiful crispy crust that we all love. To do this, you’ll need a Dutch oven with a tight-fitting lid. Simply preheat the oven and the Dutch oven, put the dough in the Dutch oven, cover it, and bake it. It’s that simple!
Skillet
Another option is the skillet method. This method is similar to the Dutch oven method, but instead of using a Dutch oven, you’ll use a cast iron skillet. Preheat the skillet in the oven, then carefully transfer the dough from the proofing basket to the skillet. This method creates a great crust and it’s a great option for those who don’t have a Dutch oven.
Cloche
The cloche method is another great option for those who want a crispy crust. A cloche is a dome-shaped cover that creates a steamy environment in the oven, similar to the Dutch oven method. Simply preheat the oven and the cloche, put the dough in the cloche, cover it, and bake it.
Traditional
Finally, we have the traditional method, which is the most hands-on method but also the most rewarding. To do this, you’ll need a baking stone and a peel or a baking sheet. Preheat the oven and the baking stone, then carefully transfer the dough from the proofing basket to the baking stone. This method requires a bit of practice but once you get the hang of it, the results are truly spectacular.
So there are a variety of ways to bake sourdough bread at home, each with its own unique characteristics. Experiment and find the one that you like the best.
What is Sourdough Bread?
Let me tell you all about the wonderful world of sourdough bread.
Sourdough bread is a type of bread that is made by fermenting a mixture of flour and water with wild yeast and bacteria. This fermentation process not only creates that delicious tangy flavor that we all know and love, but it also makes the bread more nutritious and easier to digest.
Now, you may be wondering why one would go through all the trouble of making sourdough bread at home when it’s so readily available at the store. Well, let me tell you, there’s nothing quite like the taste and texture of freshly baked homemade sourdough bread. It has a depth of flavor that store-bought bread simply cannot match.
Also, making sourdough at home allows you to have control over the ingredients that go into your bread. You can use organic, unbleached flour and add different seeds or herbs for an added flavor and nutrition. And let’s not forget the satisfaction and sense of accomplishment that comes from baking your own bread.
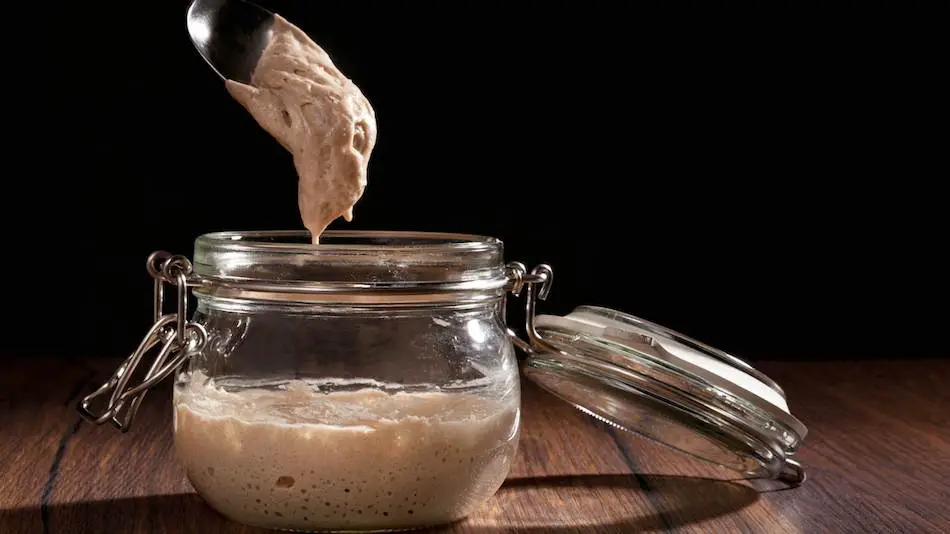
Making a Sourdough Starter
The first step in making delicious homemade sourdough bread is creating a sourdough starter. A sourdough starter is a mixture of flour and water that has been fermented with wild yeast and bacteria. It is the “mother” of your bread and it will be used to leaven the dough and give it that signature tangy flavor.
To make a sourdough starter, you will need:
- flour (all-purpose or whole wheat flour works well)
- water (filtered or chlorine-free)
- a glass jar with a tight-fitting lid
Here’s how to make a Sourdough starter:
- In a clean glass jar, mix together equal parts flour and water. For example, if you are using 1 cup of flour, use 1 cup of water.
- Stir well to combine and remove any lumps.
- Cover the jar with a tight-fitting lid and let it sit at room temperature for 24 hours.
- After 24 hours, you will see bubbles forming on the surface of the mixture. This means that the wild yeast and bacteria are starting to ferment the mixture.
- Discard half of the mixture and add equal parts flour and water to the remaining mixture. For example, if you have 1 cup of starter, discard 1/2 cup and add 1/2 cup flour and 1/2 cup water.
- Repeat this feeding process for about a week, until the starter becomes bubbly and active.
Once you have an active starter, you can use it to make bread or you can keep it going by feeding it regularly. Feeding the starter means to add fresh flour and water to it, this will keep the wild yeast and bacteria alive and active.
To care for your starter:
- Keep it in a glass jar with a tight-fitting lid.
- Feed it regularly with flour and water.
- Keep it at room temperature, avoid storing it in the refrigerator.
If you’re not going to use your starter for a while, you can store it in the refrigerator, but you will need to revive it before using it again. To revive a dormant starter, take it out of the refrigerator, feed it with flour and water, and let it sit at room temperature for a few days until it becomes active again.
And there you have it, my dears. With a little patience and care
Sourdough Ingredients
When it comes to making sourdough bread, the ingredients are few and simple. The three main ingredients you’ll need are flour, water, and salt. Let me tell you a bit more about each of them.
Flour: The type of flour you use for sourdough bread is important. Bread flour or all-purpose flour works well, but you can also experiment with different types of flour such as whole wheat, rye or spelt to give your bread a unique flavor and texture.
Water: The water you use for your sourdough bread should be chlorine-free, as chlorine can inhibit the growth of wild yeast and bacteria. Filtered water or spring water works well.
Salt: Salt is essential for sourdough bread as it helps to flavor the bread and control the fermentation process. It’s important to use a good quality salt, such as sea salt or Himalayan salt.
All these ingredients are crucial in making Sourdough bread, they interact with each other and give the bread its unique taste, texture, and structure. The ratio of each ingredient will also affect the final product. It’s important to measure the ingredients accurately and follow the recipe closely for best results.
Equipment Needed to make Sourdough
Making sourdough bread at home requires some basic equipment to get the best results. Here are a few essential items you’ll need:
Bowl: You’ll need a large mixing bowl to hold the dough while it rises. A plastic or glass bowl works well.
Mixing Spoon: A wooden spoon or spatula is essential for mixing and kneading the dough.
Banneton or Proofing basket: A banneton or proofing basket is used to shape and hold the dough while it rises. It’s traditionally made of wicker or cane, but there are also plastic versions available.
Dutch Oven or cast iron pot: This heavy-duty pot is used to bake the bread. The lid creates a steamy environment that helps the bread to rise and develop a crispy crust.
Lame or sharp blade: A sharp blade is used to make slashes or “scores” on the bread before baking. This allows the bread to expand and create a beautiful pattern on the crust. You can use a razor blade, a bread lame, or a very sharp knife.
These are the basic equipment you’ll need to make Sourdough bread, you can also use a bread machine or a stand mixer with a dough hook to make the process easier, but it’s not necessary. With these equipment, you’re ready to start your Sourdough bread journey. Happy Baking!
The Fermentation Process
The fermentation process is the heart and soul of sourdough bread. This is the magic that transforms a simple mixture of flour and water into a delicious and tangy loaf of bread.
The fermentation process begins when the wild yeast and bacteria in the starter come into contact with the flour and water. They start to consume the sugars in the flour and produce carbon dioxide, which causes the dough to rise and develop its characteristic tangy flavor.
The length of the fermentation process can vary depending on a number of factors such as the temperature, humidity, and the strength of the starter. In general, it takes about 6-8 hours for the dough to rise and develop its flavor. However, you may find that it takes longer or shorter depending on the conditions in your kitchen.
But how do you know when the fermentation process is complete and the dough is ready to be shaped and baked? Well, my dears, there are a few signs to look for. The dough should be visibly risen and have a characteristic tangy smell.
Also, when you press a finger into the dough, the indentation should slowly spring back, this is called the “windowpane test” and it’s a good indicator that the dough is ready.

Shaping and Scoring the Dough
Shaping the dough is the process of forming it into the desired shape and size. This can be done by gently shaping the dough into a round or oval shape and then letting it rest and rise in a banneton or proofing basket.
Scoring the dough is the process of making slashes or “scores” on the surface of the dough before baking. This allows the bread to expand and create a beautiful pattern on the crust. When scoring the dough, you should use a sharp blade, such as a razor blade, a bread lame, or a very sharp knife. The depth of the score should be about 1/4 inch.
Baking the Sourdough
First, it’s essential to preheat the oven. Sourdough bread is best baked at a high temperature, around 450°F (230°C) for a crispy crust and well-developed flavor. Allow the oven to preheat for at least 30 minutes before baking your bread.
Creating steam in the oven is crucial to achieve a crispy crust. You can do this by placing a tray of water at the bottom of the oven, or by placing a cast iron pot or Dutch oven in the oven while it preheats and then placing the bread in it and covering it with a lid to trap the steam. The steam helps the bread to rise and develop a beautiful crust.
When is Sourdough Bread Done?
So how do you know when the Sourdough bread is done? A good indicator is the internal temperature of the bread. It should reach an internal temperature of about 205°F (96°C) for it to be fully baked. Another way is to tap the bottom of the loaf, it should sound hollow, if it sounds dense, it needs more baking time.
Storing Sourdough
Storing and reheating sourdough bread can be a bit tricky, but with a little know-how, you’ll be able to keep your bread fresh and delicious for days to come.
When it comes to storing sourdough bread, the key is to keep it away from moisture. The best way to do this is to store the bread in a paper bag or a cloth bag that is breathable, this will help to prevent the crust from becoming soft and the bread from becoming moldy. You can also store the bread in a plastic bag, but make sure to poke some holes in it to allow the bread to breathe.
Sourdough bread is best eaten within a few days of baking, but if you want to keep it for longer, you can freeze it. Wrap the bread tightly in plastic wrap and place it in a resealable freezer bag. It will keep for up to 3 months in the freezer.
Reheating Sourdough
The best way to reheat sourdough bread is to use a preheated oven or a toaster oven. You can also reheat it in a skillet or on a griddle, but be careful not to overcook it. To reheat the bread in the oven, place the loaf on a baking sheet and heat it in a preheated 350°F (175°C) oven for about 10-15 minutes or until heated through. To reheat in a skillet or griddle, place the slice of bread in the skillet or griddle over medium heat, and cook for a minute or two on each side or until heated through.
Reheating the bread in this way will help to crisp up the crust and bring back the bread’s original texture and taste.
Sourdough Tips and Tricks
Here are a few tips for success:
- Start with a strong and healthy starter. A strong starter will ensure that your bread will rise and have a good flavor.
- Use high-quality flour. Sourdough bread is a simple recipe, so it’s essential to use good quality flour to get the best results.
- Be patient. Sourdough bread takes time to make, so be prepared to wait for the dough to rise and ferment.
- Experiment with different flours and methods. Sourdough bread can be made with a variety of flours, and you can try different shaping and scoring techniques to create different effects on the crust.
Don’t be afraid to experiment with different flours and methods. Sourdough bread can be made with a variety of flours, such as whole wheat, rye, spelt, and more. And you can try different shaping and scoring techniques to create different effects on the crust. Sourdough baking is a craft that requires patience and experimentation, but the results are truly worth the effort.
How to Make Sourdough Bread: Step-by-Step
- Create a Sourdough Starter: To begin, you’ll need to create a sourdough starter, which is a mixture of flour and water that’s fermented with wild yeast. This will be the base of your bread.
- Mix the Dough: In a large mixing bowl, combine your starter with flour, water, and salt. Mix until the dough comes together and is well combined.
- Knead the Dough: Knead the dough for about 10-15 minutes, until it becomes smooth and elastic.
- Let the Dough Rise: Cover the dough and let it rise at room temperature for about 8-12 hours. The dough should double in size.
- Shape the Dough: Once the dough has risen, shape it into a round loaf. Place it in a floured banneton or a bowl lined with a kitchen towel.
- Proof the Dough: Cover the dough and let it rise again for about 2-3 hours, or until it has doubled in size.
- Preheat the Oven: Preheat your oven to the desired temperature, usually around 450-500 degrees Fahrenheit.
- Bake the Bread: Place the dough in a preheated Dutch oven or on a baking stone and bake for about 30-40 minutes, or until the bread is golden brown and has a crispy crust.
- Cool the Bread: Once the bread is done baking, remove it from the oven and let it cool completely before slicing and serving.