

If you’re looking for a delicious and nutritious alternative to traditional sourdough bread, look no further than wheatless sourdough. This guide will show you how to make a delicious and satisfying bread without using wheat, making it perfect for those with wheat allergies or intolerances. Not only is wheatless sourdough gluten-free, but it also offers a host of health benefits, including improved digestion and a lower glycemic index. Whether you’re a seasoned bread maker or a beginner, this guide will provide you with the tools and knowledge you need to make a delicious and nutritious wheatless sourdough bread at home. So let’s get started on our journey to making the perfect loaf of wheatless sourdough!
Wheatless sourdough is a type of sourdough bread that is made without using wheat, making it a great option for those with wheat allergies or intolerances. This type of bread is typically made with alternative flours such as rice, oat, or almond flour, which not only make the bread gluten-free but also provide additional nutritional benefits. Because it is made with natural fermentation, it is also easier to digest and has a lower glycemic index than traditional sourdough bread. Wheatless sourdough can be made at home and it’s a great option for those who want to enjoy the taste and texture of sourdough bread without having to worry about wheat-based allergies or gluten intolerance.
Understanding the Basics of Wheatless Sourdough
When it comes to bread making, sourdough is often thought of as the king of all breads. But for those with wheat allergies or intolerances, traditional sourdough can be a no-go. Enter wheatless sourdough – the delicious and nutritious alternative that will have you questioning why you ever thought you couldn’t enjoy sourdough bread.
Let’s start with the basics. Wheatless sourdough is made using alternative flours such as rice, oat, or almond flour instead of wheat flour. This not only makes the bread gluten-free, but it also provides additional nutritional benefits. And just like traditional sourdough, wheatless sourdough is made using natural fermentation, which means it’s easier to digest and has a lower glycemic index.
But, don’t be fooled, just because it’s wheatless, doesn’t mean it’s any less delicious. In fact, many people find that wheatless sourdough has a more complex and nuanced flavor profile than traditional sourdough. And, let’s be real, who doesn’t love a bread that’s not only delicious but also good for you?
So, whether you’re a seasoned bread maker or a beginner, give wheatless sourdough a try. Trust me, it’s a game-changer for those with wheat allergies or intolerances, and it’s sure to become a staple in your bread-making repertoire.
The Benefits of Wheatless Sourdough
For those with wheat allergies or intolerances, traditional sourdough can be a no-go. Enter wheatless sourdough – the delicious and nutritious alternative that will have you questioning why you ever thought you couldn’t enjoy sourdough bread.
So, what are the benefits of wheatless sourdough? First and foremost, it’s gluten-free. This makes it a great option for those with gluten sensitivities or celiac disease. But it’s not just gluten-free, it’s also packed with nutrients. Alternative flours such as rice, oat, or almond flour used in wheatless sourdough are rich in fiber, vitamins, and minerals that are not present in wheat flour.
Another benefit of wheatless sourdough is that it’s easier to digest than traditional sourdough, thanks to the natural fermentation process. This means that it has a lower glycemic index, which is great for blood sugar control. Additionally, wheatless sourdough has a more complex and nuanced flavor profile than traditional sourdough.
So, not only is wheatless sourdough delicious and nutritious, but it’s also easy on the stomach, making it a great option for those with wheat allergies or intolerances.
Choosing the Right Flour for Wheatless Sourdough
When making wheatless sourdough, choosing the right flour is key. After all, this is the foundation of your bread, and you want to make sure you’re using the best ingredients possible. But with so many options out there, it can be overwhelming to choose the right one.
First, it’s important to remember that wheat flour is not an option when it comes to wheatless sourdough. Instead, you’ll want to choose alternative flours such as rice, oat, or almond flour. Each of these flours has its own unique taste and texture, so it’s important to experiment to find the one that you like best.
Rice flour is a great option for those looking for a light and fluffy bread. It’s also gluten-free and has a mild flavor that makes it a great option for those with gluten sensitivities or celiac disease. Oat flour is another great option, it’s rich in fiber and it gives the bread a nutty flavor and a chewy texture. On the other hand, almond flour is high in protein and healthy fats, it also gives a nutty flavor to the bread and a slightly crumbly texture.
When it comes to wheatless sourdough, the key is to experiment and find the flour that works best for you. So, don’t be afraid to play around with different flours until you find the perfect one for your wheatless sourdough bread.

Preparing the Sourdough Starter
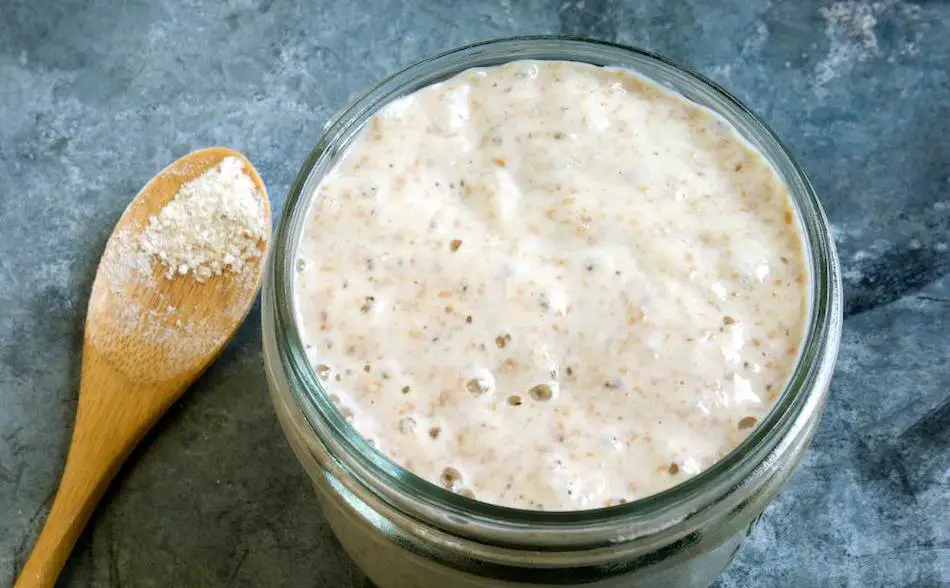
Preparing the sourdough starter is one of the most critical steps when making wheatless sourdough. This is the living, breathing culture that will ferment your dough and give it that tangy, sour flavor that we all know and love. And while it may seem daunting, preparing the sourdough starter is actually quite simple.
To begin, you’ll need to choose a flour to use as the base of your starter. While traditional sourdough starters are made with wheat flour, for our wheatless sourdough, we’ll be using alternative flours such as rice, oat, or almond flour. Once you’ve chosen your flour, mix it with water in a jar or container and let it sit at room temperature for a few days.
During this time, you’ll want to “feed” your starter by adding more flour and water. This will help the natural yeast and bacteria present in the flour to grow and thrive. As your starter ferments, you’ll notice bubbles forming on the surface and a tangy aroma developing. This is a good sign that your starter is alive and well.
Once your starter is active and bubbly, it’s ready to use in your wheatless sourdough bread. And the best part is, once you’ve got a starter going, you can keep it going indefinitely by regularly feeding it and storing it in the refrigerator. So, don’t be intimidated by the thought of preparing a sourdough starter. With a little patience and care, you’ll have a healthy and active starter in no time.
Mixing and Kneading the Dough
Once you’ve got your sourdough starter prepared, it’s time to move on to the next step: mixing and kneading the dough. And while it may seem like a simple step, it’s actually one of the most important in the bread-making process.
First, you’ll want to mix your starter with the rest of the ingredients, including your chosen flour, water, and salt. This can be done by hand or using a stand mixer with a dough hook. As you mix, you’ll notice the dough starting to come together and form a sticky ball.
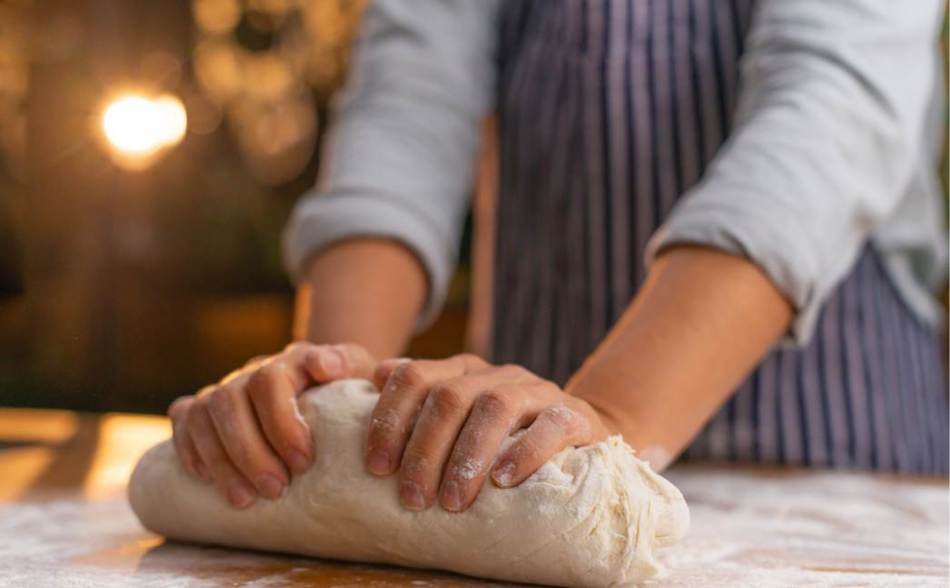
Next, it’s time to knead the dough. Kneading is the process of working the dough by hand or with a machine to develop the gluten, which gives the bread its structure and texture. It’s important to knead the dough for the right amount of time, as under-kneaded dough will be too sticky and over-kneaded dough will be tough.
When the dough is ready, it should be smooth, elastic, and able to pass the “windowpane test” which means you can stretch the dough to a thin and translucent layer without breaking.
Once your dough is kneaded to perfection, it’s time to move on to the next step of fermentation. And remember, kneading the dough is not just a mechanical process, it’s also a creative one, so don’t be afraid to play around with different techniques until you find the perfect one for your wheatless sourdough bread.

Fermenting and Proofing the Dough
After mixing and kneading the dough, it’s time to move on to the next step in the bread-making process: fermentation and proofing. These steps are critical to developing the flavor and structure of your wheatless sourdough bread, and they’re also where things can get a little tricky.
Fermentation is the process of allowing the dough to sit and rise, allowing the natural yeast and bacteria present in the sourdough starter to ferment the sugars in the dough. This is what gives sourdough its tangy flavor and unique texture.
When fermenting the dough, it’s important to keep it at the right temperature, around 75°F to 80°F, and in a draft-free place. Cover it with a towel or plastic wrap and let it sit for a few hours. You’ll notice the dough starting to rise and develop bubbles on the surface, which is a good sign that fermentation is happening.
Once fermentation is complete, it’s time to move on to proofing. This is the process of shaping the dough and allowing it to rise again before baking. To proof your dough, gently shape it into a round loaf and place it in a proofing basket or a floured towel-lined bowl. Cover it with a towel or plastic wrap and let it sit for another few hours.
When the dough is ready, it should have risen and be full of bubbles. And remember, fermentation and proofing are not just mechanical processes, they’re also an art, so don’t be afraid to play around with different techniques until you find the perfect fermentation and proofing time for your wheatless sourdough bread.

Shaping and Baking the Wheatless Sourdough Loaf
After fermentation and proofing, it’s time to shape and bake your wheatless sourdough loaf. This is the final step in the bread-making process and it’s where you’ll see all your hard work come to fruition.
Shaping the dough is a crucial step that not only gives your loaf its final shape but also helps to create a nice crust during the baking process. To shape your dough, gently deflate it and shape it into a round loaf, then place it in a preheated Dutch oven or a baking sheet.
Once the dough is shaped and placed in the oven, it’s time to bake. This is the step where the magic happens and the bread transforms from a lump of dough into a delicious and crusty loaf. To achieve a nice crust and an even bake, it’s important to keep the oven temperature high, around 425°F to 450°F, and to bake the bread for the right amount of time.
When the bread is ready, it should be golden brown, and have a nice crust. To check if the bread is fully baked, tap the bottom of the loaf and it should sound hollow.
Storing and Freezing Wheatless Sourdough
After all the hard work of making wheatless sourdough, it’s important to store and freeze it properly so that you can enjoy it for as long as possible. Whether you’re saving some for later or freezing the whole loaf, there are a few things you need to keep in mind.
It’s important to let the bread cool completely before storing it. This will help to prevent mold and bacteria from forming. Once the bread is cool, you can store it in a plastic bag or a bread box at room temperature for up to 3 days.
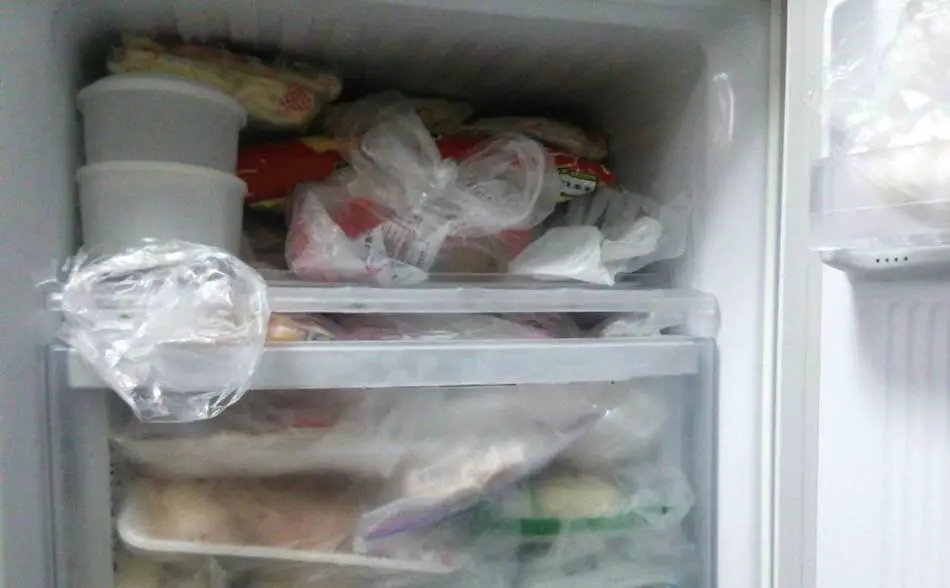
If you’re looking to store the bread for a longer period of time, freezing is the way to go. To freeze the bread, wrap it tightly in plastic wrap or aluminum foil, then place it in a plastic bag or container. This will help to prevent freezer burn and keep the bread fresh.
When you’re ready to enjoy your frozen wheatless sourdough, simply remove it from the freezer and let it thaw at room temperature. You can also reheat it in the oven or on the grill for a crispy crust.
Tips and Tricks for Making the Perfect Wheatless Sourdough Loaf
Making the perfect wheatless sourdough loaf takes time, patience and a little bit of know-how. And while there’s no one-size-fits-all recipe, there are a few tips and tricks that can help you achieve the perfect loaf every time.
One of the most important things to keep in mind when making wheatless sourdough is to use the right flour. Experiment with different flours such as rice, oat, or almond flour to find the one that works best for you.
Another tip is to be patient when it comes to fermentation and proofing. These steps are critical to developing the flavor and structure of your bread, and they take time. So don’t rush it, let the dough rise and ferment for the right amount of time.
When shaping the dough, make sure to handle it gently, and don’t over-knead it, as it can make the bread tough. And when baking, it’s important to preheat the oven and use a Dutch oven or a baking sheet to get a nice crust and an even bake.
Variations and Add-Ins for Wheatless Sourdough
When it comes to wheatless sourdough, the options for variations and add-ins are endless. From different flours and herbs to nuts and fruits, the possibilities are endless. And while the traditional wheatless sourdough recipe is delicious on its own, there are a few variations and add-ins that can take your loaf to the next level.
A popular variation is to add herbs and spices such as rosemary, thyme, or fennel seeds. These add a depth of flavor and aroma to the bread, making it perfect for pairing with soups or salads.
Another variation is to add nuts and seeds such as pumpkin seeds, sunflower seeds, or flax seeds. These not only add a nice crunch to the bread but also provide additional nutritional benefits.
Fruits such as raisins, dried cranberries or apricots can also be added to the dough. These add a nice sweetness and a burst of flavor to the bread, making it perfect for breakfast or as a dessert.
You can also experiment with different flours such as spelt flour, quinoa flour, or even teff flour, to add unique flavors and textures to your wheatless sourdough bread.
Troubleshooting Common Wheatless Sourdough Problems
Making wheatless sourdough can be a bit tricky, and there are a few common problems that can arise along the way. But don’t worry, these issues are usually easy to fix, and with a little bit of troubleshooting, you’ll be back on track in no time.
The dough not rising is a common problem when baking wheatless sourdough. This can be caused by a variety of things, such as using water that’s too hot or too cold, or not allowing enough time for fermentation and proofing. To fix this problem, make sure to use water at the right temperature and give the dough enough time to rise.
Another common problem is that the bread is too dense or heavy. This can be caused by over-kneading the dough or not allowing enough time for fermentation and proofing. To fix this problem, make sure to handle the dough gently and give it enough time to rise.
A third problem is that the bread doesn’t have a nice crust. This can be caused by not preheating the oven or not using a Dutch oven or a baking sheet. To fix this problem, make sure to preheat the oven and use the right equipment to get a nice crust.
These are just a few of the common problems that can arise when making wheatless sourdough, but don’t let them discourage you. With a little bit of troubleshooting, you’ll be able to fix these problems and enjoy a delicious loaf of bread in no time. And remember, bread-making is an art, not a science, so don’t be afraid to experiment and find the perfect method for your wheatless sourdough bread.
Serving and Enjoying Wheatless Sourdough
Making wheatless sourdough is a labor of love, and once it’s ready, it’s time to enjoy it! The best way to enjoy your wheatless sourdough is with some butter or olive oil, or even with a bit of jam or honey. It can also be paired with soups, salads, or cheese for a delicious and satisfying meal.
A classic way to enjoy wheatless sourdough is to toast it and serve it with breakfast items like eggs, bacon, or avocado. It’s also great for sandwiches and paninis, as the chewiness and nutty flavor of the bread pairs perfectly with different meats and cheeses.
Another way to enjoy your wheatless sourdough is to make croutons out of it. Cut the bread into small cubes, drizzle with olive oil and season with salt and pepper. Bake it in the oven for 15-20 minutes, and you’ll have crispy and delicious croutons to add to your salad or soup.
Finally, if you have leftovers, don’t throw them away! You can freeze the bread, and then when you’re ready to enjoy it again, simply thaw it and reheat it in the oven or on the grill for a crispy crust.
Nutritional Information for Wheatless Sourdough
When it comes to nutritional information for wheatless sourdough, it’s important to keep in mind that it will vary depending on the specific ingredients used. However, in general, wheatless sourdough bread is a nutritious and healthy option that can be a great addition to any diet.
One of the main benefits of wheatless sourdough bread is that it is typically made with alternative flours such as rice, oat, or almond flour. These flours are often gluten-free and provide a good source of fiber, protein, and healthy fats.
Also, sourdough bread is made through a fermentation process that can make it more easily digestible for people with gluten sensitivities or celiac disease. The fermentation process also increases the level of vitamins and minerals, such as vitamin B and lactic acid, which can be beneficial to the gut.
It’s also worth noting that wheatless sourdough breads can be lower in calories than traditional breads, due to the fact that alternative flours like almond flour are less calorie-dense than wheat flour.
As always, it’s important to be mindful of the ingredients and portion sizes when incorporating wheatless sourdough into your diet. And remember, it’s always best to consult a doctor or nutritionist for personalized advice about your diet.
How to Incorporate Wheatless Sourdough into Your Diet
When it comes to incorporating wheatless sourdough into your diet, the possibilities are endless. This delicious and nutritious bread is a great option for those with wheat allergies or intolerances and can be enjoyed in many different ways.
One of the best ways to enjoy wheatless sourdough is as toast with butter or olive oil, or even with a bit of jam or honey. It’s also great for sandwiches and paninis, as the chewiness and nutty flavor of the bread pairs perfectly with different meats and cheeses.
Another way to incorporate wheatless sourdough into your diet is to use it as a base for pizzas or focaccia. The chewiness and nutty flavor of the bread make it perfect for these dishes.
You can also enjoy it as a side dish for soups, stews, and salads. The bread’s chewy texture and tangy flavor will add an extra layer of flavor and texture to any dish.
Finally, if you have leftovers, don’t throw them away! You can freeze the bread, and then when you’re ready to enjoy it again, simply thaw it and reheat it in the oven or on the grill for a crispy crust.
In conclusion, wheatless sourdough bread is a delicious and nutritious option for those with wheat allergies or intolerances. It can be enjoyed in many different ways, and it’s a great way to add some variety to your diet. So, go ahead and enjoy your wheatless sourdough bread, it’s a labor of love, and it’s worth it!
How to Make a Sourdough Starter Without Wheat
Making a sourdough starter without wheat is a great option for those with gluten sensitivities or allergies. It’s a simple process that requires a few basic ingredients and a little bit of patience. Here’s a step-by-step guide on how to make a wheat-free sourdough starter:
- Choose your flour: You can use a variety of flours such as rice, oat, or almond flour to make your starter. Choose a flour that you like and that is readily available.
- Combine your ingredients: In a large glass jar, combine equal parts flour and filtered water. For example, 1 cup of flour and 1 cup of water. Stir the mixture until it’s well combined.
- Leave the mixture to ferment: Cover the jar with a towel or a lid and leave it at room temperature for 12-24 hours. The mixture will start to ferment and bubble, which is a good sign that the fermentation process is happening.
- Feed the starter: After 12-24 hours, remove half of the mixture and discard it. Add equal parts flour and water to the remaining mixture, and stir well. Repeat this process for the next 3-5 days, until the starter becomes bubbly and active.
- Use the starter: Once your starter is active and bubbly, it’s ready to use. You can use it to make bread, pancakes, or any other recipe that calls for sourdough starter.
- Store the starter: Once your starter is active, you can store it in the refrigerator and feed it once a week to keep it alive.
And remember, making a sourdough starter without wheat is an art, not a science, so don’t be afraid to experiment with different flours and techniques until you find the perfect one for your wheat-free sourdough starter.

How to Make a Sourdough Loaf Without wheat
Making a sourdough loaf without wheat is a delicious and nutritious way to enjoy bread, even for those with gluten sensitivities or allergies. The process is a bit more time-consuming than traditional bread making, but the end result is worth it. Here’s a step-by-step guide on how to make a wheat-free sourdough loaf:
- Prepare the starter: Before you begin, make sure you have an active sourdough starter without wheat. If you don’t have one, you can follow the guide provided above on how to make one.
- Choose your flour: You can use a variety of flours such as rice, oat, or almond flour to make your bread. Choose a flour that you like and that is readily available.
- Mix the dough: In a large mixing bowl, combine your flour, salt, and active sourdough starter. Slowly add water and mix until the dough comes together.
- Knead the dough: Knead the dough for about 10 minutes, until it becomes smooth and elastic.
- Ferment the dough: Cover the dough with a towel or plastic wrap and let it sit at room temperature for about 8-12 hours. The dough will rise and become bubbly, which is a good sign that fermentation is happening.
- Shape the dough: Gently shape the dough into a round loaf and place it in a proofing basket or a floured towel-lined bowl. Cover it with a towel or plastic wrap and let it sit for another 4-6 hours.
- Bake the bread: Preheat the oven to 425°F. Place the dough in a Dutch oven or a baking sheet, and bake for about 45-50 minutes.
- Enjoy your bread: Once the bread is ready
How to Make Sourdough bread using alternative flours
Making sourdough bread using alternative flours is similar to making traditional sourdough bread, but with a few adjustments. Here is a basic recipe:
Ingredients:
- 1 cup of sourdough starter
- 1 cup of alternative flour (such as spelt, rye, or cornmeal)
- 1 cup of all-purpose flour
- 1 teaspoon of salt
- 1 cup of water
Instructions:
- In a large mixing bowl, combine the sourdough starter, alternative flour, all-purpose flour, and salt.
- Slowly add in the water, mixing until a rough dough forms.
- Knead the dough for several minutes until it becomes smooth and elastic.
- Cover the bowl with a towel and let the dough rise in a warm place for 12-24 hours.
- Preheat the oven to 450 degrees F (230 degrees C).
- Shape the dough into a round loaf and place it on a baking sheet lined with parchment paper.
- Let the dough rise for another hour.
- Make slashes on the top of the loaf with a sharp knife.
- Place the loaf in the oven and bake for 30-40 minutes, or until the crust is golden brown and the bread sounds hollow when tapped on the bottom.
- Let the bread cool before slicing and serving.

How to make Sourdough bread using Gluten-Free flour
Making sourdough bread using gluten-free flour is a bit more challenging than using traditional wheat flour because gluten-free flours don’t have the same structure-building properties as wheat flour. Here is a basic recipe that you can use as a starting point:
Ingredients:
- 1 cup of active sourdough starter
- 1 cup of gluten-free flour blend (such as a blend of rice flour, tapioca flour, and potato starch)
- 1/4 cup of ground flaxseed
- 1/4 cup of water
- 1 teaspoon of salt
Instructions:
- In a large mixing bowl, combine the gluten-free flour blend, ground flaxseed, and salt.
- Add the active sourdough starter and 1/4 cup of water, mixing until a rough dough forms.
- Knead the dough for several minutes until it becomes smooth and elastic.
- Cover the bowl with a towel and let the dough rise in a warm place for 12-24 hours.
- Preheat the oven to 350 degrees F (175 degrees C).
- Shape the dough into a round loaf and place it on a baking sheet lined with parchment paper.
- Let the dough rise for another 30 minutes.
- Bake the bread for 60-70 minutes or until golden brown.
- Let the bread cool before slicing and serving.